| < Day Day Up > |
Adding Slides
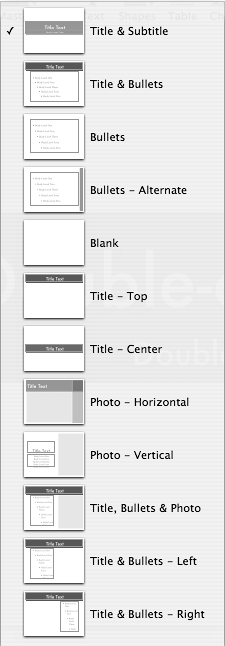
Once you have created a presentation and applied a theme, you'll want to add additional slides. You need to first add the slide, then choose the master slide you want for that slide. To add slides
|
| < Day Day Up > |
| < Day Day Up > |
Deleting SlidesDeleting unwanted slides is easy; just select the slide and get rid of it. To delete slides
|
| < Day Day Up > |
| < Day Day Up > |
Changing Slide Navigator ViewsThe Slide Navigator allows you to view the slides in your presentation in three different views, Navigator View, Outline View, and Slide Only View . Navigator View
This view shows the slides in your presentation as thumbnails (
Figure 2.5
). The currently selected slide is highlighted with a white background. Navigator View is good for getting an overall view of your presentation, and you can use it to move slides to different spots in your presentation, and also to
Figure 2.5. The Slide Navigator View shows the slides in your presentation as thumbnails.
Outline ViewThe Outline View displays your presentation as text, with each slide displaying its bullet points as indented text ( Figure 2.6 ). Any graphics on your slide do not appear in Outline View. Outline View is useful when you want to concentrate on the words in your presentation, without the distractions of the slide layout or graphics. In fact, I recommend that you create the main structure of your presentations in Outline View. You'll find more about that subject in the "Writing in the Outline" section later in this chapter. Figure 2.6. Outline View shows your slides as text, with indented bullet points.
Slide Only ViewThis view hides the Slide Navigator, displaying only the slide area (and the Notes field, if that is turned on). Use this view when you want to concentrate on tweaking the appearance of a slide. To change views
|
| < Day Day Up > |