Data Binding
While styling the Listbox, you’ve already seen a few features for data binding. But of course there are a lot more. Windows Forms 2.0 data binding has a lot of improvements compared to 1.0. WPF data binding takes another huge step forward. This section gives you a good start in data binding with WPF and discusses these topics:
-
Overview
-
Binding with XAML
-
Simple object binding
-
Object data provider
-
List binding
-
Binding to XML
Overview
With WPF data binding, the target can be any dependency property of a WPF element, and every property of a CLR object can be the source. Because a WPF element is implemented as a .NET class, every WPF element can be the source as well. See Figure 31-35 for the connection between the source and the target. The Binding object defines the connection.

Figure 31-35
Binding supports several binding modes between the target and source. Binding can be one-way, where the source information goes to the target, but if the user changes information in the user interface, the source does not get updated. For updates to the source, two-way binding is required.
The following table shows the binding modes and their requirements.
| Binding Mode | Description |
|---|---|
| One-time | Binding goes from the source to the target and occurs only once when the application is started or the data context changes. Here, you get a snapshot of the data. |
| One-way | Binding goes from the source to the target. This is useful for read-only data, as it is not possible to change the data from the user interface. To get updates to the user interface, the source must implement the interface INotifyPropertyChanged. |
| Two-way | With a two-way binding, the user can make changes to the data from the UI. Binding occurs in both directions - from the source to the target and from the target to the source. |
| One-way-to-source | With one-way-to-source binding, if the target property changes, the source object gets updated. |
Binding with XAML
A WPF element can not only be the target for data binding; it can also be the source. You can bind the source property of one WPF element to the target of another WPF element.
The next example uses the funny face created earlier, which is built up from WPF shapes and binds it to a slider, so you can move it across the window. The Slider is the source element with the name slider. The property Value gives the actual value of the slider position. The target for data binding is the inner Canvas element. The inner Canvas element with the name FunnyFace contains all the shapes needed to draw the funny face. This canvas is contained within an outer Canvas element, so it is possible to position this canvas within the outer canvas by setting the attached properties. The attached property Canvas .Left is set to the Binding markup extension. In the Binding markup extension, the ElementName is set to slider to reference the WPF slider element, and the Path is set to Value to get the value from the Value property.
When the running application you can move the slider, and the funny face moves, as you can see with Figures 31-36 and 31-37.
<Window x: xmlns="http://schemas.microsoft.com/winfx/2006/xaml/presentation" xmlns:x="http://schemas.microsoft.com/winfx/2006/xaml" Title="DataBindingSample" Height="345" Width="310"> <StackPanel> <Canvas Height="210" Width="280"> <Canvas Canvas.Top="0" Canvas.Left="{Binding Path=Value, ElementName=slider}" Name="FunnyFace" Height="210" Width="230"> <Ellipse Canvas.Left="20" Canvas.Top="50" Width="100" Height="100" Stroke="Blue" StrokeThickness="4" Fill="Yellow" /> <Ellipse Canvas.Left="40" Canvas.Top="65" Width="25" Height="25" Stroke="Blue" StrokeThickness="3" Fill="White" /> <Ellipse Canvas.Left="50" Canvas.Top="75" Width="5" Height="5" Fill="Black" /> <Path Name="mouth" Stroke="Blue" StrokeThickness="4" Data="M 32,125 Q 65,122 72,108" /> <Line X1="94" X2="102" Y1="144" Y2="166" Stroke="Blue" StrokeThickness="4" /> <Line X1="84" X2="103" Y1="169" Y2="166" Stroke="Blue" StrokeThickness="4" /> <Line X1="62" X2="52" Y1="146" Y2="168" Stroke="Blue" StrokeThickness="4" /> <Line X1="38" X2="53" Y1="160" Y2="168" Stroke="Blue" StrokeThickness="4" /> </Canvas> </Canvas> <Slider Name="slider" Orientation="Horizontal" Value="10" Maximum="100" /> </StackPanel> </Window>
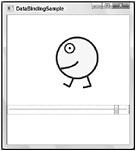
Figure 31-36
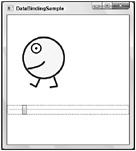
Figure 31-37
Instead of defining the binding information with XAML code, as was done in the example with the Binding metadata extension, you can do it with code behind:
<Canvas Canvas.Top="0" Canvas.Left="{Binding Path=Value, ElementName=slider}" Name="FunnyFace" Height="210" Width="230"> With code behind you have to create a new Binding object and set the Path and Source properties. The Source property must be set to the source object; here, it is the WPF object slider. The Path is set to a PropertyPath instance that is initialized with the name of the property of the source object, Value. With the target, you can invoke the method SetBinding() to define the binding. Here, the target is the Canvas object with the name FunnyFace. The method SetBinding() requires two parameters, the first one is a dependency property, and the second one is the binding object. The Canvas.Left property should be bound, so the dependency property of type DependencyProperty can accessed with the Canvas.LeftProperty field:
Binding binding = new Binding(); binding.Path = new PropertyPath("Value"); binding.Source = slider; FunnyFace.SetBinding(Canvas.LeftProperty, binding); With the Binding class, you can configure a number of binding options, described in the following table.
| Binding Class Members | Description |
|---|---|
| Source | With the Source property, you define the source object for data binding. |
| RelativeSource | With RelativeSource, you can specify the source in relation to the target object. This is useful to display error messages when the source of the error comes from the same control. |
| ElementName | If the source is a WPF element, you can specify the source with the ElementName property. |
| Path | With the Path property, you specify the path to the source object. This can be the property of the source object, but indexers and properties of child elements are also supported. |
| XPath | With an XML data source, you can define an XPath query expression to get the data for binding. |
| Mode | The mode defines the direction for the binding. The Mode property is of type BindingMode. BindingMode is an enumeration with the following values: Default, OneTime, OneWay, TwoWay, OneWayToSource. The default mode depends on the target: with a TextBox, two-way binding is the default; with a Label that is read-only, the default is one-way. OneTime means that the data is only init loaded from the source; OneWay also does updates from the source to the target. With TwoWay binding changes from the WPF elements are written back to the source. OneWayToSource means that the data is never read but always written from the target to the source. |
| Converter | With the Converter property, you can specify a converter class that converts the data for the UI and back. The converter class must implement the interface IvalueConverter, which defines the methods Convert() and ConvertBack(). You can pass parameters to the converter methods with the ConverterParameter property. The converter can be culture- sensitive; the culture can be set with the ConverterCulture property. |
| FallbackValue | With the FallbackValue property, you can define a default value that is used if binding doesn’t return a value. |
| ValidationRules | With the ValidationRules property, you can define a collection of ValiationRule objects that are checked before the source is updated from the WPF target elements. The class ExceptionValidationRule is derived from the class ValidationRule and checks for exceptions. |
Simple Object Binding
For binding to CLR objects, with the .NET classes you just have to define properties, as shown in this example with the class Book and the properties Title, Publisher, Isbn, and Authors:
public class Book { public Book(string title, string publisher, string isbn, params string[] authors) { this.title = title; this.publisher = publisher; this.isbn = isbn; foreach (string author in authors) { this.authors.Add(author); } } public Book() : this("unknown", "unknown", "unknown") { } private string title; public string Title { get { return title; } set { title = value; } } private string publisher; public string Publisher { get { return publisher; } set { publisher = value; } } private string isbn; public string Isbn { get { return isbn; } set { isbn = value; } } public override string ToString() { return title; } private readonly List<string> authors = new List<string>(); public string[] Authors { get { return authors.ToArray(); } } } In the user interface, several labels and TextBox controls are defined to display book information. Using Binding markup extensions the TextBox controls are bound to the properties of the Book class. With the Binding markup extension nothing more than the Path property is defined to bind it to the property of the Book class. There’s no need to define a source because the source is defined by assigning the DataContext, as you can see in the code behind that follows. The mode is defined by its default with the TextBox element, and this is two-way binding.
<Window x: xmlns="http://schemas.microsoft.com/winfx/2006/xaml/presentation" xmlns:x="http://schemas.microsoft.com/winfx/2006/xaml" Title="Object Binding Sample" Height="300" Width="340" > <Grid Name="bookGrid" Margin="5,5,5,5" > <Grid.ColumnDefinitions> <ColumnDefinition Width="30*" /> <ColumnDefinition Width="70*" /> </Grid.ColumnDefinitions> <Grid.RowDefinitions> <RowDefinition Height="50" /> <RowDefinition Height="50" /> <RowDefinition Height="50" /> <RowDefinition Height="50" /> <RowDefinition Height="50" /> </Grid.RowDefinitions> <Label Grid.Column="0" Grid.Row="0">Title:</Label> <TextBox Width="200" Height="30" Grid.Column="1" Grid.Row="0" Text="{Binding Title}" /> <Label Grid.Column="0" Grid.Row="1">Publisher:</Label> <TextBox Width="200" Height="30" Grid.Column="1" Grid.Row="1" Text="{Binding Publisher}" /> <Label Grid.Column="0" Grid.Row="2">ISBN:</Label> <TextBox Width="200" Height="30" Grid.Column="1" Grid.Row="2" Text="{Binding Isbn}" /> <Button Margin="5,5,5,5" Grid.Column="1" Grid.Row="4" Click="OnOpenBookDialog" Name="bookButton">Open Dialog</Button> </Grid> </Window>
With the code behind a new Book object is created, and the book is assigned to the DataContext property of the Grid control. DataContext is a dependency property that is defined with the base class FrameworkElement. Assigning the DataContext with the Grid control means that every element in the Grid control has a default binding to the same data context.
public partial class Window1 : System.Windows.Window { private Book book1 = new Book(); public Window1() { InitializeComponent(); book1.Title = "Professional C# 2005"; book1.Publisher = "Wrox Press"; book1.Isbn = "978-0764575341"; bookGrid.DataContext = book1; } } After starting the application, you can see the bound data in Figure 31-38.
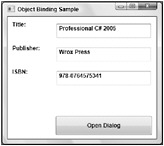
Figure 31-38
To demonstrate the two-way binding (changes to the input of the WPF element are are reflected inside the CLR object), the OnOpenBookDialog() method is implemented. This method is assigned to the Click event of the bookButton, as you can see in the XAML code. When implemented a message box pops up to show the current title and ISBN number of the book1 object. Figure 31-39 shows the output from the message box after a change to the input was made during runtime.
void OnOpenBookDialog(object sender, RoutedEventArgs e) { string message = book1.Title; string caption = book1.Isbn; MessageBox.Show(message, caption); } 
Figure 31-39
Object Data Provider
Instead of defining the object in code behind, you can define an object instance with XAML. To make this possible, you have to reference the namespace with the namespace declarations in the XML root element. The XML attribute xmlns:src=”clr-namespace:Wrox.ProCsharp.WPF” assigns the .NET namespace Wrox.ProCSharp.WPF to the XML namespace alias src.
One object of the Book class is now defined with the Book element inside the Window resources. By assigning values to the XML attributes Title and Publisher, you set the values of the properties from the class Book. x:Key=”theBook” defines the identifier for the resource so that you can reference the book object. In the TextBox element, now the Source is defined with the Binding markup extension to reference the theBook resource.
| Tip | As you can see, you can mix markup extensions. The StaticResource markup extension used to reference the book resource is contained within the Binding markup extension. |
<Window x: xmlns="http://schemas.microsoft.com/winfx/2006/xaml/presentation" xmlns:x="http://schemas.microsoft.com/winfx/2006/xaml" xmlns:src="/books/4/80/1/html/2/clr-namespace:Wrox.ProCSharp.WPF" Title="Object Binding Sample" Height="300" Width="340"> <Window.Resources> <src:Book x:Key="theBook" Title="Professional C# with .NET 3.0" Publisher="Wrox Press" /> </Window.Resources> <!-- ... --> <TextBox Width="200" Height="30" Grid.Column="1" Grid.Row="0" Text="{Binding Source={StaticResource theBook}, Path=Title}" /> <!-- ... -->
| Tip | If the .NET namespace to reference is in a different assembly, you have to add the assembly as well to the XML declaration: |
xmlns:system="clr-namespace:System;assembly=mscorlib".
Instead of defining the object instance directly within XAML code, you can also define an object data provider that references a class to invoke a method. For use by the ObjectDataProvider, it’s best to create a factory class that returns the object to display, as shown with the BookFactory class:
public class BookFactory { private List<Book> books = new List<Book>(); public BookFactory() { books.Add(new Book("Professional C# with .NET 3.0", "Wrox Press", "978-0-470-12472-7")); } public Book GetTheBook() { return books[0]; } } The ObjectDataProvider element can be defined in the resources section. The XML attribute ObjectType defines the name of the class; with MethodName you specify the name of the method that is invoked to get the book object:
<Window.Resources> <ObjectDataProvider ObjectType="src:BookFactory" MethodName="GetTheBook" x:Key="theBook"> </ObjectDataProvider> </Window.Resources> The properties you can specify with the ObjectDataProvider class are listed in the following table.
| ObjectDataProvider | Description |
|---|---|
| ObjectType | The ObjectType property defines the type to create an instance of. |
| ConstructorParameters | Using the ConstructorParameters collection, you can add parameters to the class to create an instance. |
| MethodName | The MethodName property defines the name of the method that is invoked by the object data provider. |
| MethodParameters | With the MethodParameters property, you can assign parameters to the method defined with the MethodName property. |
| ObjectInstance | With the ObjectInstance property, you can get and set the object that is used by the ObjectDataProvider class. For example, you can assign an existing object programmatically instead of defining the ObjectType so that an object is instantiated by the ObjectDataProvider. |
| Data | With the Data property you can access the underlying object that is used for data binding. If the MethodName is defined, with the Data property you can access the object that is returned from the method defined. |
List Binding
Binding to a list is more frequently done than binding to simple objects. Binding to a list is very similar to binding to a simple object. You can assign the complete list to the DataContext from code behind, or you can use an ObjectDataProvider that accesses an object factory that returns a list. With elements that support binding to a list (e.g., a ListBox), the complete list is bound. With elements that just support binding to one object (e.g., a TextBox), the current item is bound.
With the BookFactory class, now a list of Book objects is returned:
public class BookFactory { private List<Book> books = new List<Book>(); public BookFactory() { books.Add(new Book("Professional C# with .NET 3.0", "Wrox Press", "978-0-470-12472-7", "Christian Nagel", "Bill Evjen", "Jay Glynn", "Karli Watson", "Morgan Skinner")); books.Add(new Book("Professional C# 2005", "Wrox Press", "978-0-7645-7534-1", "Christian Nagel", "Bill Evjen", "Jay Glynn", "Karli Watson", "Morgan Skinner", "Allen Jones")); books.Add(new Book("Beginning Visual C#", "Wrox Press", "978-0-7645-4382-1", "Karli Watson", "David Espinosa", "Zach Greenvoss", "Jacob Hammer Pedersen", "Christian Nagel", "John D. Reid", "Matthew Reynolds", "Morgan Skinner", "Eric White")); books.Add(new Book("ASP.NET Professional Secrets", "Wiley", "978-0-7645-2628-2", "Bill Evjen", "Thiru Thangarathinam", "Bill Hatfield", "Doug Seven", "S. Srinivasa Sivakumar", "Dave Wanta", "Jason T. Roff")); books.Add(new Book("Design and Analysis of Distributed Algorithms", "Wiley", "978-0-471-71997-7", "Nicolo Santoro")); } public List<Book> GetBooks() { return books; } } In the WPF code-behind constructor of the class Window1 a BookFactory is instantiated and the method GetBooks() invoked to assign the Book array with the DataContext of the Window1 instance:
public partial class Window1 : System.Windows.Window { private BookFactory factory = new BookFactory(); public Window1() { InitializeComponent(); this.DataContext = factory.GetBooks(); } } In XAML you just need a control that supports lists, such as the ListBox, and to bind the ItemsSource property as shown:
<Window x: xmlns="http://schemas.microsoft.com/winfx/2006/xaml/presentation" xmlns:x="http://schemas.microsoft.com/winfx/2006/xaml" Title="List Binding Sample" Height="300" Width="518" > <DockPanel> <Grid > <Grid.ColumnDefinitions> <ColumnDefinition /> </Grid.ColumnDefinitions> <Grid.RowDefinitions> <RowDefinition /> <RowDefinition /> <RowDefinition /> <RowDefinition /> </Grid.RowDefinitions> <ListBox HorizontalAlignment="Left" Margin="5,5,5,5" Grid.RowSpan="4" Width="200" Grid.Row="0" Grid.Column="0" Name="booksList" ItemsSource="{Binding}" /> </Grid> </DockPanel> </Window>
Because the Window has the Book array assigned to the DataContext, and the ListBox is placed within the Window, the ListBox shows all books with the default template, as illustrated in Figure 31-40.
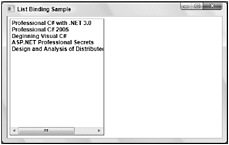
Figure 31-40
For a more flexible layout of the Listbox, you have to define a template, as was discussed earlier for ListBox styling. The ItemTemplate contained in the style listBoxStyle defines a DataTemplate with a Label element. The content of the label is bound to the Title. The item template is repeated for every item in the list.
The ListBox element has the Style property assigned. ItemsSource is as before set to the default binding. Figure 31-41 shows the output of the application with the new ListBox style.
<Window.Resources> <Style x:Key="listBoxStyle" TargetType="{x:Type ListBox}" > <Setter Property="ItemTemplate"> <Setter.Value> <DataTemplate> <Label Content="{Binding Title}" /> </DataTemplate> </Setter.Value> </Setter> </Style> </Window.Resources> <!-- ... --> <ListBox HorizontalAlignment="Left" Margin="5,5,5,5" Style="{StaticResource listBoxStyle}" Grid.RowSpan="4" Width="200" ItemsSource="{Binding}" /> 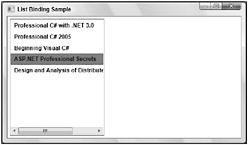
Figure 31-41
Master-Details Binding
Instead of just showing all the elements inside a list, maybe detail information about the selected item should be shown. It doesn’t require a lot work to do this. You just have to define the elements to display the current selection. In the sample application, three Label elements are defined with the Binding markup extension set to the Book properties Title, Publisher, and Isbn. There’s one important change you have to make to the ListBox. By default, the labels are just bound to the first element of the list. By setting the ListBox property IsSynchronizedWithCurrentItem=”True”, the selection of the list box is set to the current item. In Figure 31-42 you can see the result; the selected item is shown in the detail section labels.
<Window x: xmlns="http://schemas.microsoft.com/winfx/2006/xaml/presentation" xmlns:x="http://schemas.microsoft.com/winfx/2006/xaml" Title="List Binding Sample" Height="300" Width="518" > <Window.Resources> <Style x:Key="listBoxStyle" TargetType="{x:Type ListBox}" > <Setter Property="ItemTemplate"> <Setter.Value> <DataTemplate> <Label Content="{Binding Title}" /> </DataTemplate> </Setter.Value> </Setter> </Style> <Style x:Key="labelStyle" TargetType="{x:Type Label}"> <Setter Property="Width" Value="190" /> <Setter Property="Height" Value="40" /> <Setter Property="Margin" Value="5,5,5,5" /> </Style> </Window.Resources> <DockPanel> <Grid> <Grid.ColumnDefinitions> <ColumnDefinition /> <ColumnDefinition /> </Grid.ColumnDefinitions> <Grid.RowDefinitions> <RowDefinition /> <RowDefinition /> <RowDefinition /> <RowDefinition /> </Grid.RowDefinitions> <ListBox IsSynchronizedWithCurrentItem="True" HorizontalAlignment="Left" Margin="5,5,5,5" Style="{StaticResource listBoxStyle}" Grid.RowSpan="4" Width="200" ItemsSource="{Binding}" /> <Label Style="{StaticResource labelStyle}" Content="{Binding Title}" Grid.Row="0" Grid.Column="1" /> <Label Style="{StaticResource labelStyle}" Content="{Binding Publisher}" Grid.Row="1" Grid.Column="1" /> <Label Style="{StaticResource labelStyle}" Content="{Binding Isbn}" Grid.Row="2" Grid.Column="1" /> </Grid> </DockPanel> </Window> 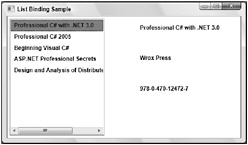
Figure 31-42
Value Conversion
The authors of the book are still missing in the output. If you bind the Authors property to a Label element, the ToString() method of the Array class is invoked, which just returns the name of the type. One solution to this is to bind the Authors property to a ListBox. For the ListBox, you can define a template for a specific view. Another solution is to convert the string array returned by the Authors property to a string and use the string for binding.
The class StringArrayConverter converts a string array to a string. WPF converter classes must implement the interface IValueConverter from the namespace System.Windows.Data. This interface defines the methods Convert() and ConvertBack(). With the StringArrayConverter, the Convert() method converts the string array from the variable value to a string by using the String.Join() method. The separator parameter of the Join() is taken from the variable parameter received with the Convert() method.
| Tip | You can read more about the methods of the String classes in Chapter 8, “Strings and Regular Expressions.” |
public class StringArrayConverter : IValueConverter { public object Convert(object value, Type targetType, object parameter, System.Globalization.CultureInfo culture) { string[] stringCollection = (string[])value; string separator = (string)parameter; return String.Join(separator, stringCollection); } public object ConvertBack(object value, Type targetType, object parameter, System.Globalization.CultureInfo culture) { string s = (string)value; char separator = (char)parameter; return s.Split(separator); } } In the XAML code, the StringArrayConverter class can be declared as a resource for referencing it from the Binding markup extension:
<Window x: xmlns="http://schemas.microsoft.com/winfx/2006/xaml/presentation" xmlns:x="http://schemas.microsoft.com/winfx/2006/xaml" xmlns:src="/books/4/80/1/html/2/clr-namespace:Wrox.ProCSharp.WPF" Title="List Binding Sample" Height="300" Width="518" > <Window.Resources> <src:StringArrayConverter x:Key="stringArrayConverter" /> <!-- ... -->
For multiline output, a TextBlock element is declared with the TextWrapping property set to Wrap to make it possible to display multiple authors. In the Binding markup extension the Path is set to Authors, which is defined as a property returning a string array. The string array is converted from the resource stringArrayConverter as defined by the Converter property. The Convert method of the converter implementation receives the ConverterParameter ‘, ‘ as input to separate the authors:
<TextBlock Width="190" Height="50" Margin="5,5,5,5" TextWrapping="Wrap" Text="{Binding Path=Authors, Converter={StaticResource stringArrayConverter}, ConverterParameter=', ' }" Grid.Row="3" Grid.Column="1" /> Figure 31-43 shows the book details, including authors.
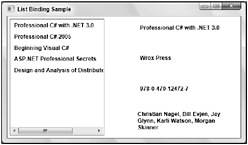
Figure 31-43
Adding List Items Dynamically
What if list items are added dynamically? The WPF element must be notified of elements added to the list.
In the XAML code of the WPF application, a Button element is added inside a StackPanel. The Click event is assigned to the method OnAddBook():
<!-- ... --> <DockPanel> <StackPanel Orientation="Horizontal" DockPanel.Dock="Bottom" Height="60"> <Button Click="OnAddBook" Name="addBookButton" Margin="5,5,5,5" Width="80" Height="40">Add Book</Button> </StackPanel> <Grid > <!-- ... -->
In the method OnAddBook(), which implements the event handler code for the addBookButton, a new Book object is added to the list. If you test the application with the BookFactory as it is implemented now, there’s no notification to the WPF elements that a new object has been added to the list.
void OnAddBook(object sender, RoutedEventArgs e) { factory.AddBook(new Book(".NET 2.0 Wrox Box", "Wrox Press", "978-0-470-04840-5")); } The object that is assigned to the DataContext must implement the interface INotifyCollectionChanged. This interface defines the CollectionChanged event that is used by the WPF application. Instead of implementing this interface on your own with a custom collection class, you can use the generic collection class ObservableCollection<T> that is defined with the namespace System.Collections .ObjectModel in the assembly WindowsBase. Now, as a new item is added to the collection, the new item immediately shows up in the ListBox.
public class BookFactory { private ObservableCollection<Book> books = new ObservableCollection<Book>(); // ... public void AddBook(Book b) { books.Add(b); } public ObservableCollection<Book> GetBooks() { return books; } }
Data Templates
In this chapter, you’ve already seen how controls can be customized with templates. You can also define a template for a data type, for example, the Book class. No matter, where the Book class is used, the template defines the default look.
In the example, the DataTemplate is defined within the Window resources. The DataType property references the class Book from the namespace Wrox.ProCSharp.WPF. The template defines a border with two label elements contained in a stack panel. With the ListBox element you can see there’s no template referenced. The only property that is defined by the ListBox is ItemsSource with a value for the default Binding markup extension. Because the DataTemplate does not define a key, it is used by all lists containing Book objects. Figure 31-44 shows the output of the application with the data template.
<Window x: xmlns="http://schemas.microsoft.com/winfx/2006/xaml/presentation" xmlns:x="http://schemas.microsoft.com/winfx/2006/xaml" xmlns:src="/books/4/80/1/html/2/clr-namespace:Wrox.ProCSharp.WPF" Title="Data Template Sample" Height="300" Width="300" > <Window.Resources> <DataTemplate DataType="{x:Type src:Book}"> <Border BorderBrush="Blue" BorderThickness="2" Background="LightBlue" Margin="10" Padding="15,15,15,15"> <StackPanel> <Label Content="{Binding Path=Title}" /> <Label Content="{Binding Path=Publisher}" /> </StackPanel> </Border> </DataTemplate> </Window.Resources> <Grid> <ListBox ItemsSource="{Binding}" /> </Grid> </Window>
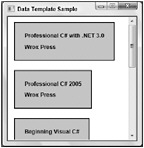
Figure 31-44
Binding to XML
WPF data binding has special support for binding to XML data. You can use XmlDataProvider as a data source and bind the elements by using XPath expressions. For a hierarchical display, you can use the TreeView control and create the view for the items by using the HierarchicalDataTemplate.
The following XML file containing Book elements will be used as a source in the next examples:
<?xml version="1.0" encoding="utf-8" ?> <Books> <Book isbn="978-0-470-12472-7"> <Title>Professional C# with .NET 3.0</Title> <Publisher>Wrox Press</Publisher> <Author>Christian Nagel</Author> <Author>Bill Evjen</Author> <Author>Jay Glynn</Author> <Author>Karli Watson</Author> <Author>Morgan Skinner</Author> </Book> <Book isbn="978-0-7645-4382-1"> <Title>Beginning Visual C#</Title> <Publisher>Wrox Press</Publisher> <Author>Karli Watson</Author> <Author>David Espinosa</Author> <Author>Zach Greenvoss</Author> <Author>Jacob Hammer Pedersen</Author> <Author>Christian Nagel</Author> <Author>John D. Reid</Author> <Author>Matthew Reynolds</Author> <Author>Morgan Skinner</Author> <Author>Eric White</Author> </Book> </Books> Similarly to defining an object data provider, you can define an XmlDataProvider. Both ObjectDataProvider and XmlDataProvider are derived from the same base class DataSourceProvider. With the XmlDataProvider in the example, the Source property is set to reference the XML file books.xml. The XPath property defines an XPath expression to reference the XML root element Books. The Grid element references the XML data source with the DataContext property. With the data context for the grid, all Book elements are required for a list binding, so the XPath expression is set to Book. Inside the grid, you can find the ListBox element that binds to the default data context and uses the DataTemplate to include the title in TextBlock elements as items of the ListBox. Inside the grid, you can also see three Label elements with data binding set to XPath expressions to display the title, publisher, and ISBN numbers.
<Window x: xmlns="http://schemas.microsoft.com/winfx/2006/xaml/presentation" xmlns:x="http://schemas.microsoft.com/winfx/2006/xaml" Title="XmlBindingSample" Height="348" Width="498" > <Window.Resources> <XmlDataProvider x:Key="books" Source="Books.xml" XPath="Books" /> <DataTemplate x:Key="listTemplate"> <TextBlock Text="{Binding XPath=Title}" /> </DataTemplate> <Style x:Key="labelStyle" TargetType="{x:Type Label}"> <Setter Property="Width" Value="190" /> <Setter Property="Height" Value="40" /> <Setter Property="Margin" Value="5,5,5,5" /> </Style> </Window.Resources> <Grid DataContext="{Binding Source={StaticResource books}, XPath=Book}"> <Grid.ColumnDefinitions> <ColumnDefinition /> <ColumnDefinition /> </Grid.ColumnDefinitions> <Grid.RowDefinitions> <RowDefinition /> <RowDefinition /> <RowDefinition /> <RowDefinition /> </Grid.RowDefinitions> <ListBox IsSynchronizedWithCurrentItem="True" Margin="5,5,5,5" Grid.Column="0" Grid.RowSpan="4" ItemsSource="{Binding}" ItemTemplate="{StaticResource listTemplate}" /> <Label Style="{StaticResource labelStyle}" Content="{Binding XPath=Title}" Grid.Row="0" Grid.Column="1" /> <Label Style="{StaticResource labelStyle}" Content="{Binding XPath=Publisher}" Grid.Row="1" Grid.Column="1" /> <Label Style="{StaticResource labelStyle}" Content="{Binding XPath=@isbn}" Grid.Row="2" Grid.Column="1" /> </Grid> </Window>
Figure 31-45 shows the result of the XML binding.
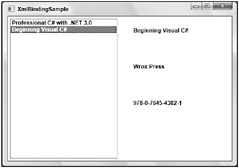
Figure 31-45
If XML data should be shown hierarchically, you can use the TreeView control.