Entering Text
How many ways can you type a memo? The answer used to be, One keystroke at a time. Today, however, Word has expanded our data-entry horizons by offering additional ways of getting text into our documents. You can enter text in a Word document in the following ways:
-
Use the good old-fashioned method and type text.
-
Use your Tablet PC, Pocket PC, or drawing tablet to write text.
-
Use the dictation feature in Word to speak text into the program.
-
Import text you ve created in other programs.
| Caution | Be forewarned: Speech dictation and recognition was new with the previous version of Word, and although it s a great feature (and fun, too), you ll have to spend quite a bit of time training Word to recognize your speech patterns before it actually saves you time. The program needs to learn how you say things before it can enter your words and phrases accurately. |
Typing Text
If you re familiar with computers at all, you know the basics of typing in a Word document. The flashing cursor shows you where the characters will appear as you type. Simply go to town entering your text. No need to press Enter at the end of a line; Word will automatically wrap the text to the next line for you. At the end of a paragraph, press Enter. It s that simple.
One important consideration when you re typing text in your document is whether you re working in Insert or Overtype mode. Insert mode inserts characters at the cursor position, pushing existing characters to the right. Overtype mode types over existing characters and can sometimes create a mess in your document if you re not paying attention. By default, your document is in Insert mode (which means characters won t be replaced ). You can toggle Overtype mode on and off by pressing the Insert key on your keyboard. When Overtype mode is on, the symbol OVR appears in the status bar along the bottom of the screen.
| |
The AutoText feature in Word is great for helping you streamline the task of typing words you use often. The feature comes with a whole slew of choices already included ”from headers and footers to mailing instructions to salutations and signature lines. You can add the text by using the dialog-box method or by displaying an AutoText toolbar in your work area (this is the best choice if you plan to use AutoText for a number of entries). Here s how to do it:
-
Choose AutoCorrect from the Tools menu.
-
Choose the AutoText tab in the AutoCorrect dialog box. Choose the AutoText entry you want to add by selecting it from the list.
-
Click Insert. The word or phrase is added at the cursor position in the document and the dialog box closes .
You can also use AutoText to add phrases you find yourself typing repeatedly. To do this, display the AutoText tab (if you re using the AutoText toolbar, you can simply click the AutoText tool to display it), type your phrase in the Enter AutoText Entries Here line, click Add, and then click OK. Now, when you want to insert the phrase, click the All Entries button on the AutoText toolbar, choose the Normal category (where customized entries are stored), and click the entry. Word inserts it at the cursor position.
| |
Writing Text
Word now offers a number of ink options that enable you to enter text longhand in your Word documents. If you want to add a quick signature to a letter or invoice, you can use the Writing Pad or the Write Anywhere feature and your stylus to sign the document. If you want to take your Tablet PC to a meeting at a client s office, you can write your notes by hand and have Word convert them to text automatically. Here are the quick steps:
| See Also | If you re just getting started using your Tablet PC, check out Jeff Van West s book Tablet PC Quick Reference (Microsoft Press, 2003) for details on setting up, working with, and caring for your Tablet PC. |
-
To display and use the Writing Pad, click the Handwriting tool on the Language Bar and choose Writing Pad from the menu; then simply use your mouse or stylus to write the characters you want to add to your Word document.

-
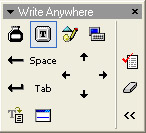
To use the Write Anywhere feature, choose Handwriting on the Language Bar and click Write Anywhere. A small palette of tools appears. Click the Ink tool and begin writing on the document.
-
If you re using a Tablet PC with Word 2003 installed, you don t need to turn on any feature to begin writing on the screen. Handwriting is enabled by default, so you can simply write on the screen to enter text.
| Caution | You may not see the Language Bar when you first begin working with Word because it is most likely minimized in the system tray area of the taskbar. Display the taskbar and look for a small keyboard symbol. Click it to display a menu; then choose Show The Language Bar. If Handwriting does not appear as an option on the Language Bar, the feature may not be installed. Go to the Windows XP Control Panel and double-click the Regional And Language Options icon; then click the Languages tab and the Details button. Click Handwriting Recognition, and click Add to install the feature. (If you are on a network, be sure to check with your system administrator before making any change to your existing Office installation.) |
| |
If you have a Microsoft Windows- powered Pocket PC, you can use Pocket Word to write letters , create memos, work on your expense reports , and more. You can create documents on your Pocket PC and then upload them to your work computer or vice versa. For more information on Pocket Word, visit http://www.microsoft.com/mobile/pocketpc .
| |
Speaking Text
Word also enables you to speak your text into being. Your applications for this feature may be somewhat limited, unless you are adding voice annotations to documents or recording notes you ll want to transcribe later.
| |
Before you work with speech in Word, you must have set up the feature in Windows XP. To do this, click Speech Tools on the right side of the Language Bar, and then choose Options. This displays the Speech Properties dialog box, where you can create a training profile, test and adjust your microphone, and modify speech settings.
| |
Simple Speech
To add text using the speech feature, follow these steps:
-
Position your cursor at the point in the document where you want to add the dictated text.
-
Choose Speech from the Tools menu. The Windows XP Language Bar appears across your document.
-
Make sure your microphone is turned on and positioned properly.
-
Speak clearly and slowly into the microphone. The text appears on the screen.
Using Voice Commands in addition to accepting dictation, Word s speech feature will also respond to your voice commands: Open File opens the File menu, Print displays the Print dialog box, and so on. To activate voice commands, click Voice Command on the Language Bar, and then speak clearly into the microphone.
| Caution | Depending on the power of your microphone, Word might pick up any little sound and interpret it as either a command or a word to be entered. While I was working on this section, for example, the telephone rang and I answered it. Somehow during that brief exchange, Word got the idea I was commanding it to print the document, so it opened the Print dialog box and tried sending the file to the printer. The moral: Turn the microphone off when you don t mean to speak into it. |
EAN: 2147483647
Pages: 238