Example: UDP Echo ServerClient
|
|
Example: UDP Echo Server/Client
Now that we have seen how to create a TCP client and server, let's find out how to do it with the use of the UDP protocol. As we mentioned before, UDP is a connectionless protocol, meaning that the client will never actually connect to the server but will just send packets of information to the server's IP address and port. Let's first look at the complete source code to the UDP echo server, and then we will take a more in-depth look at the code and see the differences between UDP and TCP from a coding point of view.
Code Listing 17-3: UDP echo server
import java.net.*; import java.io.*; public class UDPEchoServer { public static void main(String args[]) { int port = 8000; // create the server... DatagramSocket serverDatagramSocket = null; try { serverDatagramSocket = new DatagramSocket(port); System.out.println("Created UDP Echo Server on port "+port); } catch(IOException e) { System.out.println(e); System.exit(1); } try { byte buffer[] = new byte[1024]; DatagramPacket datagramPacket = new DatagramPacket(buffer, buffer.length); String input; while(true) { // listen for datagram packets serverDatagramSocket.receive(datagramPacket); input = new String(datagramPacket.getData(), 0, datagramPacket.getLength()); System.out.println("Received from server: "+input); // send received packet back to the client serverDatagramSocket.send(datagramPacket); } } catch(IOException e) { System.out.println(e); } } } When we run the UDP echo server console application, it will look like the following on the screen:
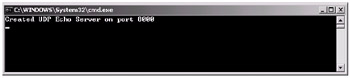
Figure 17-4: The UDP echo server
First, in the main method, we define a port for the server to be created. In this example, we use port 8000, which is declared as follows:
int port = 8000;
Next we need to actually create the server, which will work in a similar way to the TCP echo server in that it will continually loop until it receives data, printing the messages it receives and then sending the message back to where it came from. Of course, UDP has no connections, as it is a connectionless protocol; therefore, there are no streams associated with it, so we first need to create a DatagramSocket on the specified port, which we can then use later to look for incoming data. Here is how we create the DatagramSocket.
serverDatagramSocket = new DatagramSocket(port);
Notice that all we need to do is pass the port to the constructor of the DatagramSocket class. So now we have a datagram socket. At the moment, it is not actually doing anything so we now need to enter an infinite while loop, which we can use to wait for incoming data (packets). After we create a buffer to store any incoming data, we declare the infinite while loop. We can then create a DatagramPacket object, which we can use to store the incoming and outgoing data packets by passing our buffer into the constructor, as well as the length of the buffer (i.e., the array size). This can be seen here:
byte buffer[] = new byte[1024]; DatagramPacket datagramPacket = new DatagramPacket(buffer, buffer.length);
We then call the receive method of our DatagramSocket object, serverDatagramSocket. This method blocks (waits) until a packet is sent to the server and then stores it in the packet, from which we then retrieve the byte data within the packet to create a String object (which is our network message). This can be seen here:
serverDatagramSocket.receive(datagramPacket); input = new String(datagramPacket.getData(), 0, datagramPacket.getLength());
Once we have our received message in the String object input, we then output the string to the console window, and finally we send the packet back to the sender by passing the packet we received to the send method of the serverDatagramSocket object. This can be seen here:
serverDatagramSocket.send(datagramPacket);
The final part of our application is then to simply catch the possible IOException, which will not occur when a client application closes, however, as they are never actually connected. This will only occur by other means, such as a network failure where the server is running.
Now that we have created the server code, let's look at the complete source to the UDP echo client:
Code Listing 17-4: UDP echo client
import java.net.*; import java.io.*; public class UDPEchoClient { public static class UDPEchoReader extends Thread { public UDPEchoReader(DatagramSocket socket) { datagramSocket = socket; active = true; } public void run() { byte[] buffer = new byte[1024]; DatagramPacket incoming = new DatagramPacket(buffer, buffer.length); String receivedString; while(active) { try { // listen for incoming datagram packet datagramSocket.receive(incoming); // print out received string receivedString = new String(incoming.getData(), 0, incoming.getLength()); System.out.println("Received from server: "+receivedString); } catch(IOException e) { System.out.println(e); active = false; } } } public boolean active; public DatagramSocket datagramSocket; } public static void main(String[] args) { InetAddress address = null; int port = 8000; DatagramSocket datagramSocket = null; BufferedReader keyboardReader = null; // Create a Datagram Socket... try { address = InetAddress.getByName("127.0.0.1"); datagramSocket = new DatagramSocket(); keyboardReader = new BufferedReader(new InputStreamReader(System.in)); } catch (IOException e) { System.out.println(e); System.exit(1); } // Start the listening thread... UDPEchoReader reader = new UDPEchoReader(datagramSocket); reader.setDaemon(true); reader.start(); System.out.println("Ready to send your messages..."); try { String input; while (true) { // read input from the keyboard input = keyboardReader.readLine(); // send datagram packet to the server DatagramPacket datagramPacket = new DatagramPacket (input.getBytes(), input.length(), address, port); datagramSocket.send(datagramPacket); } } catch(IOException e) { System.out.println(e); } } } When we run the UDP echo client example with the server also running, we can see that each line we enter is sent to the server, which then sends the message back, where it is handled in the reader thread of the client application. The following figure is a screen shot of what we can expect:
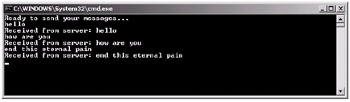
Figure 17-5: The UDP echo client
Let's now look at the source code of the client in more detail and see how it works.
To begin with, we start in the main method in which we first assign a port variable to be 8000 and also set an address variable to the IP address 127.0.0.1. Once we have done this, we then create our DatagramSocket object datagramSocket using the following line of code:
datagramSocket = new DatagramSocket();
Straight after, we create a BufferedReader object called keyboardReader, as we did in the TCP echo client to read in the keyboard input.
Next, we need to start a thread to handle incoming data (packets). This is done simply by creating a new thread by creating an instance of a UDPEchoReader class (which we will look at in a moment), setting it as a daemon thread, and then calling the start method to begin execution of the run method. Let's now look at the UDPEchoReader class.
In the constructor, we pass in a DatagramSocket object, which in this example is the one we created in the main method, and we simply assign this to an instance variable called datagramSocket. Then we set the flag active to true, which is the condition for the while loop in the run method (just like the TCPEchoReader).
Next, we declare the run method and create a buffer that will be used to store incoming data. This is done with the following line of code:
byte[] buffer = new byte[1024];
Then, we need to create a DatagramPacket (which we have called incoming), passing in the buffer and its length (size) to the constructor. This can be seen in the following line of code:
DatagramPacket incoming = new DatagramPacket(buffer, buffer.length);
After this is done, we then enter a while loop (using the active flag as a condition) and call the receive method of our datagramSocket object, which will block (wait) until it receives a packet from a remote source. Note that we need to pass our incoming DatagramPacket object into the receive method, as when it is received the data will be stored in that object (as well as information regarding where it came from, as we saw with the server). This can be seen in the following code segment:
datagramSocket.receive(incoming);
Once we have data (a packet) from the server, we need to construct a string from the byte data that is stored within the packet. To do this, we use the String class constructor to pass in the data and the length of the data from our packet by calling the getData and getLength methods. This can be seen in the following line of code:
receivedString = new String(incoming.getData(), 0, incoming.getLength());
Therefore, once we have the data as a string, we then simply output it to the console with the following line of code:
System.out.println(receivedString);
After this, all we need to do is catch the possible IOException and then end our while loop. This is done with the following block of code:
} catch (IOException e) { System.out.println(e); active = false; } } Now that we have seen the run method, let's go back to the main code where we left it (after calling the start method).
We now simply call the readLine method of the keyboardReader object within an infinite while loop.
input = keyboardReader.readLine();
Then when a line of text is obtained from the keyboard, we just create a new DatagramPacket object called datagramPacket, passing in a byte array of the string data (obtained by calling the getBytes method), the length of the string, the address to send the packet to, and finally the port at that address. This can be seen here:
DatagramPacket datagramPacket = new DatagramPacket(input.getBytes(), input.length(), address, port);
Once we have the packet ready, we then send it using the send method of our datagramSocket object, passing our packet datagramPacket as the parameter. This can be seen in the following line of code:
datagramSocket.send(datagramPacket);
All we need to do now is end the while loop and catch the possible IOException.
|
|
EAN: 2147483647
Pages: 237