Using the Java Sound API
|
|
Playing Sampled Sound
The Java Sound API, introduced in the Java 1.3 release, gives us more control over our sound. As well as play sound samples as we did in the previous example, the Sound API also allows us to record audio, stream audio, and play MIDI music. Before we look at these useful features, let's first look at an example of using the Sound API (rather than the old method) to play a wav file in an application, as we did in the previous simple example.
Code Listing 11-4: Playing samples in the Java Sound API
import java.awt.event.*; import javax.swing.*; import java.io.*; import javax.sound.sampled.*; // Import the Sound API public class SoundAPIApplication extends JFrame implements ActionListener { public SoundAPIApplication() { super("Sound API Example"); setDefaultCloseOperation(EXIT_ON_CLOSE); getContentPane().setLayout(null); setResizable(false); setBounds(0, 0, 306, 100); // Get the current directory... File soundFile = new File("siren.wav"); // Attempt to load the sound file... try { AudioInputStream source = AudioSystem .getAudioInputStream(soundFile); DataLine.Info clipInfo = new DataLine.Info(Clip.class, source.getFormat()); if(AudioSystem.isLineSupported(clipInfo)) { theSound = (Clip) AudioSystem.getLine(clipInfo); theSound.open(source); } else { JOptionPane.showMessageDialog(null, "The Clip was not supported", "Error", JOptionPane.ERROR_MESSAGE); } } catch(UnsupportedAudioFileException e) { System.out.println(e); } catch(LineUnavailableException e) { System.out.println(e); } catch(IOException e) { System.out.println(e); } // Set up the GUI... playButton = new JButton("Play"); playButton.setBounds(0, 0, 100, 74); playButton.addActionListener(this); getContentPane().add(playButton); loopButton = new JButton("Loop"); loopButton.setBounds(100, 0, 100, 74); loopButton.addActionListener(this); getContentPane().add(loopButton); stopButton = new JButton("Stop"); stopButton.setBounds(200, 0, 100, 74); stopButton.addActionListener(this); getContentPane().add(stopButton); setVisible(true); } public void actionPerformed(ActionEvent e) { if(e.getSource() == playButton) { if(theSound.isActive()) { theSound.stop(); } theSound.setFramePosition(0); theSound.loop(0); } else if(e.getSource() == loopButton) { if(theSound.isActive()) { theSound.stop(); } theSound.setFramePosition(0); theSound.loop(Clip.LOOP_CONTINUOUSLY); } else if(e.getSource() == stopButton) { theSound.stop(); theSound.setFramePosition(0); } } public static void main(String args[]) { SoundAPIApplication simpleSoundApplication = new SoundAPIApplication(); } private Clip theSound; // GUI private JButton playButton; private JButton loopButton; private JButton stopButton; } In this example, we have added some GUI to allow us to control the sound from the application. Here is how the application looks when we compile and execute it:
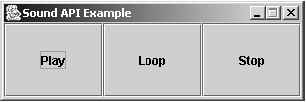
Figure 11-2: Playing sampled sound example
When the Play button is pressed, the application checks to see if the sound is playing. If it is, it stops the sound, resets its position back to the start, and starts it playing again. The Loop button does the same, except it plays the sample on a loop indefinitely. Finally, the Stop button just stops the sample outright.
Let's now look at the code for this example in detail and see how it differs from the old method of adding sound in Java.
First we include the Sound API package with the following line of code:
import javax.sound.sampled.*;
Note that this package contains everything we need for sampled sounds (such as wav files). As we will see later, we require another package for playing MIDI music.
Next, we create a File object called soundFile, which holds the complete path to the sound sample we wish to load (which in this case is in the same directory as the code and is called siren.wav). Here is the line of code we require to do this:
File soundFile = new File("siren.wav"); Once we have the complete path to our file, we then have to enter a try/catch block, as the Sound API code will throw various exceptions that we need to catch if thrown. Once in our try block, we can then attempt to get an AudioInputStream by calling the getAudioInputStream static method of the AudioSystem class. Note that we pass the complete file path soundFile into the method's constructor. This can be seen in the following code segment:
try { AudioInputStream source = AudioSystem .getAudioInputStream(soundFile); Once we have our AudioInputStream created, we then create an Info object, which is a subclass of the DataLine class. We create this object by creating an instance of the Info subclass, passing the class described by the Info object, as well as the audio format of the file we have loaded (note that this is retrieved by the getSource method of the AudioInputStream class). This can be seen in the following line of code:
DataLine.Info clipInfo = new DataLine.Info(Clip.class, source.getFormat());
Next we need to check if the audio format (line) is supported by the operating system. This is accomplished by checking if the line is supported, which is implemented with the following line of code:
if(AudioSystem.isLineSupported(clipInfo))
Note that isLineSupported is a static method of the AudioSystem class and that we pass in our clipInfo variable, which is of type DataLine.Info.
So, if the audio format is supported, then we can get a Clip object from the line and then open our source. We can then use the clip to manipulate our audio sample. This is done with the following two lines of code:
theSound = (Clip) AudioSystem.getLine(clipInfo); theSound.open(source);
Note that if the audio line was not supported, we simply display an error dialog to the user with the following line of code:
JOptionPane.showMessageDialog(null, "The Clip was not supported", "Error", JOptionPane.ERROR_MESSAGE);
The final part of our loading is to catch the three possible exceptions that can be thrown. They are UnsupportedAudioFileException, LineUnavailableException, and IOException.
Next, we add three GUI buttons to allow us to manipulate the sound from within the application. Note that the application implements the ActionListener interface, so we can handle the user clicking on the buttons (we will see more on the GUI in Chapter 13). Here is the code we use to add our buttons to the application:
playButton = new JButton("Play"); playButton.setBounds(0, 0, 100, 74); playButton.addActionListener(this); getContentPane().add(playButton); loopButton = new JButton("Loop"); loopButton.setBounds(100, 0, 100, 74); loopButton.addActionListener(this); getContentPane().add(loopButton); stopButton = new JButton("Stop"); stopButton.setBounds(200, 0, 100, 74); stopButton.addActionListener(this); getContentPane().add(stopButton); Let's now look at the code that we have added within the actionPerformed method for the Play, Loop, and Stop buttons.
-
Play Button
if(theSound.isActive()) { theSound.stop(); } theSound.setFramePosition(0); theSound.loop(0);For the Play button, we first check if our sound is active and if so, we stop the sound from playing by calling the stop method. Then we set the position of the sound to the start by calling setFramePosition with 0 as the argument, which represents the start of the sample. Then we finally call the loop method with 0 as the argument, meaning it will only play the sound once.
-
Loop Button
if(theSound.isActive()) { theSound.stop(); } theSound.setFramePosition(0); theSound.loop(Clip.LOOP_CONTINUOUSLY);For the Loop button, we again check if our sound is active and if so, we stop the sample from playing. Then we set the position of the sample back to the start by calling the setFramePosition method. Finally, we call the loop, but this time we specify the constant Clip.LOOP_CONTINUOUSLY, which does what it says—makes the sample play in a loop indefinitely.
-
Stop Button
theSound.stop(); theSound.setFramePosition(0);
For the Stop button, we simply stop the sample from playing and reset the sample's position back to the start by calling the setFramePosition method.
Streaming Audio
One major problem with playing sampled audio is the size of the file that you are trying to play. If, for example, you have a 100 MB wav file (in our previous examples), it would load the entire 100 MB file into RAM and then begin playing, which as you can guess is not ideal.
In this section, we will learn a better way to handle larger audio data by only reading and playing sections of the file at one time, rather than loading the whole file into memory. This is a technique known as streaming.
Let's now look at an example similar to the previous example, except this time we will use streaming audio.
Code Listing 11-5: Streaming audio
import java.awt.event.*; import javax.swing.*; import java.io.*; import javax.sound.sampled.*; // Import the Sound API public class StreamingSoundExample extends JFrame implements ActionListener, Runnable { public StreamingSoundExample() { super("Streaming Example"); setDefaultCloseOperation(EXIT_ON_CLOSE); getContentPane().setLayout(null); setResizable(false); setBounds(0, 0, 209, 97); // Get the current directory... File soundFile = new File("ambience.wav"); // Attempt to load the sound file... try { audioInputStream = AudioSystem.getAudioInputStream (soundFile); if(audioInputStream.markSupported()) { audioInputStream.mark(Integer.MAX_VALUE); } AudioFormat format = audioInputStream.getFormat(); DataLine.Info audioInputStreamInfo = new DataLine.Info(SourceDataLine.class, format); if(AudioSystem.isLineSupported(audioInputStreamInfo)) { sourceDataLine = (SourceDataLine) AudioSystem.getLine(audioInputStreamInfo); bufferSize = (int) (format.getFrameSize()*format .getFrameRate()/2.0f); System.out.println("Set Buffer Size to: " + bufferSize); sourceDataLine.open(format, bufferSize); soundData = new byte[bufferSize]; } } catch(UnsupportedAudioFileException e) { System.out.println(e); } catch(LineUnavailableException e) { System.out.println(e); } catch(IOException e) { System.out.println(e); } // Set up the GUI... playButton = new JButton("Play"); playButton.setBounds(0, 0, 100, 70); playButton.addActionListener(this); getContentPane().add(playButton); stopButton = new JButton("Stop"); stopButton.setBounds(100, 0, 100, 70); stopButton.addActionListener(this); getContentPane().add(stopButton); setVisible(true); } public void actionPerformed(ActionEvent e) { if(e.getSource() == playButton) { startStreaming(); } else if(e.getSource() == stopButton) { stopStreaming(); } } public void startStreaming() { if(sourceDataLine == null) { JOptionPane.showMessageDialog(null, "The line is not available", "ERROR", JOptionPane.ERROR_MESSAGE); return; } thread = new Thread(this); sampleStreaming = true; thread.start(); } public void stopStreaming() { sampleStreaming = false; } public void run() { sourceDataLine.start(); int readBytes = 0; try { while(sampleStreaming) { readBytes = audioInputStream.read(soundData, 0, soundData.length); if(readBytes == -1) { if(audioInputStream.markSupported()) audioInputStream.reset(); sourceDataLine.drain(); sampleStreaming = false; break; } sourceDataLine.write(soundData, 0, readBytes); } } catch(IOException e) { System.err.println(e); } sourceDataLine.stop(); } public static void main(String args[]) { StreamingSoundExample simpleSoundApplication = new StreamingSoundExample(); } private int bufferSize; private byte soundData[]; AudioInputStream audioInputStream; SourceDataLine sourceDataLine; Thread thread; // GUI private JButton playButton; private JButton stopButton; boolean sampleStreaming = false; } When we execute the streaming audio example, we can see that it looks like the following figure:

Figure 11-3: Streaming audio example
As well as the application window, you will also notice that in the console window we have output the buffer size that was allocated by the application to allow it to stream the sound correctly.
Let's now look at the code to see how we implemented the streaming audio.
First we create a File object based upon the current directory and the name of the wav file we wish to read. This can be seen in the following line of code:
File soundFile = new File("ambience.wav"); After we have created our File object, we then pass it as an argument to the static getAudioInputStream method of the AudioSystem class to obtain a reference to an AudioInputStream object, which we store in a variable called audioInputStream. This can be seen in the following line of code:
audioInputStream = AudioSystem.getAudioInputStream(soundFile);
Next, we do something special to allow us to reset the audio file back to the start. This is called marking the stream and is done with the following segment of code:
if(audioInputStream.markSupported()) { audioInputStream.mark(Integer.MAX_VALUE); } Notice how we check first if marking is supported, and if so, we set the mark to the maximum possible value of an integer. This is to ensure that our mark is valid for as long as possible.
Next, we need to get the audio format, so we call the getFormat method of our audioInputStream and store it in a local variable called format. This can be seen in the following line of code:
AudioFormat format = audioInputStream.getFormat();
Once we have the audio format, we can then create a DataLine.Info object based upon the format information. This can be seen in the following line of code:
DataLine.Info audioInputStreamInfo = new DataLine.Info(SourceDataLine.class, format);
Next, we check that our audio format is supported by using the following code:
if(AudioSystem.isLineSupported(audioInputStreamInfo))
If it is, we then create an object from the SourceDataLine class called sourceDataLine by calling the static getLine method of the AudioSystem class and passing our DataLine.Info subclass object audioInputStreamInfo into the method. This can be seen in the following line of code:
sourceDataLine = (SourceDataLine) AudioSystem.getLine(audioInputStreamInfo);
Now we need to define a size for the audio buffer (i.e., how much data we wish to load into RAM at one time). By allocating too little data, you will find that the sound stutters as it runs out of buffer to play. If you allocate too much buffer, it defeats the whole point of streaming the data, as it will be clogging up the system resources. So for our buffer size, we have chosen to read in enough data to store half a second of audio data. We work this out by dividing the frame rate of the audio format by two and multiplying the result by the frame size of the audio format. This can be seen in the following line of code:
bufferSize = (int) (format.getFrameSize() *format.getFrameRate()/2.0f);
Now that we have the buffer size, we open our sourceDataLine by calling the open method, passing in the audio format format and the size of the buffer that we wish to have, which in this case is our variable bufferSize. This can be seen in the following line of code:
sourceDataLine.open(format, bufferSize);
Next we need to allocate an array of bytes, which will actually hold the sound data and act as our buffer. This is allocated as follows:
soundData = new byte[bufferSize];
The final part of our initialization is simply to add our Play button to the application with the following code segment:
playButton = new JButton("Play"); playButton.setBounds(0, 0, 100, 70); playButton.addActionListener(this); getContentPane().add(playButton); Now that we have our initialization complete, let's look at the startStreaming method that we have defined in our main class.
First we check that our sourceDataLine object is valid, and if not we display a message box to the user informing them of this and cancel the streaming by returning out of the method. This can be seen in the following code segment:
if(sourceDataLine == null) { JOptionPane.showMessageDialog(null, "The line is not available", "ERROR", JOptionPane.ERROR_MESSAGE); return; } If our sourceDataLine is valid, we proceed by creating a thread whose execution is handled by our main class (i.e., we define the run method in our main class). Then we set the class member sampleStreaming to true so our thread continues execution when we start it in our final line. This can be seen in the code segment that follows.
thread = new Thread(this); sampleStreaming = true; thread.start();
Let's now take a look at the run method that we have implemented to handle the execution of the thread. The first thing we do in our run method is start our sourceDataLine by calling the start method. This can be seen in the following line of code:
sourceDataLine.start();
Next we declare a local variable called readBytes, which will record how many bytes of data that we have read from our audioInputStream. We then enter a while loop, which continues while our sampleStreaming variable is true.
So in our while loop, we first attempt to read from our audioInputStream to fill up the buffer that we created in our initialization (which we called soundData). Here is the line of code we use to read the sound data into the buffer. (Note also that the read method we use to read in the data returns the amount of data that has been read, which we store in the readBytes variable.)
readBytes = audioInputStream.read(soundData, 0, soundData.length);
After we have read the sound data into our soundData buffer, check if there was data to read by comparing readBytes to –1. If there was no data read, check if marking is supported and if so, call the reset method to reset our audio stream. Then call the drain method of our sourceDataLine object, which plays the remaining data in the buffer. Finally we set our sampleStreaming variable to false. This can be seen in the following block of code:
if(readBytes == -1) { if(audioInputStream.markSupported()) audioInputStream.reset(); sourceDataLine.drain(); sampleStreaming = false; break; } However, if there was data read in, we simply call the write method of our sourceDataLine class, passing in our soundData buffer as an argument of what to be written. This can be seen in the following line of code:
sourceDataLine.write(soundData, 0, readBytes);
Finally, after the sampleStreaming variable has been set to false and the while loop has been terminated, call the stop method of our sourceDataLine.
sourceDataLine.stop();
Now let's take a final look at the stopStreaming method. All we do here is set the value of our sampleStreaming variable to false so that the thread is informed that the user wishes to stop the stream from playing. This method can be seen in the block of code that follows.
public void stopStreaming() { sampleStreaming = false; }
Playing MIDI Music
The word "MIDI" is an acronym for Musical Instrument Digital Interface. A MIDI music file has the file extension .mid and does not actually contain any sampled sound. Instead, it contains a list of commands that are used to recreate music from instruments that are available in the computer's MIDI synthesizer.
Let's get back to the point, however, and look at how we can play MIDI music in Java by looking at the following example application:
Code Listing 11-6: Playing MIDI music with the Java Sound API
import javax.swing.*; import java.io.*; import java.awt.event.*; import javax.sound.midi.*; public class MIDIExample extends JFrame implements ActionListener { public MIDIExample() { super("MIDI Example"); setDefaultCloseOperation(EXIT_ON_CLOSE); getContentPane().setLayout(null); setResizable(false); setSize(200, 200); // Set up the MIDI try { theSequencer = MidiSystem.getSequencer(); theSequencer.open(); } catch(MidiUnavailableException e) { JOptionPane.showMessageDialog(null, "There was no available sequencer.", "ERROR", JOptionPane.ERROR_MESSAGE); System.exit(1); } File theMidiFile = new File("music.mid"); try { theSequence = MidiSystem.getSequence(theMidiFile); theSequencer.setSequence(theSequence); } catch(InvalidMidiDataException e) { JOptionPane.showMessageDialog(null, "The MIDI file was not valid.", "ERROR", JOptionPane.ERROR_MESSAGE); System.exit(1); } catch(IOException e) { JOptionPane.showMessageDialog(null, "The file did not exist.", "ERROR", JOptionPane.ERROR_MESSAGE); System.exit(1); } // Create the button... playButton = new JButton("Play"); playButton.setBounds(45, 30, 100, 100); playButton.addActionListener(this); getContentPane().add(playButton); setVisible(true); } public void actionPerformed(ActionEvent e) { if(e.getSource() == playButton) { if(playButton.getText().compareTo("Play") == 0) { playButton.setText("Stop"); theSequencer.start(); } else { playButton.setText("Play"); theSequencer.stop(); theSequencer.setTickPosition(0); } } } public static void main(String[] args) { MIDIExample theApp = new MIDIExample(); } private JButton playButton; private Sequencer theSequencer; private Sequence theSequence; } When we execute the MIDI example, it will look like the following figure.
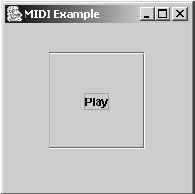
Figure 11-4: MIDI example
When the application starts, it first loads a file called music.mid from the current directory into a MIDI sequence. When the Play button is pressed, the sequence is instructed to be played and the button changes to a Stop button. When the Stop button is pressed, the sequence is told to stop playing and its position is set back to the beginning.
Let's now look at the code that makes this work. The first thing we must do is include the MIDI package, which is javax.sound.midi.*.
Then we attempt to get the MIDI sequencer by using the static member of the MidiSystem class, which is defined within the MIDI package. Once we have the sequencer, we then attempt to open it by calling the open method of the Sequencer class. This is accomplished with the following code segment:
try { theSequencer = MidiSystem.getSequencer(); theSequencer.open(); } catch(MidiUnavailableException e) { JOptionPane.showMessageDialog(null, "There was no available sequencer.", "ERROR", JOptionPane.ERROR_MESSAGE); System.exit(1); } Note that it can throw the MidiUnavailableException, which is thrown if a MIDI sequencer is not available to use. If this is the case, show the user a dialog stating this and then exit the application.
Now that we have the sequencer, we need to get our MIDI sequence, which the sequencer will play. First though, create a File object called theMidiFile by passing the name of our MIDI file into the File constructor. This can be seen in the following line of code.
File theMidiFile = new File("music.mid"); Once we have the File object, we can then attempt to get the sequence from it and set the sequence in our sequencer. This is done with the following block of code:
try { theSequence = MidiSystem.getSequence(theMidiFile); theSequencer.setSequence(theSequence); } catch(InvalidMidiDataException e) { JOptionPane.showMessageDialog(null, "The MIDI file was not valid.", "ERROR", JOptionPane.ERROR_MESSAGE); System.exit(1); } catch(IOException e) { JOptionPane.showMessageDialog(null, "The file did not exist.", "ERROR", JOptionPane.ERROR_MESSAGE); System.exit(1); } First we attempt to get the MIDI sequence by calling the static getSequence method of the MidiSystem class, passing our File object into the constructor. Once we have the sequence, we call the setSequence method of our theSequencer object, passing our sequence in as the argument of the constructor. Note that we need to catch both an InvalidMidiDataException and an IOException, which can be seen in the previous code segment.
At this point, our sequencer is now set up and ready to play, so we can create our button to allow us to play it with the following few lines of code:
playButton = new JButton("Play"); playButton.setBounds(45, 30, 100, 100); playButton.addActionListener(this); getContentPane().add(playButton); Now that we have everything set up, let's look at the actionPerformed method. We are going to make it so that when the Play button is pressed, the text will change to Stop. When Stop is pressed, it will change back to Play, etc. So when Play is pressed, we start the MIDI sequencer, theSequencer, by calling its start method with the following line of code:
theSequencer.start();
This will start the MIDI file playing. When the Stop button is then pressed, we need to call the stop method and then also the setTickPosition method with 0 as a parameter to set the MIDI file back to the start again. This can be seen in the following two lines of code:
theSequencer.stop(); theSequencer.setTickPosition(0);
|
|
EAN: 2147483647
Pages: 237