SQL Search
| Finding information in your database can be a simple or a complex process. Depending on the search criteria, you can give your users the capability to narrow down their searches as fine as a specific date range. Suppose that you wanted to find all employees in your database who have the name John Smith; you can create a simple query in Access that selects all the records in the Customers table whose name was equivalent to the name John Smith. Your SQL statement could look similar to this: SELECT Name FROM Employees WHERE Name = 'John Smith' The result returns all the matching records. Indeed, the Dorknozzle database is filled with information that users may want access to, including the following:
As you can see, just within the Dorknozzle database, there is plenty available to search on. Whether you are approaching the problem as an admin or an employee, the database ultimately is a warehouse of information. How you access that information is covered next. Creating the Dorknozzle Search PageIn Chapter 23, "A Database Primer," you learned how to display dynamic data to the user. You created a query and integrated that query into your application using a server behavior that presented dynamic data. The problem with that approach is that it's hard-coded, meaning that the data the user ends up seeing always remains the same. What if your users don't want to see what you are choosing to present to them? Fortunately for you, you can allow your users to perform a search in your site based on criteria they specify through the use of form objects, recordsets/DataSets, and variables/parameters. Before we jump ahead, let's dissect a common approach to creating search functionality. Figure 27.1 shows the Amazon website and the search form you would use to search for a book. Figure 27.1. Most websites employ some way of allowing their users to search for information.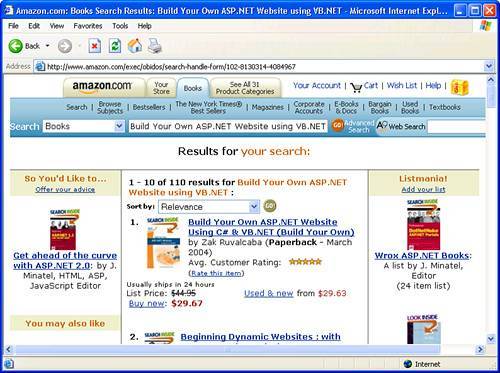 Suppose that you have a database with a list of book titles. The user of the website types a book name; the value of that text box is dynamically appended to a WHERE or a LIKE clause in a SQL statement. The database is then queried, and the results are presented to the user in a well-structured manner. Of course, this kind of intuitive functionality isn't limited to large companies such as Amazon and eBay. You, too, can create functionality such as this using Dreamweaver. To create your own basic SQL-based search page, regardless of server model, follow these steps:
Save your work and test the results in the browser. Enter a value and click the Search button. As Figure 27.3 shows, the value you enter into the text field is passed along with the URL in the address bar. Figure 27.3. Enter a value in the search text box and click Search. The value is passed along with the URL in the address bar. Figure 27.3 shows the value being searched on displayed in the address bar as a parameter appended to the URL string. As you can see, the page isn't returning a result just yet. Let's do that next. Creating the Dorknozzle Search Results PageNow that the search page has been created, you'll want some way of collecting the value of the user's input and processing the result of the search. The search results page is where all the work is done. The search results page must contain the following components for the search to be processed correctly:
Remember that a recordset/DataSet is always used to capture the results of the table information. To create a new recordset or DataSet for the search results page, follow these steps:
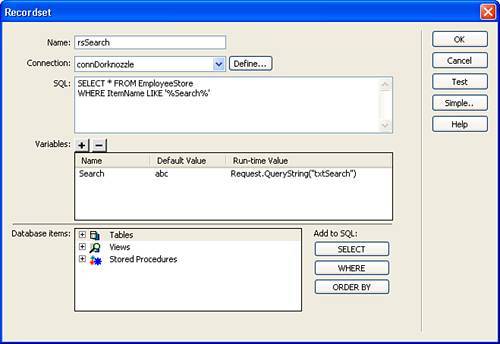
Although the query seems to work perfectly, it's still not dynamic to the user. As things stand now, the Dorknozzle Shirt value always appears as the searched item. The next section introduces you to working with variables (also known as parameters if you're working in ASP.NET or ColdFusion). Variables/parameters allow you to capture the users' input and ultimately make the search much more dynamic. Working with Variables in ASP and PHPUp to this point, we've yet to discuss the topic variables. Variables in Dreamweaver's Recordset dialog allow you to capture user information from sessions, form requests, cookies, and application variables. Variables let you work dynamically by passing values from one page to another. If you take the search page as an example, a user submits the input in a form object to the search results page. In the search results page, a piece of functionality must be added to capture that input so that it can be automatically appended to the SQL statement's WHERE clause. In the ASP and PHP server models, that functionality is called a variable. NOTE The ASP and PHP server models support variables; the ASP.NET and ColdFusion server models support parameters. Dedicated sections to both ASP.NET and ColdFusion are outlined next. Variables in Dreamweaver enable you to capture the data being sent from a previous page, store it, and then use it at any time in the current page. Variables contain three properties:
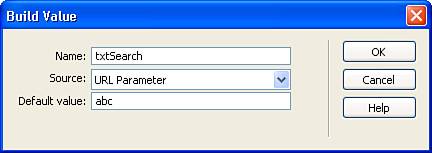
You can set up a variable to capture the user's input from the search page by following these steps:
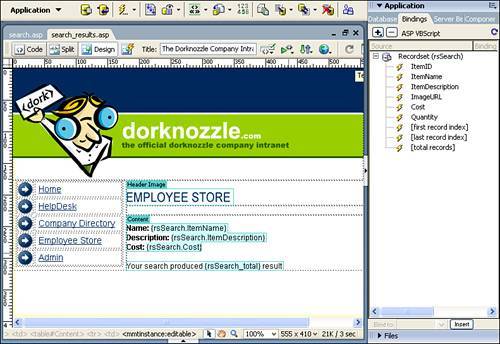
Save your work and test the results in the browser. Figure 27.8 shows the search result when I typed the value Dorknozzle Shirt and clicked Submit. Figure 27.8. Dorknozzle Shirt was searched for and the results came back with a match. As you can see, the search produced a filtered result (1 record) based on the value I entered in the search text box. The results are made possible because of the variable. The variable captured the results of the request sent by the form's submission. The variable was then appended to the SQL statement, which caused the dynamic search for the object's value. Working with Parameters in ASP.NETSimilar to the ASP server model, the search functionality can easily be created using ASP.NET. The difference between ASP/PHP and ASP.NET, however, lies in how we store and use the value that's coming across, appended to the URL in the address bar. As you saw in the previous section, variables are the method used for collecting, storing, and then subsequently reusing the value coming across. In the ASP.NET server model, we use parameters instead of variables. Like the variables we used in the ASP and PHP models, parameters are the mechanism used for dynamically passing and using values coming from one page to the other. Parameters in ASP.NET support the following three properties:
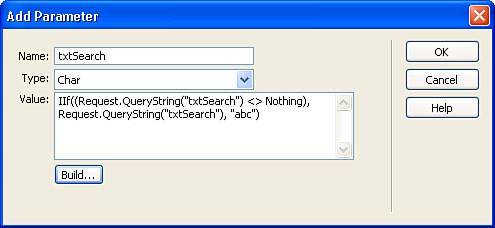
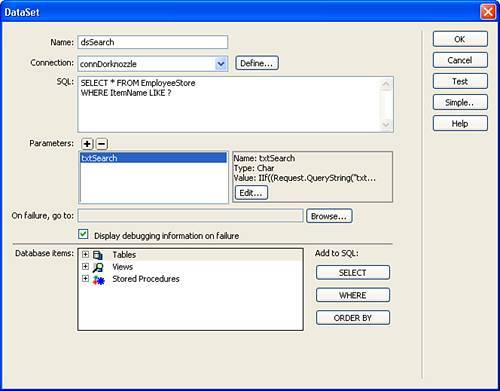
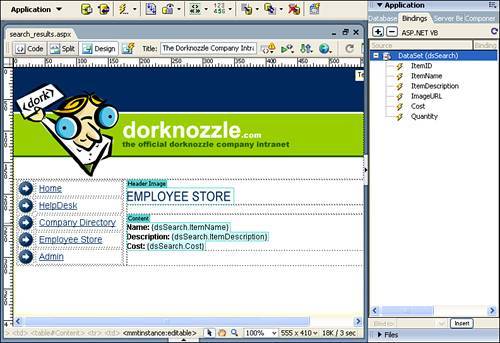
Now that the DataSet has been created and the SQL statement has been generated, you'll want to dynamically change the value that appears just after the LIKE keyword. Essentially, that value becomes a parameter, meaning that rather than using a variable to store the value being sent across, a parameter is passed to the SQL statement dynamically. To create a new parameter for the SQL statement, follow these steps:
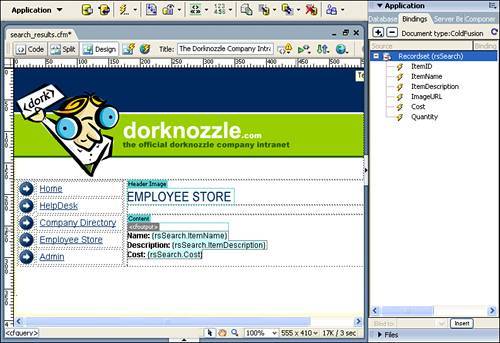
Save your work and test the results in the browser. Figure 27.13 shows the search result when I type the value Dorknozzle Shirt and click Submit. Figure 27.13. Dorknozzle Shirt was searched for and the results came back with a match.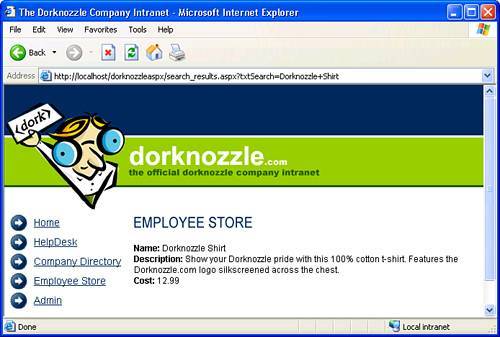 As you can see, the search produced a filtered result (1 record) based on the value I entered in the search text box. The results are made possible because of the parameter. The parameter captured the results of the request when the form was submitted. The parameter was then appended to the SQL statement, and the exact result based on the filtered criteria was returned. Working with Parameters in ColdFusionSimilar to the ASP, ASP.NET, and PHP server models, search functionality for our Dorknozzle site can easily be created using the ColdFusion server model. The difference between ColdFusion and the other server models, however, lies in how we store and use the value that's coming across, appended to the URL in the address bar. As you saw in the previous two sections, variables and parameters were used for collecting, storing, and then subsequently reusing the value coming across. In the ColdFusion server model, however, variables and parameters are not necessary. Instead we can dynamically append to the WHERE clause of the SQL statement the value of the form name as a parameter, enclosed with # symbols. To demonstrate this, let's build the search functionality in ColdFusion by following these steps:
Save your work and test the results in the browser. Figure 27.15 shows the search result when I type the value Dorknozzle Shirt and click Submit. Figure 27.15. The Dorknozzle Shirt was searched for and the results came back with a match.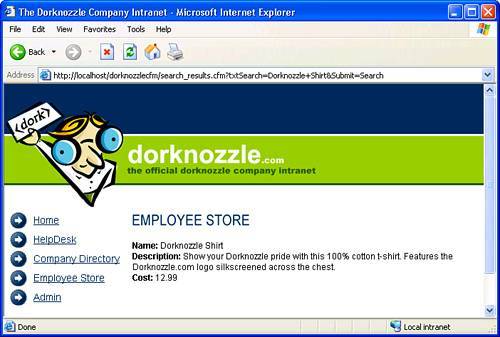 As you can see, the search produced a filtered result (1 record) based on the value I entered in the search text box. Repeating RegionsNow that your application has search capabilities, you might want to allow the user to see more than one item returned from the search at a time. For now, our search works fine as is because we're performing a search (Dorknozzle Shirt) that returns only one result from the EmployeeStore table. But what if the user performed a search on just the word Dorknozzle? In this case, our search would return multiple results because nearly every item in the EmployeeStore table begins with the word Dorknozzle. But would it really return multiple results? Let's try it! Type the word Dorknozzle in the search page and click Search. As you'll notice, the results page returns just the first item in our EmployeeStore table. The problem with our approach doesn't lie in the functionality we've added, rather it lies in the functionality we haven't added. Our recordset/DataSet is returning multiple results, the problem is that we haven't added functionality for repeating all the values contained in the recordset/DataSet within the search results page. To fix this problem, we need only add a repeating region. (Repeating regions were discussed at length in Chapter 25, "Working with Dynamic Data.") To add a repeating region to your results page, follow these steps:
Save your work and test the search page in the browser by pressing the F12 key. Now type a value such as shirt in the text box and click Search. Figure 27.16 shows the four records that are displayed in the results page. Figure 27.16. The Repeat Region server behavior opens the door for your users by allowing them to search for data in the database that might have more than one result.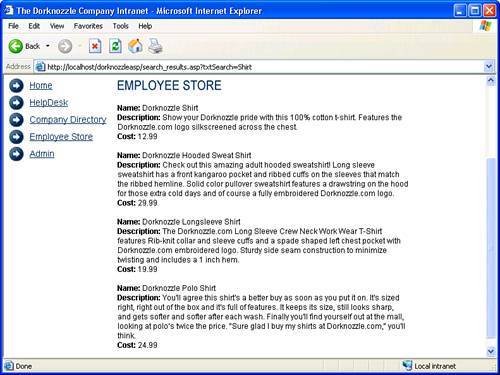 Displaying Alternative TextCurrently, as users search for data in the database, they are presented with results in a structured format. But suppose that users enter a value to search by and the recordset/DataSet cannot return a match? Unless you're using ASP (which allows you to display a record count), the page returns as blank. You can see how counterintuitive this would be to the user, not to mention that it isn't very user friendly. Using the Show Region server behavior set, you can present users with an alternative text message, alerting them of the failed search result and allowing them to link back to the search page to try their search again. To insert the alternative text into your search result page, follow these steps:
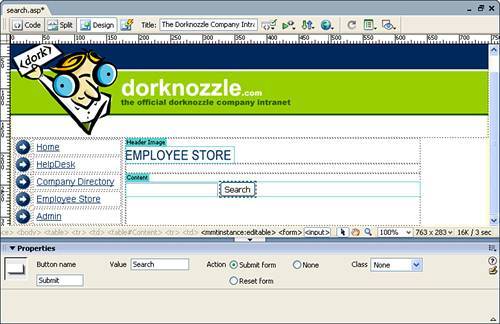
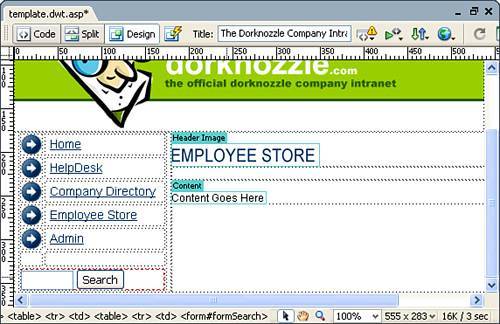
Save your work and test the result in the browser by pressing F12. In the search page, type something you know the search will not produce a result for, such as Dorknozzle Paperclip, and click Search. Your Sorry message will appear along with the Try Again link that allows you to link back to the search page, as shown in Figure 27.17. Figure 27.17. If the recordset/DataSet comes up empty, you are presented with the custom message along with a link that allows you to link back to the search page.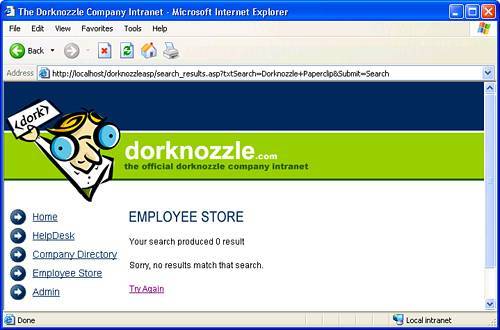 Globalizing the Search FunctionalityNow that most of the search functionality has been added to the Dorknozzle site, you're ready to globalize it. What exactly does globalizing mean? Globalization is the term given to items or functionality that can be accessed from anywhere at any time. Currently, the search functionality can be accessed only from the search.asp, search.aspx, search.cfm, or search.php page. What you want is for that search functionality to be accessible from every page; that way, when a user has an immediate need to search for a particular item, it can be done no matter what page the user is on. Accomplishing this task is as simple as emulating the form objects you inserted on the search page in the main template located in the Templates folder of the defined site. Modifying the template provides access to the search functionality on every page in the Dorknozzle site. To globalize the search functionality, follow these steps:
Now close the template and open any page based on that template. Preview the page in the browser by pressing the F12 key. Figure 27.19 shows that, no matter what page you visit, the search field appears just under the navigation menu. Figure 27.19. The search form appears on every page. Try typing the value Shirt and clicking the Search button. The results should appear the same as they did when you initiated the search from the search.asp, search.cfm, or search.php pages. |


EAN: 2147483647
Pages: 237
- Challenging the Unpredictable: Changeable Order Management Systems
- ERP System Acquisition: A Process Model and Results From an Austrian Survey
- The Second Wave ERP Market: An Australian Viewpoint
- Context Management of ERP Processes in Virtual Communities
- Development of Interactive Web Sites to Enhance Police/Community Relations