| AutoCorrect is a useful feature that can help save you time and automatically correct mistakes you frequently make. If you need to frequently enter a long term or name , it can save you time and effort if you enter a shorter term and have PowerPoint fill in the longer term . For example, say that the name of your latest product is "All Natural, Fat-Free Chilly Cherry Sorbet." You're tired of typing that phrase over and over, so you set up an AutoCorrect entry named "CCS" and have PowerPoint automatically enter "All Natural, Fat-Free Chilly Cherry Sorbet" any time you type the letters "CCS." In addition, if you know that you always misspell a particular word, you can enter the word as you normally misspell it in the Replace field and the correct spelling in the With field. To see, add, change, and delete AutoCorrect options, select Tools, AutoCorrect Options. The AutoCorrect dialog box for your installed language opens, shown in Figure 21.23. Figure 21.23. You can view and modify automatic correction options in this dialog box. 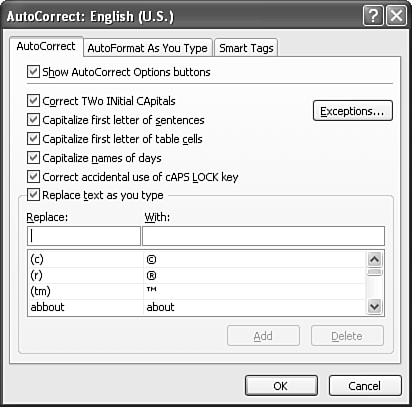 Basic AutoCorrect options include -
Show AutoCorrect Options Buttons ” Displays the AutoCorrect Options button after an automatic correction occurs. Place the mouse over the small blue box beneath the correction and click the down arrow to view a menu of options (see Figure 21.24). From here, you can revert back to your original entry, stop automatically correcting this type of entry, or open the AutoCorrect dialog box. Figure 21.24. Choose from several options when you automatically correct text entries in PowerPoint. 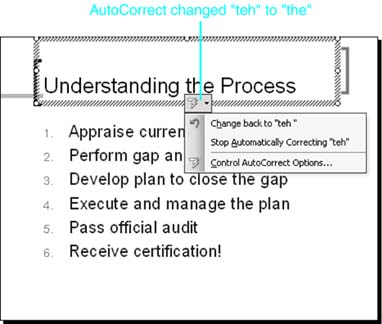 -
Correct TWo INitial CApitals ” Corrects instances in which you accidentally type two initial capital letters in a row. You can enter exceptions to this rule if you like (such as ID). -
Capitalize First Letter of Sentences ” Capitalizes the first letter of all sentences. -
Capitalize First Letter of Table Cells ” Capitalizes the first letter of text in a table cell . -
Capitalize Names of Days ” Capitalizes days of the week such as Monday, Tuesday, and so forth. -
Correct Accidental Use of cAPS LOCK Key ” When caps lock is on and you type regular sentences, AutoCorrect turns caps lock off and fixes the capitalization of whatever you've typed. -
Replace Text As You Type ” Replaces AutoCorrect entries as you type them. Customizing AutoCorrect Entries You can customize AutoCorrect entries. The lower portion of the dialog box includes a list of existing automatic corrections. To delete an existing entry, select it and click the Delete button. To change an existing entry, select it and enter the new data in the Replace and/or With fields as needed. Then click Replace. To add an entry, enter the term to replace in the Replace field and the term to replace it with in the With field. Then click Add. Specifying AutoCorrect Exceptions To specify exceptions to these rules, click the Exceptions button. Figure 21.25 illustrates the AutoCorrect Exceptions dialog box. Figure 21.25. If you want to make exceptions to AutoCorrect functionality, you can do it here. 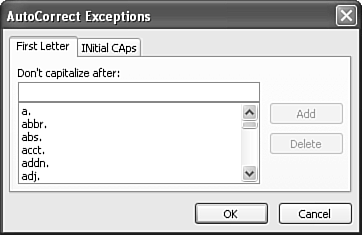 On the First Letter tab, you can specify abbreviations that end with a period that you don't want to treat as the end of a sentence . PowerPoint ignores standard rules of capitalization here and doesn't capitalize the next letter after the period. Terms such as etc. and abbr. are already included here, but you can also add your own or delete any existing entries. On the INitial CAps tab, shown in Figure 21.26, you can enter any capitalized terms that you don't want PowerPoint to covert to lowercase. Figure 21.26. Automatically resolve capitalization problems on this tab. 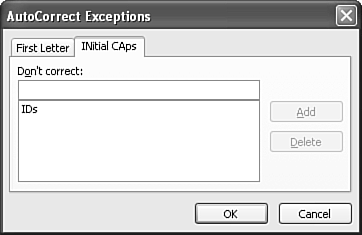 For example, to avoid having the word ID converted to Id based on the normal rules of capitalization, add it to this list. AutoFormatting As You Type The AutoFormat As You Type tab of the AutoCorrect dialog box lets you replace and apply a number of formatting options as you type. You save time because you don't need to manually format. Figure 21.27 shows this tab. Figure 21.27. You can see and change automatic correction options in this dialog box. 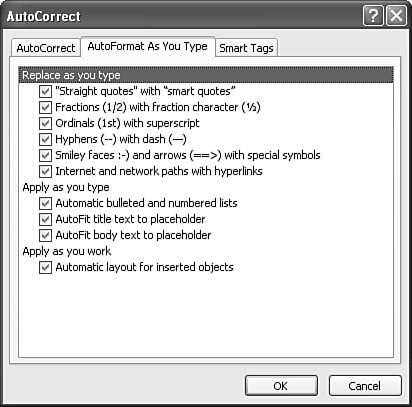 Options include -
"Straight Quotes" with "Smart Quotes" ” Inserts a "curly" quotation mark when you type a quotation mark. If this check box is not selected, you get "straight" quotation marks, a throwback to typewriter days. -
Fractions (1/2) with Fraction Character ( ½) ” Replaces 1/4, 1/2, and 3/4 with built fractions ¼, ½, and ¾. -
Ordinals (1st) with Superscript ” Replaces manually entered ordinals with superscript ordinals. -
Hyphens (--) with Dash ( ”) ” Replaces manually entered hyphens with an em dash. Using two hyphens is a holdover from typewriter days when there was no way to type a proper dash. -
Smiley Faces :-) and Arrows ==> with Special Symbols ” Replaces typed representations of faces and arrows with face and arrow characters , as the following shows: | Replaces This | With This | | :-) or :) |  | | :-( or :( |  | | :- or : |  | | ==> |  | | <== |  | | ”> |  | | < ” |  | -
Internet and Network Paths with Hyperlinks ” Applies a hyperlink to an Internet address so that it opens a browser when you click it. For example, AutoCorrect converts www.microsoft.com to www.microsoft.com . -
Automatic Bulleted and Numbered Lists ” Applies automatic bulleting or numbering when PowerPoint detects that you're creating a list (when you use an asterisk for a bullet, for example). -
AutoFit Title Text to Placeholder ” Resizes text if it won't fit in a title placeholder. For example, title text is 44 points by default, but the font size can be reduced if your title is too long to fit. When PowerPoint fits title text to the placeholder, the AutoFit Options button appears (see Figure 21.28). Click the down arrow on the right side of the button to display a menu from which you can accept or reject automatic fitting and open the AutoCorrect dialog box. Figure 21.28. Use the AutoFit Options button to change PowerPoint's automatic formatting. 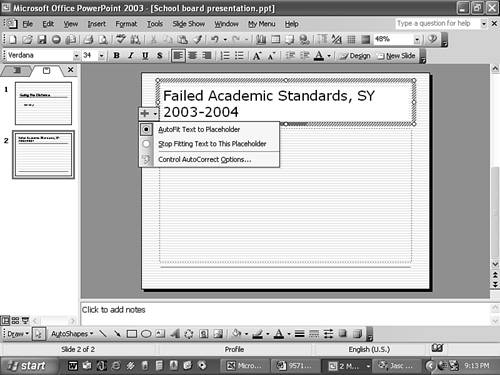 -
AutoFit Body Text to Placeholder ” Resizes text if it won't fit in a body text placeholder. This option works in much the same way as the AutoFit Title Text to Placeholder option. -
Automatic Layout for Inserted Objects ” Automatically sets the layout for objects you insert. These options are all selected by default, but you can remove the check mark if you want to deactivate them for any reason. Setting Up Smart Tags  | Smart tags let you do things in PowerPoint that you'd normally use other programs or Internet services to do. For example, smart tags can link a date in a presentation to Microsoft Outlook, letting you see your calendar or schedule a meeting for that date. They can also link a stock ticker symbol to financial information at MSN Money. | Use the Smart Tags tab of the AutoCorrect dialog box (see Figure 21.29) to enable smart tags and choose which recognizers (that is, kinds of smart tags) to use. Figure 21.29. Use the Smart Tags tab to enable smart tags and choose which kinds of smart tags to use. 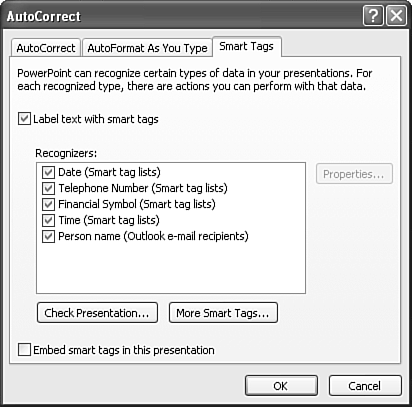 You can set the following options: -
Label Text with Smart Tags ” Select this check box to enable smart tags. Deselect it to disable smart tags. -
Date ” Makes smart tags out of dates. Date smart tags link to Microsoft Outlook to schedule meetings and open your calendar. -
Telephone Number ” Makes smart tags out of telephone numbers . These smart tags let you make a contact in Outlook for the number. -
Financial Symbol ” Makes smart tags out of stock ticker symbols. These smart tags link to MSN Money on the Internet, where you can bring up current financial information about the company. -
Time ” Makes smart tags out of time, such as 3:15. These smart tags link to your Outlook calendar. -
Person Name ” Makes smart tags from names that appear in your Outlook contacts list. When a name is in your Outlook contact list, you can send email or open the contact record. When a name isn't in your Outlook contact list, you can add it from the smart tag. -
Properties ” Opens a page at the Microsoft Office Web site where you can set properties for certain recognizers. -
Check Presentation ” Scans the presentation for text that matches the selected recognizers, and makes smart tags from them. PowerPoint makes smart tags as you type, but if you paste text from another application or create a presentation with smart tags disabled, you need to click this button. -
More Smart Tags ” Opens the Microsoft Office eServices Web site ”from which you can download more smart tags that let you track packages, get information about baseball teams , and news from any city. -
Embed Smart Tags in This Presentation ” Saves smart tags with the presentation. When this check box is deselected, PowerPoint discards all smart tags when you close the presentation. TIP If the Embed Smart Tags in This Presentation check box is deselected when you close a presentation, you can get the smart tags back when you reopen it. Just open the AutoCorrect dialog box to the Smart Tags tab and click Check Presentation.
 |