Managing User Templates
|
| < Day Day Up > |
|
User rights, privileges, permissions, and shares are some of the mechanisms that make Windows Server 2003 quite daunting to many. Windows Small Business Server can shield you from these details with user templates. When you create or modify user accounts, you can apply templates to the accounts. By using templates, many of the account properties and permissions will already be specified, making account management easier.
Creating a New User Template
Most organizations can use the supplied user templates with or without modification. However, it’s a simple matter to make your own templates when you follow these steps:
-
Select Server Management from the Start Menu. Click User Templates in the console tree and then Add A Template to launch the Add Template Wizard.
-
On the Template Account Information page, provide a name for the template and specify whether it is to be the default template for the Add User Wizard and whether power users will be able to use it.
-
On the Security Groups page, select the security group memberships for user accounts created with this template.
-
On the Distribution Groups page, select the distribution groups for user accounts created with this template.
-
On the SharePoint Access page, specify the roles user accounts created with this template will have on your SharePoint site.
-
On the Address Information page, type in address information that will be applied to all the users created with this template. When address information will be different for different user accounts, leave the fields empty and click Next.
-
On the Disk Quotas page, specify disk quotas if they are to be applied to the user accounts.
-
On the final page of the wizard, the settings you made for this template are summarized. Click the link at the bottom of the page to print, save, or e-mail the summary.
Applying a Template to Existing Users
When you create a new template, modify an existing one, or just want to make changes to users’ permissions, you can apply a template to one or more user accounts.
-
Select Server Management from the Start menu then click Users in the console tree. Click Change User Permissions to launch the Change User Permissions Wizard.
-
On the Template Selection page, select the template to apply (Figure 9-8).
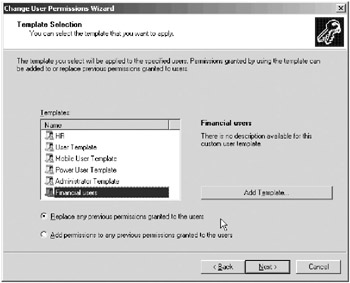
Figure 9-8: Choosing a template to apply to existing user accounts. -
Select the option to replace existing permissions or to add this template’s permissions to the existing ones.
-
On the User Selection page, select the users to whom this template will apply. (Note that you can use this template to change other templates.)
-
The final page of the Change User Permissions Wizard displays a summary of the operations the wizard will complete. Click the link at the bottom of the page to select a method of saving this information.
| Tip | Previous group memberships will be replaced by group memberships in the new template. But permissions previously granted directly to a user account remain unchanged after applying the template. |
Rights and Permissions
What users can and cannot do depends on the rights and permissions that have been granted to them. Rights generally apply to the system as a whole. The ability to back up files or to log on to a server, for example, is a right that the administrator can assign or remove. Rights can be assigned individually, but most often they are characteristics of groups, and a user is assigned to a particular group on the basis of the rights that the user needs.
Permissions indicate the access that a user (or group) has to specific objects such as files, directories, and printers. For example, a user’s ability to read a particular directory or access a network printer is a permission.
Rights, in turn, are divided into two types: privileges and logon rights. Privileges include such things as the ability to run security audits or force shutdown from a remote system—obviously not things that are handled by most users. Logon rights are self-explanatory; they involve the ability to connect to a computer in specific ways. Rights are automatically assigned to the built-in groups in Windows Small Business Server, although they can be assigned to individual users as well as groups. Assignment by group is preferred, so whenever possible, you should assign rights by group membership to keep administration simple. When membership in groups defines rights, rights can be removed from a user by simply removing the user from the group.
|
| < Day Day Up > |
|
EAN: 2147483647
Pages: 224