Customizing Pages
|
| < Day Day Up > |
|
The home page isn’t the only page on a SharePoint Web site that can be easily customized, though other pages have somewhat different options. To modify other pages, click the Site Settings link at the top of a page in the SharePoint Web site, click the Modify Site Content link and then click the link corresponding to the item that you want to customize. This displays the Customization page (Figure 17-9) for the specified item.
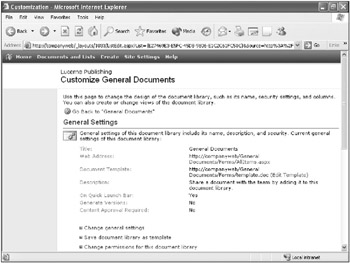
Figure 17-9: The Customization page for the General Documents library.
| Note | To create a new item, click the Create link at the top of the SharePoint Web site, click the type of item you want to create, and then provide the general settings for the item. |
On the Customization page, you can:
-
Modify settings on pages other than the home page Use the Change General Settings link to open the Change General Settings page (Figure 17-10), which you can use to change the following settings. (Not all settings are available for all item types.)
-
Page name and description.
-
Whether a link to the page appears in the Quick Launch bar.
-
Whether user-submitted items and files require approval before being posted for general viewing on the site.
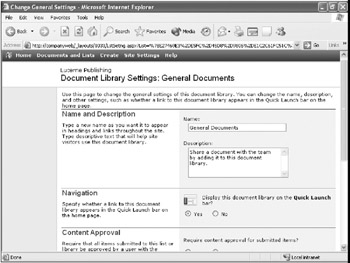
Figure 17-10: The Change General Settings page for the General Documents library.Note Members of the Administrator site group or another site group with Manage Lists rights can accept or reject posted items in a SharePoint page for which content approval is enabled. To do so, open the page, click the Approve/Reject Items view, move the mouse over the item, click the down arrow to the right of the item, and choose Approve/Reject from the pop-up menu. Rejected and Pending items remain on the site until the creator of the items or an Administrator deletes them.
-
Whether new versions of documents or pictures in the library are created with each edit. When versioning is enabled, users can access older versions of a file by clicking the down-arrow next to the item name and choosing Version History. Office 2003 programs also support the Version History command directly from within files saved to a SharePoint library with versioning enabled.
-
Whether users are allowed to attach files to posted items.
-
Which permission levels users have for items created by other users.
-
Which file is used as the template for new files created in the library.
-
-
Create a template from the item Use the Save Item As Template link to create a template from the current SharePoint item. This allows users to create new items based on the settings from the template.
-
Alter site group permissions for an item Use the Change Permissions For This Item link to alter the permissions each site group of users has for the item. You can also change which level of access to this item anonymous users have, if any, and whether to allow restricted users to request increased access privileges.
Note Anonymous users can gain access to an item only when anonymous access is enabled on the http://companyweb site in Microsoft Internet Information Services (IIS) and anonymous access is enabled for the site in SharePoint Top-Level Site Administration. See the “Managing Site Groups and Access Permissions” section of this chapter for more information.
-
Delete the item Use the Delete This Item link to delete the item and all data (posts, documents, and so on) stored within it. You probably don’t need to be told to be careful with this.
-
Make columns and views available for the item In the Columns and Views sections use the available links to modify which columns and views are available in the item.
|
| < Day Day Up > |
|
EAN: 2147483647
Pages: 224