Mixing Your Music
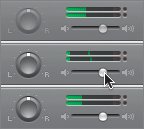
| You put three tracks together in GarageBand, and it placed them where you wanted with the instruments you selected. But you may want to make more fundamental adjustments to the music before you decide you're done. The art of determining the relative volume of each track, as well as whether you hear music from the left speaker or the right, is critical to the musical experience. Setting up these parameters is called mixing. Between the Tracks column and the workspace you've been using is the Mixer. The Mixer provides some volume and pan controls for each track (known as a slice) of your creation. These settings are not variable within the track but remain fixed for the entire track. The pair of bars above the volume control are peak meters, which alert you to sound that is loud enough to result in distortion when played in most audio equipment. It's OK if the red lights on the right edge flash a little during a loud piece of music, but for the most part the lines need to be in the middle of the bar and mostly in the green. A small vertical bar appears in each meter to indicate the peak level reached as the music volume pulses. Move the Volume slider around to get the sound volume of one track to balance with the others. Use the Pan knob to move the sound from one speaker to the otheror balance it between the two. Sometimes when you have lots of instruments, you want them to appear to occupy different locations in space, and you can do this by selecting how much you hear with each ear. For the music we're working with, there is little need to mess with the balance. If you want the volume of a track to vary during the playing of the track itselfknown in the business as using a dynamic faderyou must leave the Mixer and look in the Tracks column. You'll see five small buttons there; the one on the right is a small triangle. Click the triangle to reveal a special variable volume control track for the track you're working on (in this case, the Elec Bass track). Click the Track Volume checkboxthe small square button to the left of the wordsto activate it. 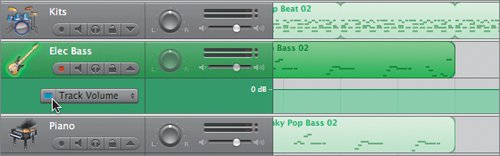 With this special volume track revealed and activated, you can move a line to increase or decrease the volume. You can also click the line to add points at which you can change the volumevery much in the way you can dynamically adjust the volume in iMovie. This process is a little more complicated than Jennifer wants. Uncheck the Track Volume checkbox to mute your volume work and close this dynamic volume control by clicking the triangle that opened it. Far more useful at this point are some of the other buttons in the Tracks column. Listening Only to the Tracks You WantTwo buttons give you two great track-auditioning capabilities in GarageBand. The first, the Mute button, is represented by a little speaker. Click it and it turns blue, indicating the track is silent. Muting a given track lets you get rid of it (temporarily) as you develop the mix of your song. The opposite of muting a track is soloing it. The Solo button is indicated by a headphones icon. Clicking it lets you hear only the track selected. You can use the Mute and Solo buttons at any time during the editing and mixing of your music. |

EAN: 2147483647
Pages: 142