Working with the Visual Studio .NET Form Designer
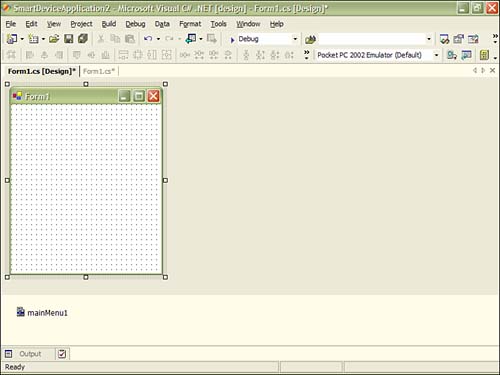
| The Visual Studio .NET Form Designer allows you to design your application's user interface visually by dragging controls onto a design-time representation of your application. Once the controls are on the form, you can visually position the controls, set their properties through the Properties window, and create event handlers for the events the controls fire. The Form Designer WindowWhen you create a Smart Device Extension (SDE) project that is a Windows application, Visual Studio .NET will open the project in Designer view. You can also select the Designer option from the View menu to put the project in Designer view. The Form Designer is usually the windows in the middle of the Visual Studio .NET environment that contains the design-time representation of the application's form object. Figure 3.1 shows the Form Designer of a SDE Pocket PC project in Designer view. Notice the mainMenu1 component at the bottom of the Designer window. This region of the designer is reserved for controls that do not have visual representations, such as the MainMenu control, the ContextMenu control, the Timer control, and so on. Figure 3.1. This SDE Pocket PC is shown in Designer view.
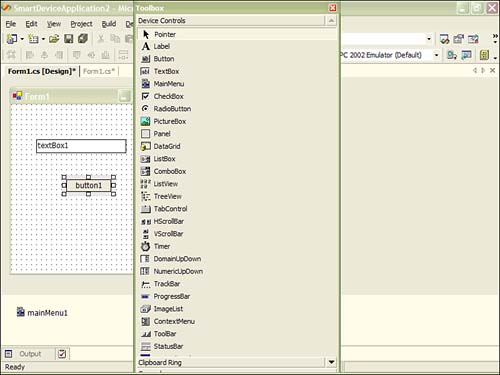
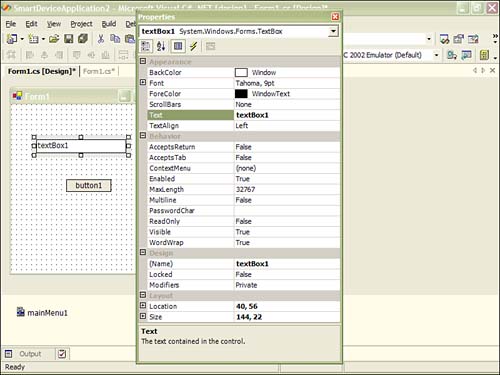
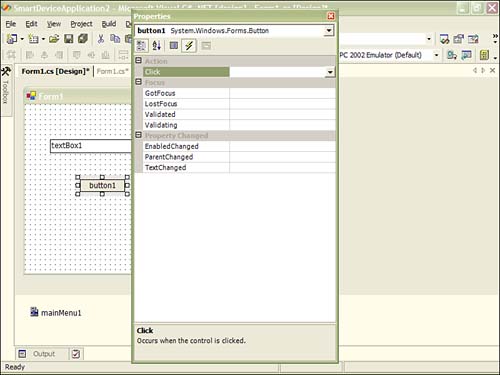
The ToolBox WindowThe ToolBox window contains all of the .NET Compact Framework controls that can be added to an application. Adding a control to an application at design-time is as easy as dragging the control from the ToolBox and dropping it on the application's form in the Form Designer window. Figure 3.2 shows the ToolBox for an SDE Pocket PC project. Figure 3.2. The ToolBox window for an SDE Pocket PC project. The Properties WindowThe Properties window contains all of the public properties of the control currently selected in the Form Designer window. You can change these properties by typing values into the TextBox controls next to the property names . If the property has a limited number of values, then a drop-down box is displayed next to the property name that contains the possible values for the property. Finally, if the property's value is a collection of objects or a complex object, there may be an ellipsis located next to the property name. Clicking this ellipsis will display a dialog box that allows you to edit the value of the property further. Figure 3.3 displays the Properties window when a TextBox is selected. Figure 3.3. The Properties window for a TextBox control. Adding Events HandlersWhen a control is manipulated at runtime, it will fire an event to notify the application that the control's state has changed. This event notification follows the same event handling convention used throughout the .NET Compact Framework. To handle an event published by a control, you must first create a method containing the code to execute when the event is fired . Then attach the method to the control's published event. This can be done through the Properties window. The Properties window lists the events that are published by the control. Clicking the Events button at the top of the Properties window will list these events. The Events button is labeled with a lightning bolt. Figure 3.4 shows the Properties window displaying the event published by the Button control. (In Visual Basic .NET, events are found in drop-down boxes above the code editor.) You can assign a method as the event handler by clicking the event and selecting a method from the drop-down control next to the event name. (In Visual Basic .NET, selecting the event name from the drop-down box will automatically generate a method to handle the event.) Figure 3.4. The Properties window that displays the Button control's published events. You can also add an event handle by double-clicking the event name. Doing so will switch the project to code view and will leave the editor inside the event-handler method. Code to wire the event handler to the control is also automatically generated. You can find this code in the InitializeComponent method of the application's Form class. (In Visual Basic .NET an event handler is wired to its event in its method signature.) The InitializeComponent method may be in a collapsed region labeled "Windows Form Designer generated code." The following code was automatically generated in the InitializeComponent method. This code wires a Click event handler to the Click event of a Button control. C# #region Windows Form Designer generated code /// <summary> /// Required method for Designer support; do not modify /// the contents of this method with the code editor. /// </summary> private void InitializeComponent() { this.button1 = new System.Windows.Forms.Button(); // // button1 // this.button1.Location = new System.Drawing.Point(56, 128); this.button1.Text = "button1"; this.button1.Click += new System.EventHandler(this.button1_Click); // // Form1 // this.Controls.Add(this.button1); this.Text = "Form1"; } #endregion VB Private Sub Button1_Click(ByVal sender As System.Object, - ByVal e As System.EventArgs) Handles Button1.Click MessageBox.Show("Hello") End Sub |
EAN: 2147483647
Pages: 206