The Process
The process of constructing a level can vary greatly from designer to designer. What works for one person may not work for another. Each team is likely to have its own process and method for building an environment. That said, I have found the following progression of steps to be one that works well for me. I may not always follow the steps precisely, but generally speaking, this progression produces more consistent and efficient results than just cranking out a level without any plan of what to do first or how to proceed.
Step 1. Preliminary
Before starting development on an action/exploration game such as those found in the Tomb Raider series, it is important to have a clearly defined set of moves for the player.
Before starting to design a level for the game, ask yourself if the gameplay is in a close-to-final state. Do you have a solid foundation to build upon? Are your game mechanics nailed down? Is the game going to change so much that the level you design will no longer be fun to play? Or worse , will the level no longer be playable ? For instance, suppose you are developing a third-person action/adventure such as Tomb Raider . Before you start making a level for the game, you need to determine how final the movement of the main character is. Will more moves for the character be added? Will the game s hero someday be able to do a double forward flip that will radically change the distance she will be able to jump? Often when you begin working on a level the game itself is far from complete, and some changes will probably be made to the main character s movement. But if the team is aware that radical changes to the player movement model will be made, having level designers start working on levels is a big mistake.
On one project I worked on, we started working on the levels before the ability for the main character to jump had even been added to the game. As a result, once it was added, we went back and had to modify the levels to include areas that would use this jumping ability. Unfortunately, after the jumping had been in the game for a while, it became clear that the jumping was not that much fun, and that we would have to go back to the levels and remove a lot of the jumps we had put in. The end result was not nearly as clean as if we had known from the very beginning how the jumping would work. The problem here was that production had started on the levels before the game mechanics were sufficiently hammered out, implemented, and their fun level ascertained. As I discussed in Chapter 15, Getting the GameplayWorking, you will probably need to have one level in progress while you work on implementing the gameplay, so you can test out different behaviors as they are added. But working on more than that one particular level is a waste of time that may be detrimental to the project in the long run.
Furthermore, it may make sense to scrap the test level once the gameplay is firmly established, since that preliminary level usually turns out to be far from the best work you are capable of.
Step 2. Conceptual and Sketched Outline
Before beginning work on a level, I think it is very important to understand what that level is going to need to do from a gameplay and story perspective. What sort of challenges will players face here, and what sorts of environments best facilitate those challenges? How exciting and nerve -racking is the gameplay in this level? Where will players need to be rewarded? What story elements need to be conveyed through the level? At all times, but especially during the planning stage, you must keep in mind the game s focus and how your level will work to support that focus.
Once the designer has some grasp of what the level is supposed to accomplish, a pencil and paper sketch of the level s general layout is a very good idea. This avoids the perils of designing yourself into a corner. Say you are designing a building in a military compound for a fully 3D first-person shooter. In your compound you need to include a room with a large generator. When you start making the architecture for the building, you first lay out all the halls, then start working on some of the cooler rooms before you finally get to the generator room. Then, whoops, it turns out you failed to leave as much space as necessary for the generator. The room is now too small to be easily navigable. Unfortunately, the only way to make it big enough involves ripping up a lot of the halls you had made already. At this point, some designers would just move the generator room to a less-logical or less-optimal location rather than having to redo a lot of geometry they already spent time building. Of course, a level sketch might not always prevent this problem, but if done correctly it might point out to the designer how small the generator room was at a time when making it bigger only involves using the eraser on her pencil. Changes to a sketch are much easier to make than changes to a fully constructed level. A sketch may also be valuable as something that you can show to your team leader, who may want to look it over to make sure you are on the right track with the rest of the team and the game as a whole.
Step 3. Base Architecture/Block Out
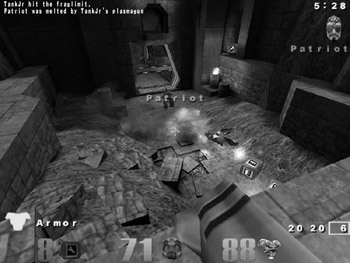
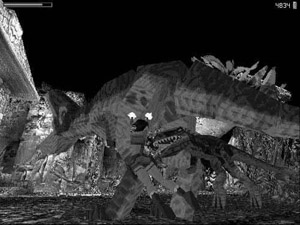
As game engines become more sophisticated, the amount of time required to build a level increases dramatically. For example, a professional level using the Quake III Arena engine will easily take weeks to complete.
Once you are happy with your sketch, the actual construction of the level can begin. This construction stage varies in time and scope depending on the complexity of the level being created. For instance, a 2D, tile-based engine will allow for much quicker construction of a level than a 3D engine. Similarly, the complexity of the 3D engine being used will radically alter how much time is required to build out the level. An excellent map made with the Doom engine can be pounded out in a day or two. A level of similar quality made with the much more sophisticated Quake III engine can easily take weeks of hard work.
At this point, keep in mind that you are just creating the base layout for your level. You are not adding niceties such as lighting or texturing, nor are you concentrating on making the geometry as pretty as possible. On this first pass you want to get the level to the point where players can navigate through it and all of the locations are accessible. At this point it makes sense to use temporary textures and primitive forms of geometry. Instead of putting a real chair in the game, just place an appropriately scaled box. This allows you to get a sense for whether the level s layout feels right without wasting any more time than necessary.
Step 4. Refine Architecture Until It Is Fun
At this point you need to repeat step three until your level starts feeling good and navigating it starts to be fun. For instance, if you are working on a first-person shooter, you should experiment with navigating your character around the 3D world, and see if the corners are fun to swing around, if the jumps are of just about the right difficulty, and if the areas come out at the size you had wanted them to. Take a look at the level as a whole and see if it makes sense and flows as you hoped it would. Once you actually spend time looking at and navigating the level as players would, instead of just fiddling with it in the level editor, you stand a better chance of determining if your level is working out. If the level is not working out as you want, now is the time to make changes until it does.
Step 5. Base Gameplay
Now that your level feels right in terms of player navigation, it is time to start implementing the gameplay your level will use. Certainly you had the gameplay in mind through all of the steps of this process and you planned it out thoroughly before you even started building, but now is the time to see if it will actually work out as you had hoped. The best designers can come up with ideas and sketches for levels that successfully translate into fun levels in the end. Others start with a sketch, build some architecture, and when it comes time to add the gameplay, find they need to make some significant modifications to what they have already built. With experience comes the ability to predict whether abstract ideas will turn out to be any fun or not. Before you become experienced , however, the process involves a great deal of trial and error.
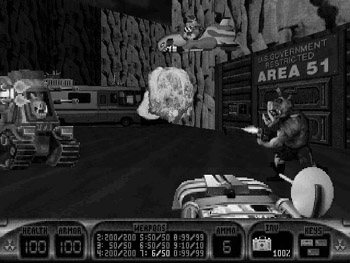
Setting up the gameplay in a level from a game like Duke Nukem 3D consists of placing monsters and weapons, and configuring puzzles.
A level s gameplay consists of whatever actions players are allowed to perform in that level. In a first-person shooter such as Duke Nukem 3D , this means placing the monsters players will shoot and the items players will pick up. In a role-playing or adventure game, this is expanded to include whatever puzzles players will need to solve, the characters with which players may talk, and the quests on which these NPCs send players. In a real-time strategy game, the designer will need to figure out starting unit placement and quantities for players and her opponents, as well as whatever reinforcements may appear later in the level. In a way, sports and racing titles have an easier time with this step, since their gameplay is the same from level to level and therefore does not need much setup for a particular stadium or track.
Step 6. Refine Gameplay Until It Is Fun
Of course, the gameplay is what makes or breaks the game, so it is absolutely essential that the designer repeat step five until the level is fun to play. Sometimes, refining the gameplay may take you all the way back to step number three. It may turn out that the area you thought would play well just is not suited to the capabilities of the AI. Or that the creature you thought would be able to spring out at players from a fissure in a cliff does not really have enough space to hide. You may need to change the layout of your level to compensate for the problems you discover once you start implementing the gameplay.
For some designers, modifying existing level architecture to suit the gameplay can be quite a painful process. For instance, suppose a designer builds some architecture she is happy with from an aesthetic standpoint. If the gameplay then does not work in that space, the designer may be reluctant to go back and rework that geometry and may instead settle for substandard gameplay. Of course, this is the wrong choice to make. As painful as it may be, in order to get the best gameplay you may need to throw out some of your work. This is why I suggested only making base architecture without refining it too much; that way making radical changes to the level will not mean that too much work was wasted . In the end, gameplay must always trump all other considerations, whether aesthetics, story, or technology. If it s not fun in the end, nothing else matters. Therefore it is only logical that you must first get the level fun before you spend a lot of time on other aspects of the level.
This is the step where your level really comes together and you start to get a sense of whether it is a success. Now you can take this space you created and really start to play in it. If you do not start enjoying yourself at this point, you may need to take a look at your level and ask yourself why it is not fun to play. In the worst case, you may realize that the level will never be fun, and as a result you need to start fresh. Ideally, however, this stage can be truly revelatory, as all of the work you put into the level starts to come together and pay off.
Step 7. Refine Aesthetics
Now that the level is playing well, you have an opportunity to make it look good as well. You may recall that in steps three and four we just set up base architecture, enough to allow players to navigate and to give you a feel for the level. Now is the time to texture your level as needed, apply lighting effects, add decorative objects, and really flesh out your level from a visual standpoint. Depending on your development process, this may be the point at which you hand the level off to an artist. Many teams spend the bulk of their time working on aesthetics for their levels, and certainly you should put in the time to make the level look as good as possible. But, as I have emphasized , it is crucial that you put off finessing the level until you are confident that the level plays well and that it accomplishes its gameplay objectives. Otherwise, you may waste your time making areas look nice that end up being scrapped. As you are finessing the level aesthetically, you must always remember not to break any of the gameplay you have already set up.
Step 8. Playtesting
Now that all the parts of your level are in place, it is time to show it to some other people, let them play it, and get some feedback. Playtesting is a crucial part of game design, and level design is no different. These test subjects may include other members of your team, but should also include people less intimately involved with your project. A lot can be said for a fresh pair of eyes looking at your game and your level and giving you feedback on whether the gameplay accomplished what you had hoped.
Playtesting a level can be as easy as giving a level to someone, asking her to play it, and having her tell you what she thinks. Another useful method, especially for level testing, is to actually be there with the tester when she tries to play your level and observe how she plays it. Does she get stuck in locations you had not thought of? Does she have trouble finding her way around? Do the gameplay situations provide her with enough challenge? Watching other people play your level can be extremely educational and informative as to whether the level flows and plays well.
In the worst case, playtesting may reveal that your level is not as fun to play as you had thought, and that major reworking will be necessary to make it fun. As a designer you must not be resistant when someone tells you your level is hard to navigate, confusing, or simply no fun. Certainly, get a second and third and fourth opinion on it, but when you start hearing the same complaints from a number of different people, you need to realize that there may be some truth to their comments and your level may need some serious reworking. Many designers who have invested a lot of time and energy in a level find it very difficult to then take criticism of their work. There is no denying that hearing someone tear apart a month s worth of work can be disheartening, but this is the purpose of playtesting. You need to take your testers comments to heart, recognize the problems with your level, and start working on the level again. Thorough playtesting can often be the difference between a merely good level and a truly great one.
Process Variations
Of course, the process for level design I outline above is not the only way to make a level. Like the dos and don ts of level design I described earlier, each level designer needs to find the method that works best for herself and her team. Many good designers use a method not entirely different from what I have outlined above, but with variations that better suit their own style of designing.
One potentially useful variation is to incorporate steps three through six. Instead of laying out the entire level, you can start with a particular room or area. Then, before moving on to set up the rest of the level, try to set up gameplay in just that area. Once you are happy with how well that section plays, move on to setting up the rest of the level, adding gameplay to the areas as you create them. This way, if an area has to be enlarged to make the gameplay work properly, less work is wasted since the areas around may not have been built yet. As I mentioned before, it is important to be careful to not design yourself into a corner. You do not want to spend a lot of time working on the gameplay for a specific area only to have to remove it later since the rest of the level no longer fits in the space available. If you are going to set up gameplay for particular areas before the entire level is built, it makes the most sense to build the architecture for an entire, discrete play-space, such as a specific building or structure. Then you can make the gameplay work in that entire area before moving on to the next .
Another useful idea is to incorporate playtesting earlier in the process, perhaps after step six. Once you have your level playable, have some people whose opinions you trust try playing the level. The aesthetics may not be fully refined yet, and you should certainly explain this to them as they play, but if you are able to get feedback at this early stage, you may be able to make important changes before you have spent a lot of time refining the aesthetics of the level. A possible drawback to testing the level this early is that others may not be able to understand that visually the level is not yet complete. As a result they may get hung up on criticizing the appearance of your level instead of providing feedback about the gameplay. Be sure to communicate what type of feedback you are looking for at this stage and hope that the playtesters can see beyond the lack of fancy lighting effects. Testing at this early stage does not replace testing after the level is more final, but it may prevent some unpleasant surprises and can make the final testing go more smoothly.
EAN: 2147483647
Pages: 189