Importing, Image Size, and Auto-Scaling


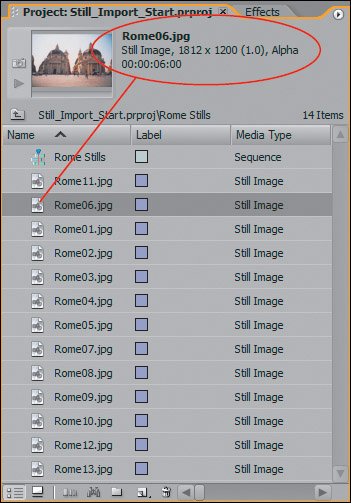
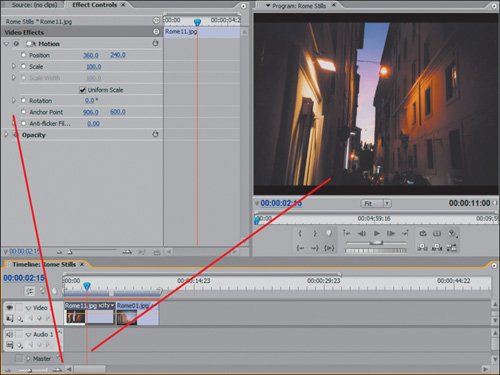
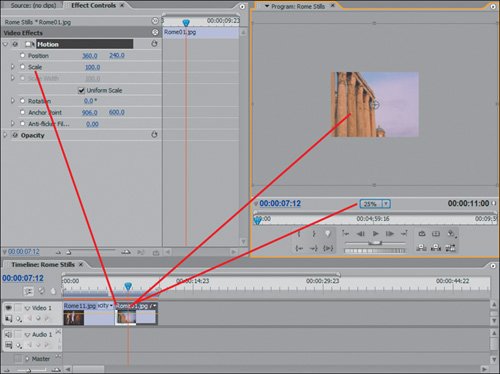
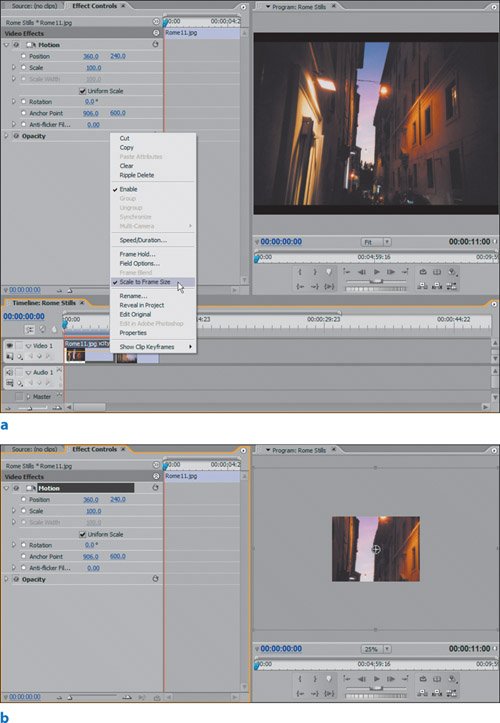
Print and video images inherently have different requirements: Video has a set screen resolution of 72 dots per inch (dpi) and a standard frame size of 720 x 486 (NTSC), while much higher dpi counts and image sizes are often used for printing. In past versions of Premiere, importing still images with these larger resolutions resulted in a compromise where the image was converted to a smaller size and this resulted in a loss of image quality when you wanted to enlarge or pan the image. Premiere Pro, however, takes a new approach that accurately processes stills and preserves their true resolution while still offering you an alternate method for quick resize adjustments. In Premiere Pro 2.0 you have a choice: Do you want to add stills to the timeline at their original full size and zoom or pan on their entire resolution, or do you want Premiere Pro to scale them automatically to fit in the video frame? When Premiere Pro 2.0 auto-scales an image, it will re-rasterize your still at your project's frame size. In other words, Premiere Pro internally creates a reference file for your still that is the size of your project's frame and no longer relies on the information in your original large-sized image.

How do you know which method to choose? It's very simple: If you want to zoom in on or pan on an image, do not turn on Auto-Scaling. If you are going to use still images as static shots, turn on Auto-Scaling. When working with oversized images that you intend to pan or zoom on, make sure the horizontal width is at least 1000 pixels for landscape-oriented stills, and the vertical height is at least 1000 for portrait images. If you plan on zooming up to 200%, then make sure the still is at least double the size of a standard video frame.

PAR: Square Pixels vs. Non-Square Pixels

A video frame, like all computer graphics, is made up of pixels. Most pixels are exact 1:1 squares, meaning they have a 1:1 pixel aspect ratio (PAR). The pixels that make up an NTSC DV video frame, however, are 1:0.9 and, thus, non-square.

The easiest way to see the results of how square pixels are distorted in DV space is to create a still image of a perfectly round circle in Photoshop with square pixels. When you import the file into Premiere Pro and add it to a DV sequence, the PAR for DV shifts the circle to become an oval.

Photoshop CS2 can work with and tag images properly for non-square pixels. Premiere Pro can recognize the tag and preserves the integrity of the image when it is imported so that there is no distortion. If you are prepping images in Photoshop and you want to use them in a DV project, use the Non-Square Pixel for DV (720 x 480) setting when creating your still.

If you want to create a square pixel document in Photoshop for use with an NTSC DV project and you want to retain the integrity of the image when you bring it into Premiere Pro, you should save the image at 720 x 534. When Premiere Pro imports the image and incorporates it into the timeline, the shift of the PAR is compensated for by the additional 154 extra pixels.

Auto-Scaling

If you don't plan any zooms or pans, try Premiere Pro's automatic scaling. When this option is on and you import a still image at a frame size of 1600 x 1200, Premiere Pro then automatically resizes the image so that it fits snug within your project's video frame. If you wanted to zoom back into the image at a later point, you can turn off the auto-scaling for that individual still and just animate the Motion/Scale effect listing. In Premiere Pro 1.5, the Auto-Scaling feature made a physical modification to the scale of a still in the Effect Controls panel; that way, you could reset the Scale properties to get the still back to its full resolution. In Premiere Pro 2.0, the Auto-Scaling feature does not use the Effect Controls panel; it simply re-rasterizes the still and lists the scale as 100%.

In this lesson, you'll examine the benefits of both approaches, as well as learn how to assign a default duration to all still images that you import.

For this lesson, you are building the Montage in a DV 24p project so that when you pan and animate the still images you do not have the potential for revealing any interlacing artifacts. If you are building a photo-only montage that does not contain any other video and it will be burned to DVD, using a progressive frame rate project is your best bet for good results. Because you are still using DV as the format, the pixel aspect ratio of 0.9 should be considered for graphics and imported elements that have square pixel aspect ratios.

Notes

When opening the different projects for each lesson, keep in mind that you will sometimes have to locate certain files associated with the project. For example, if Premiere prompts you to locate Italy_MapDV.psd, you can find the file in the Chapter 13 Lesson Files folder on the book's disc.


1.

Open Still_Import_Start.prproj from the APPST2 Lesson Files/Chapter 14 folder.

This lesson starts where you left off in the last chapter, adding a photo montage to the opening graphic you created.

2.

Create a new bin in your Project panel, and name it Rome Stills. Create a new sequence within this bin (one video track and one stereo audio track), and give it the same name.

Continuing to emphasize the idea of nesting, you are structuring this project so that all the individual elements are contained within their own sequences. Because you want the final photo montage to be accessible as a single clip, you will assemble all the Rome stills in a sequence of the same name.

3.

From the Edit menu, select Preferences > General. In the General Preferences pane, change Default Duration to 144 frames. At the bottom of the pane make sure the check box for Default Scale to Frame Size is checked, and click OK. Click on the Rome Stills bin in the Project panel. Press Ctrl+I to access the Import dialog. From the Rome subfolder in the APPST2 Lesson Files/Chapter 14 folder, select Rome06.jpg and Rome11.jpg, and click Open. In the Project panel, click on the images to view their properties (Figure 14.1).

Figure 14.1. Clicking on a file in the Project panel reveals its properties in the Project Preview area. Here you can see the frame size for the imported image, its pixel aspect ratio (PAR), whether the image contains an alpha channel, and its assigned duration


Because still images can be an infinite duration, assigning a default duration for all imported stills streamlines your workflow, especially if you are importing several images. You assigned the Default Duration for these two stills to be 144 frames (6 seconds at 24 fps), because they are the first and last images of the montage. Later, you will fade the montage in and out; therefore, you will need some extra frames to play with. Secondly, you imported these images scaled to your current project's frame size; take note of this as we'll get to that in a few more steps.

4.

Choose Edit > Preferences > Still Image, and set Default Duration to 120 frames (5 seconds) and turn off the check box for Scaling. Import the remaining files in the folder (select all except Rome06 and Rome11). Click on the newly imported stills individually, and view their properties in the Project Preview area to see their change in duration.

The second batch of imported stills does not need extra frames for transitions, so you lowered Default Duration to 120. Now the Project Preview area reports the stills are only five seconds long.

5.

In the Project panel, select Rome11.jpg and Rome01.jpg and add them onto Video 1 track at the head of the timeline. Open the Effect Controls panel and expand the Motion effect listing (Figures 14.2 and 14.3).

Figure 14.2. When Default Scale to Frame Size is checked, Premiere Pro 2.0 resizes your still so that it fits exactly within the boundaries of your project's frame size. Notice that Rome11.jpg fits within the 720 x 480 frame and more importantly, the scale listed in the Effect Controls panel is 100%. Because the Pixel Aspect ratio for the still is 1.0, the image does not quite have a 4 x 3 aspect ratio; this is why there are small black bars (letterbox) at the top and bottom of the frame. Now take a look at Rome01.jpg and Figure 14.3


Figure 14.3. Because you turned off the Default Scale for the import of Rome01.jpg, when you add the still to the timeline it displays at full resolution. Here, the scale of the Program Monitor is at 25% and the wireframe surrounding the monitor frame shows the entire dimensions of the Rome01.jpg in the timeline


When you have the Default Scale to Frame Size preference checked, Premiere Pro automatically resizes the imported still so that the entire image fits within the confines of the 720 x 480 video frame. When a still is imported with such a preference active, this is the expected behavior. When you turn off the option, the still imports at its full resolution, which may or may not exceed the current project frame size.

If you imported an image or a group of images with the check box on, you can easily turn the resizing off so that you can animate the original dimensions of the file.

6.

Right-click on the timeline instance of the clip Rome11.jpg. From the right-click menu, turn off the checked item: Scale to Frame Size (Figures 14.4a and b). Right-click on the Rome01.jpg, and activate the listing for Scale to Frame size.

Figures 14.4a and b. Whether you import a previously scaled file or you want to automatically scale the still to the default frame size, results are only a right-click away. Here you can see the Rome11.jpg is auto-scaled. Deactivate the Scale to Frame Size menu listing (a) to get these results (b)


Notes

Whether you import a Photoshop file, create a new title, or create a color matte, these items are considered stills and adhere to the Default Duration value you set in your Still Images preferences. When you open a layered Photoshop file as a sequence, all the layers that make up the sequence adhere to the same default duration.

By right-clicking on the Rome11.jpg and turning off the Default Scale adjustment, you set the image back to its full resolution. To quickly scale the size of an image to the default frame size of your project, you selected Rome01.jpg and activated the Scale to Frame Size listing. Premiere Pro updated the file's scaling automatically.

The nice thing about the menu listing is that it works with multiple stills selected. This means you can have auto-scale on or off for multiple images at the same time. Also consider auto-scaling when using video clips that are larger that your current project's dimensions.

Notes

Take note that when you import a still that does not have a 4 x 3 aspect ratio, such as 1280 x 720, when the file is automatically scaled to fit the 720 x 480 frame, it yields empty space where the aspect ratio is different. The example image would have empty black space at the top and bottom of the image, much like a letterbox for a widescreen film transferred to video. If you don't want the black space, simply adjust the scale to find the right size.


This lesson laid a foundation of basic settings for importing stills. You learned when and why to turn on Default Scaling as well as how to better control default durations of your still images. In the next lesson, you will build on these skills and learn to use Premiere Pro's Automate to Sequence feature.


Adobe Premiere Pro 2.0 Studio Techniques
ISBN: 0321385470
EAN: 2147483647
Year: 2006
Pages: 200

flylib.com © 2008-2017.
If you may any questions please contact us: flylib@qtcs.net