DVD Settings: One Export, Three Choices
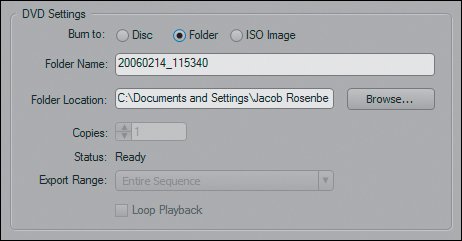
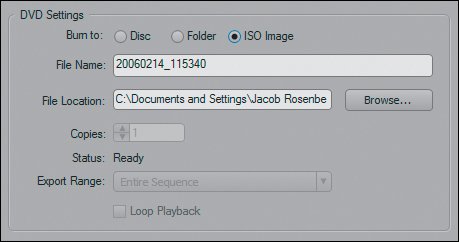
| When you choose Export to DVD, you access the Burn DVD dialog, which lets you control how you create the files for your DVD (Figure 11.2). The dialog is broken down into two basic sections: DVD Settings and Encoding. Although many of the choices in the DVD Settings area are straightforward, let's review them to understand exactly what they do. The first DVD Settings options specify where the files should be written, either to a disc, a folder, or an ISO image. The settings beneathBurner Location, Copies, Status, and Export Rangeall relate to the type of burn you will be exporting. Figure 11.2. Select the File > Export > Export to DVD menu listing to open the Burn DVD dialog. Notice that at the top there are three choices for how you would like to process the files you are creating. Burn to Disc does just that and burns the files to a physical DVD, while Folder and ISO Image write the files to your hard drive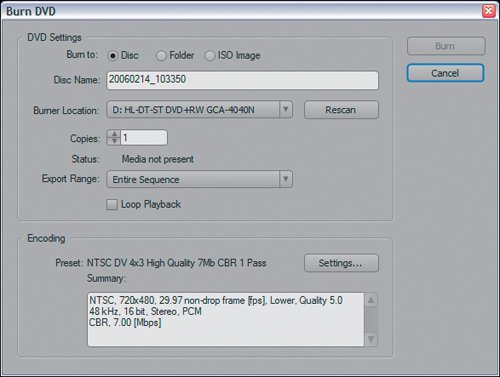 Burn to DiscBurning to disc is straightforward (assuming you have a DVD burner and disc installed)and produces a playable DVD in Auto-play or menu-based mode as the sequence dictates. When you choose Burn to Disc, the DVD Settings enable you to name the disc (Disc Name), define and scan the drive to which you will be burning (Burner Location), specify the number of copies you wish to burn (Copies), and get feedback as to whether or not Premiere Pro recognizes the drive and presence of media (Status). In Figure 11.3 you can see that my drive is detected but because there is no disc in the drive, I get the Status message "Media not Present." Figure 11.3. If you compare this figure to 11.2, you will notice one distinct difference in the DVD Settings area. The settings in Figure 11.2 are for a burn from an auto-play sequence, but these are for a burn of a menu-based sequence. When burning menu-based DVDs the Export Range and Loop Playback controls are disabled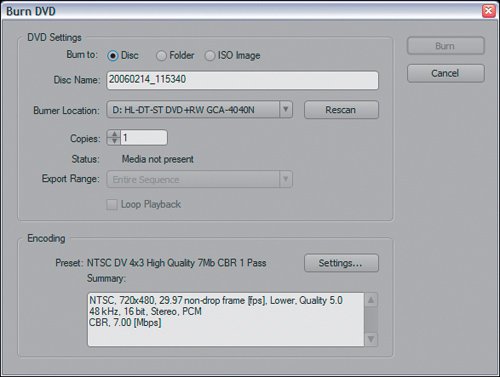 If you're burning an auto-play DVD, you have two additional decisions. In Auto-play mode, you must specify the Export Range setting, which determines whether you burn the entire sequence or only the portion under the work area bar. In addition, you can turn on Loop Playback, which creates a DVD that plays in a continual loop. Because DVD Markers distinguish the content of menu-based DVDs, there is no use for differentiating the work area or entire sequence when encoding; additionally a menu-based DVD does not have the ability to loop. Burn to FolderChoosing to burn to a folder is very valuable if you are considering backing up or repurposing the content of your DVD. When you burn to disc or an ISO image, Premiere Pro creates MPEG video files as well as various flavors of audio files and converts them into alternately named files (.VOB, and so on) in a structure that adheres to DVD architecture (AUDIO TS and VIDEO TS). If you want to collect all of the assets to be burned without the DVD formatting and renaming, however, choose Burn to Folder. When you select Burn to Folder, Premiere Pro asks for Folder Name and Folder Location settings (Figure 11.4). Provide these, and Premiere Pro encodes all the DVD files into that folder. Figure 11.4. Notice that the DVD Settings change depending on what you are burning to. For a folder burn, you need only name the folder and define its location to write the desired files Exporting to a folder is a perfect workflow if you intend on authoring in another program such as Encore DVD. After you export the files to a folder you can open the files in Encore or any other DVD authoring application and further customize the DVD. Burn to ISO ImageThe final method is to burn to an ISO image. When you burn directly to a disc, Premiere Pro structures the files and stamps them on the disc in a standard way so that when you pop the disc into a player it knows how to play the disc and which files are available. This standard arrangement is called an ISO image (or disc image). When you choose Burn to ISO image, Premiere Pro writes the ISO image to your hard drive, saving it as a single file comprised of all the elements needed to author the DVD exactly as you designed it (see Figure 11.5). If you want to be able to burn discs from a separate application or send an image of the disc to someone else to burn from, select Burn to ISO Image. Figure 11.5. Instead of naming the disc or folder, burning to ISO Image asks you to name the ISO file and define the location in which the file will be written If you intended on making future copies of a disc, you could first burn to disc and then burn to ISO image. Later, you could load the ISO image in the disc burning utility and start burning new copies. An even faster method is to burn to an ISO image and use a separate utility to burn all your DVDs. |
EAN: 2147483647
Pages: 200
- Integration Strategies and Tactics for Information Technology Governance
- Assessing Business-IT Alignment Maturity
- A View on Knowledge Management: Utilizing a Balanced Scorecard Methodology for Analyzing Knowledge Metrics
- Governing Information Technology Through COBIT
- Governance in IT Outsourcing Partnerships