| Prepare the following WebSphere Portal V5.0 CDs: -
WebSphere Studio Site Developer for Windows, V5.0.1 - CD # 4-1 -
WebSphere Studio Site Developer for Windows, V5.0.1 - CD # 4-2 -
WebSphere Studio Site Developer PTFs for Windows, V5.0.1- CD # 4-3 -
WebSphere Application Server Fix Pack 1 for Windows, V5.0 - CD # 1-6 This section will explain the procedure to install the WebSphere Studio Site Developer. -
Insert WebSphere Studio Site Developer installation CD (CD # 4-1). Navigate to the \wssd directory and double-click setup.exe . You will see the welcome window as illustrated in Figure A-7. Click Install IBM WebSphere Studio Site Developer to continue. Figure A-7. WebSphere Site Developer installation welcome screen 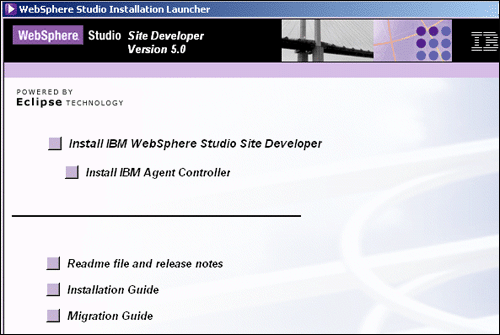 -
Click Next to continue past the copyright notice screen. Figure A-8. Copyright notice screen 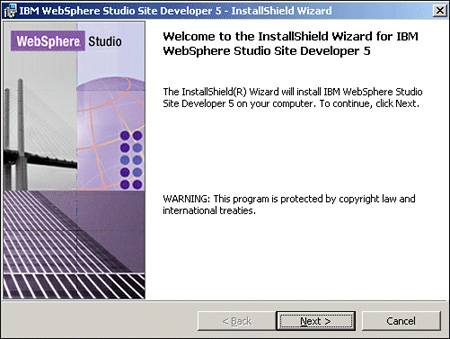 -
Select I accept the terms of this license agreement . Then click Next to continue. -
Accept the default settings for directory locations as shown in Figure A-9. Click Next to continue. Figure A-9. Installation destination folder 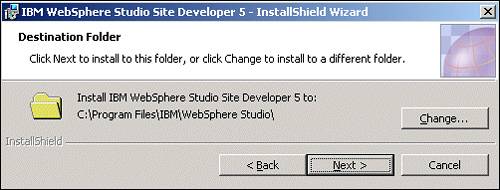 -
Select WebSphere Application Server - Express and WebSphere Application Server v5.0 . Click Next to continue. Figure A-10. WebSphere Studio Site Developer features to install 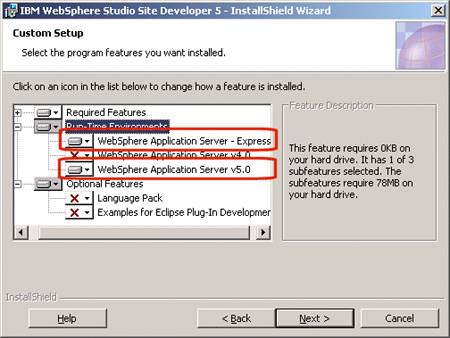 -
Click Install to begin the installation. Figure A-11. Last screen before installation begins  -
Midway through the installation, you will be prompted to insert the disk IBM WebSphere Studio Site Developer - DISK2 (Portal CD # 4-2). Insert this disk and click OK to continue the installation. Figure A-12. Insert the disk and click OK to continue the installation 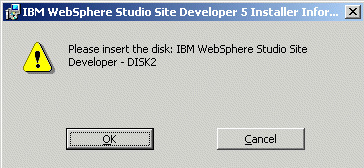 -
At the completion of the installation process, click Finish to exit. -
If you are prompted to restart the machine, click Yes to do so. Figure A-13. Click Yes to restart the machine 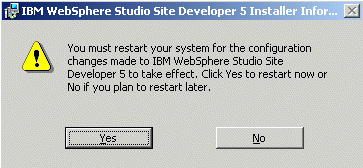 WebSphere Studio Site Developer - WSSD Fix Pack 1 After installing WebSphere Studio Site Developer, you have to update this installation with Fix Pack 1; to do this, you have two options: Software Update function from the help menu When you run WebSphere Studio Site Developer for the first time, you will get a dialog box to confirm the location of your development workspace. Check the box to not show this window again (you can change this later) and click OK . Figure A-14. Setting your workspace  -
Click Help -> Software Updates -> New Updates . Figure A-15. Help menu to install new updates 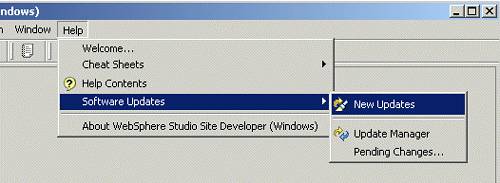 -
A dialog window will appear, indicating that WebSphere Studio Site Developer is searching for new updates. This will take a few minutes. Figure A-16. Updates dialog 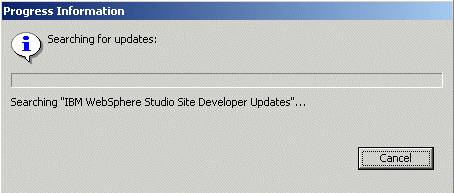 -
Choose the two updates that it finds. Click Next to continue. Figure A-17. Selecting updates to install  -
Accept the license agreement and click Finish to install. -
You will receive a verification window for each update that is installed. Click Install for each of these. Figure A-18. Installation warnings 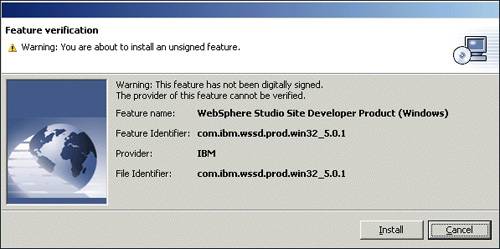 -
When the operation is complete, you will be asked to restart WebSphere Studio Site Developer. Click Yes to do so. Figure A-19. Restart the workbench dialog  Using Portal CDs When you run WebSphere Studio Site Developer for the first time, you will get a dialog box to confirm the location of your development workspace. Check the box to not show this window again (you can change this later) and click OK . Figure A-20. Setting your workspace 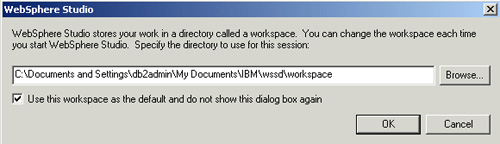 The WSSD Fix Pack 1 is available in the CD # 4-3 of the WebSphere Portal V5.0. Insert the CD # 4-3 into the drive; you can also download this fix pack from the Internet as a zip file from the following site: www3.software.ibm.com/ibmdl/pub/software/websphere/studiotools/html/501/wssd/download.html -
Start the Update manager by selecting Help -> Software Updates -> Update Manager . Figure A-21. Update Manager 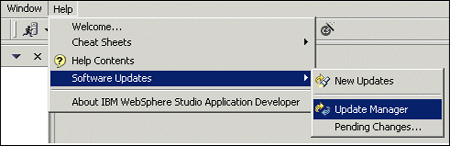 -
In the Feature Updates view, select My Computer and locate the CD drive or the temporary directory you have extracted the zip file to. -
Expand to the following. -
- If you have downloaded the fix pack: wssd501 -> update -> IBM WebSphere Studio Site Developer Updates . -
- If you are using WebSphere Portal CD # 4-3: wssdptf -> IBM WebSphere Studio Site Developer Updates . Figure A-22. Navigating in the Feature Updates view  -
Select WebSphere Studio Site Developer (Windows) 5.0.1 and then click Update in the right pane. Figure A-23. Update feature of WebSphere Studio Site Developer 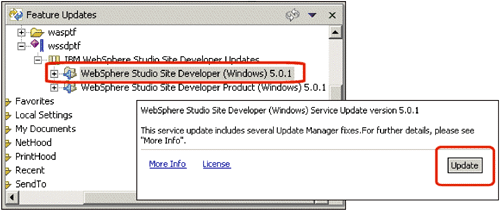 -
When the Feature Install screen appears, click Nex t. Figure A-24. Feature Install window 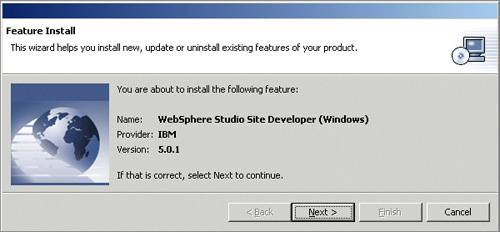 -
Once you have read and accepted the license, click Nex t. -
You will see the Optional Features panel. Do not change any settings. Click Next . Figure A-25. Optional features screen 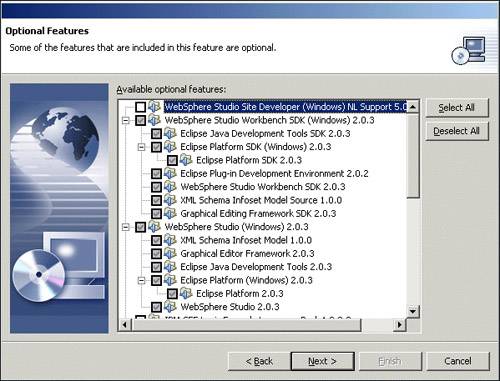 -
Click Finish on the Install Location panel. You will be warned that you are about to install an unsigned feature. There is no need to worry about this warning, so click Install to continue. -
Upon completion of the installation, you will be asked whether you want to restart the workbench. Click No to continue. -
Select WebSphere Studio Site Developer Product (Windows) 5.0.1 and then click Update in the right pane. Figure A-26. Update feature of WebSphere Studio Site Developer 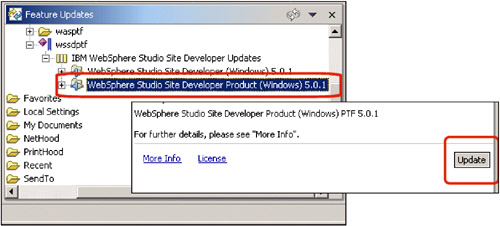 -
Go through the Feature Install, Feature License, Optional Features by successively clicking Next . Do not change any settings in the Optional Features panel. Click Finish in the Install Location panel. -
You will be warned that you are about to install an unsigned feature. There is no need to worry about this warning so click Install to continue. -
Upon completion of the installation, you will be asked whether you want to restart the workbench. Click Yes to complete the installation. WebSphere Studio Site Developer - WebSphere Application Server Fix Pack 1 -
For local debugging, you will need to update the WebSphere Application Server Test Environment; use the WebSphere Portal CD # 4-3 or download the fix pack: -
Go to: http://www3.software.ibm.com/ibmdl/pub/software/websphere/studiotools/html/501/wssd/install_was.html -
Click WebSphere Application Server v5.0, Windows download . -
Ensure that WebSphere Studio is not running. -
Navigate to the CD drive or to downloaded file and extract the fix pack file X:\wasptf\was50_fp1_win.zip to a temporary folder (for example c:\temp) then copy the extracted ptf folder to C:\Program Files\IBM\WebSphere Studio\ runtimes \base_v5\ptf. Figure A-27. PTF directory 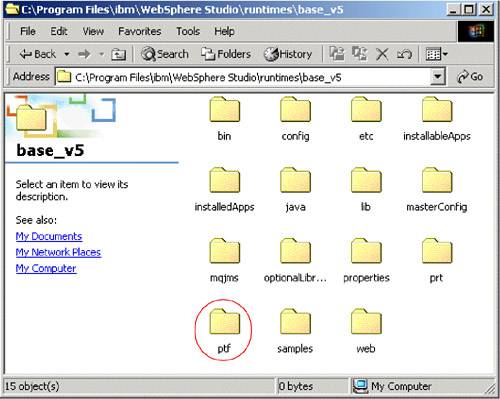 -
Run wteInstall.bat from the directory C:\Program Files\ibm\WebSphere Studio\runtimes\base_v5\ptf directory to update the software. Figure A-28. Running wteInstall.bat 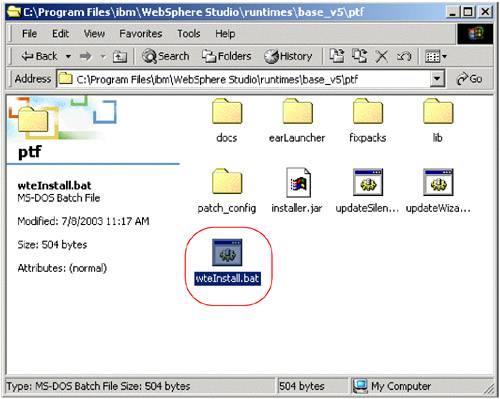 -
Installation will finish silent. WebSphere Studio Site Developer - WebSphere Application Server Interim Fixes -
Copy the entire fixes directory (including all its subdirectories and contents) from the WebSphere Portal CD # 1-6 into C:\Program Files\ibm\WebSphere Studio\runtimes\base_v5. -
Run update Wizard.bat from the directory C:\Program Files\ibm\WebSphere Studio\runtimes\base_v5\fixes to update the software. Figure A-29. WebSphere Application Server fixes directory 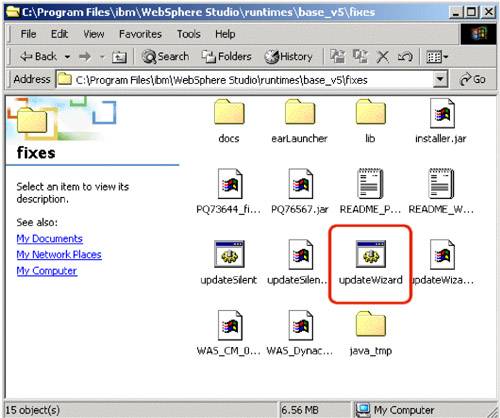 -
If you have problems launching this file, edit the updateWizard.bat file, verify if the JAVA_HOME variable is correct; if not, correct it to match your environment and run the updateWizard.bat again. Figure A-30. Modifying the JAVA_HOME setting 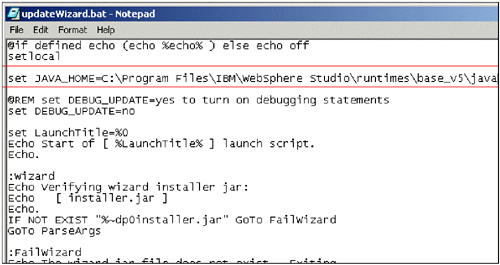 -
Click the Next button to begin the Update Installation Wizard. Figure A-31. The Update Installation Wizard 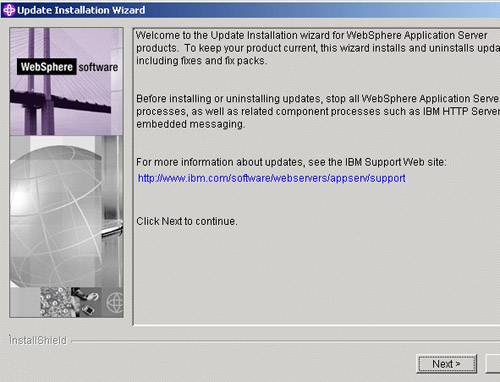 -
On the Specify Product Information window, enter C:\Program Files\IBM\WebSphere Studio\runtimes\base_v5\fixes as the Installation Directory. Click Next to continue. Figure A-32. Selecting the installation directory 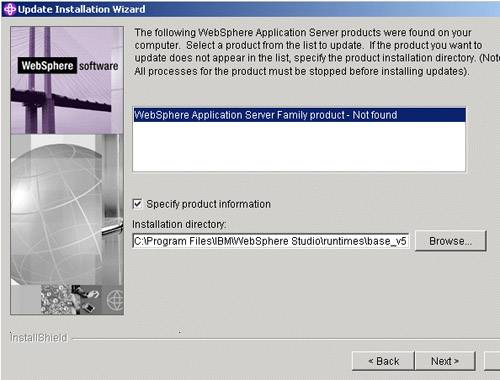 -
Click the option Install fixes . Then click Next to continue. Figure A-33. Choosing install fixes 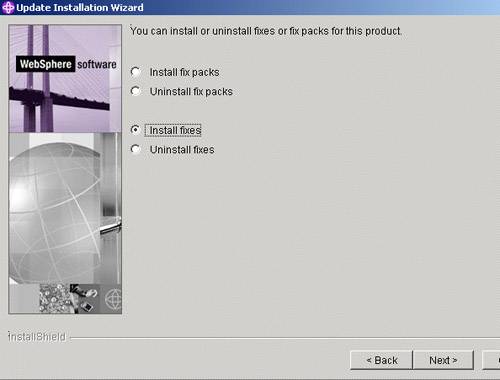 -
Type C:\Program Files\IBM\WebSphere Studio\runtimes\base_v5 as the directory where fixes are located. Click Next . Figure A-34. Choosing the location of the fixes to install 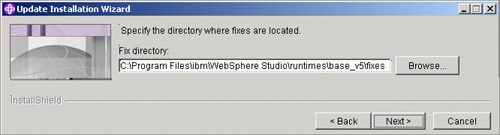 -
Select the four fixes to install. Click Next . Figure A-35. Selecting the fixes to install  -
Click Next to begin the installation of the fixes. Figure A-36. Beginning the installation 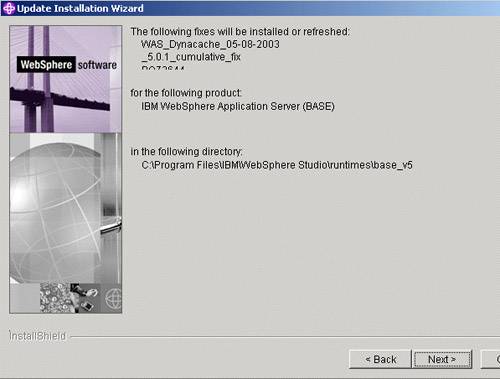 -
When installation is complete, click Finish to exit. Figure A-37. Completing the installation 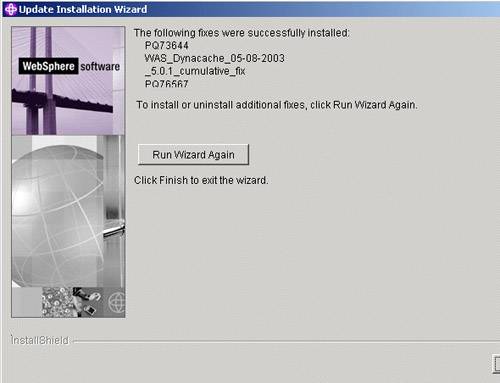 |