Calibrating Joysticks
| Before getting into the details of how to handle joystick input from a programming perspective, it's worth addressing an important issue related to joysticks: calibration. Calibration is the process of fine-tuning the settings for a joystick so that the handle is properly centered. Joystick calibration is kind of like having your car aligned; when a joystick isn't properly calibrated, it has a tendency to pull to one side. Fortunately, joystick calibration is easy to perform, and is readily available from the Windows Control Panel. To access joystick settings, just follow these steps in Windows XP:
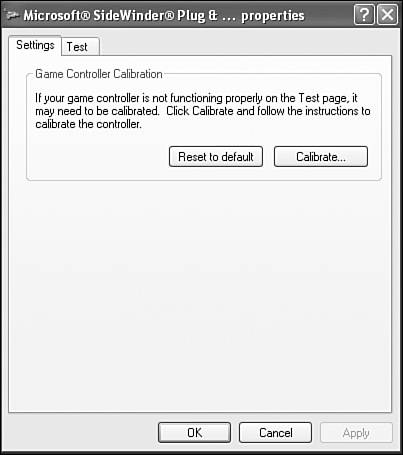
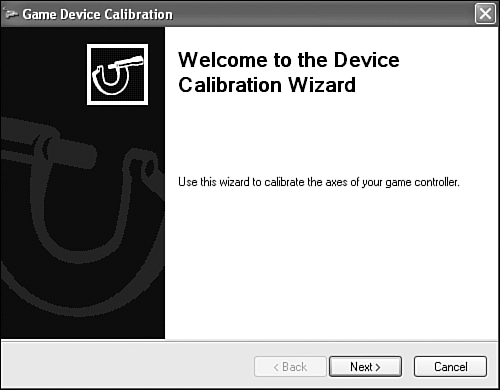
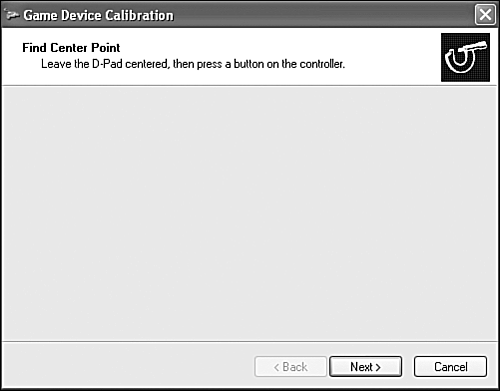
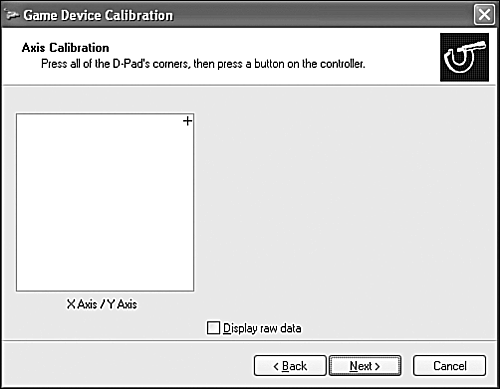
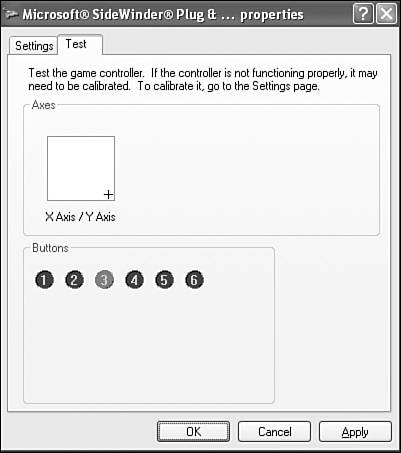
After following these steps, you'll be presented with a window that is specific to your particular joystick. In my case, I'm using a Microsoft SideWinder game pad, so the window I see is shown in Figure 7.1. Figure 7.1. The Properties window for your joystick should provide a means of calibrating the joystick. To calibrate my joystick (game pad), I just click the Calibrate button. This starts the Device Calibration Wizard, which is shown in Figure 7.2. Figure 7.2. The Device Calibration Wizard provides a means of calibrating joysticks in Windows XP. Click the Next button to get started calibrating the joystick (see Figure 7.3). Figure 7.3. Calibrating a joystick first involves pressing a button on the joystick without touching the joystick handle (or control pad for game pads). The first step in calibrating a joystick is to leave the handle centered and press a button, as shown in Figure 7.3. In the case of a game pad, you simply don't touch the control pad (D-Pad) and then press a button. You are then prompted to calibrate the axes of the joystick by moving the handle or control pad in all of its directions, followed by pressing another button (see Figure 7.4). Figure 7.4. The Device Calibration Wizard determines the range of each joystick axis by asking you to move the handle or control pad in each direction. The final step is to leave the handle (control pad) alone once more and press a button. After performing these steps, you can click the Finish button to wrap up the calibration process. Although the steps to calibrating a joystick or game pad might seem kind of pointless, the idea is that your computer is analyzing the range of movement along each axis and properly determining the center point of each. Once the center point and maximum extents are determined, the joystick can then be accurately centered. Again, it's very much like aligning a car so that it steers straight when you aren't touching the steering wheel. I encourage you to calibrate your joystick any time it starts acting strange because it is possible for a joystick to lose calibration over a period of time as it begins to wear mechanically. Your joystick's Properties window usually provides a test option for testing the joystick after you've calibrated it; this helps to make sure that the calibration worked properly. Figure 7.5 shows an example of a test window for the Microsoft SideWinder game pad. Figure 7.5. The test window for the Microsoft SideWinder game pad allows you to test out the control pad as well as the game pad's buttons . The test window for a joystick or game pad is great because it quickly allows you to see if the device is working properly. If you get no response when testing a device, you know that something is wrong with the installation. You can also use the test window to see if a joystick or game pad is properly calibrated. |

EAN: 2147483647
Pages: 271