| Particles can also be produced by an emitter, which generates particles in a particular speed and direction. There are three main types of emitters: Omni Emits particles in all directions (Figure 18.5) Figure 18.5. An Omni emitter. 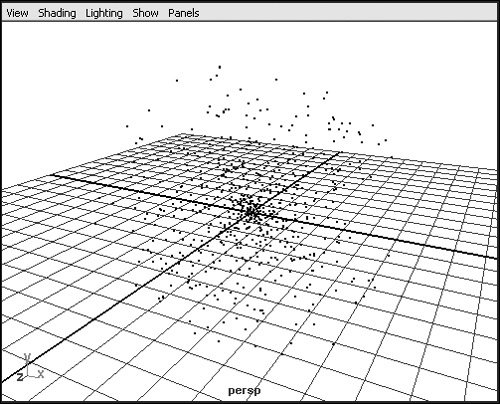 Directional Emits particles in one user-specified direction (Figure 18.6) Figure 18.6. A Directional emitter. 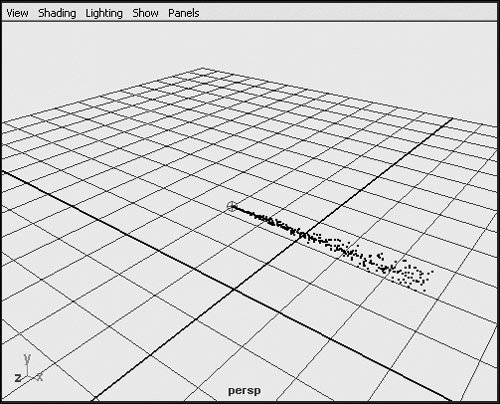 Volume Emits particles from a primitive shape such as a cube, cone, or cylinder (Figure 18.7) Figure 18.7. A cylindrical Volume emitter. 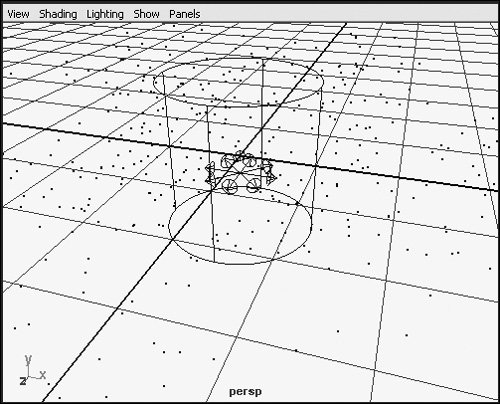 You can select the type of emitter that you want to use when you create the object (in its Options window), or you can change the emitter type in the Attribute Editor.
To create an emitter: 1. | From the Particles menu, select Create Emitter.
By default, an Omni emitter is created, and its icon appears at the center of the grid. This is where the particles will be emitted (Figure 18.8).
Figure 18.8. An emitter is created at the center of the grid. 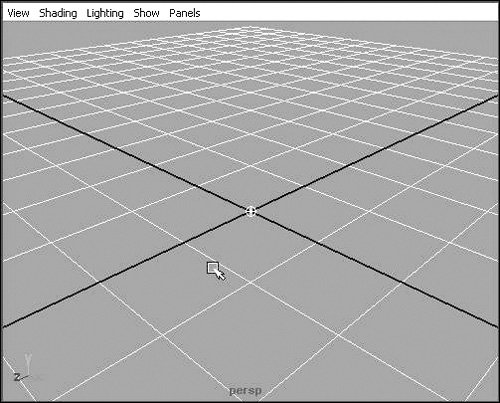
| 2. | Click Play  in the playback controls. You'll see particles emitting from the center of the emitter (Figure 18.9). in the playback controls. You'll see particles emitting from the center of the emitter (Figure 18.9).
Figure 18.9. Particles emit in all directions from an Omni emitter. 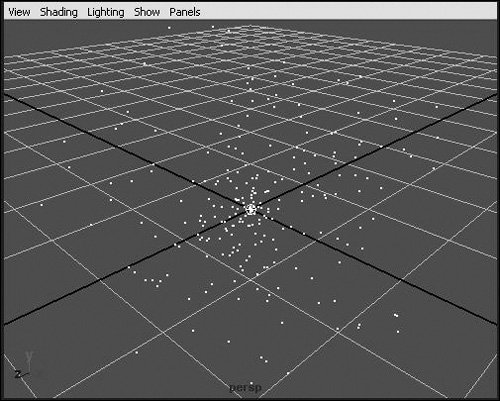
| 3. | With the particles selected, open the Attribute Editor by pressing  . .
| 4. | In the Attribute Editor, select the particleShape1 tab.
| 5. | Scroll down, and open the Lifespan Attributes section.
| 6. | From the pop-up menu, select Constant. You can now change the duration of the particles once they've been emitted. (Particle duration is the length of time that the particle is visible.) With a Constant value of 1, they last for just one second and then disappear.
| 7. | Click Play again to see the results. The emitter now emits particles from the center of the grid, and the particles' lifespan is one second.
|
There are a large number of settings for each emitter and particle object. By altering these settings, you can customize the look of an emitter to suit your task. To change emitter settings: 1. | From the Particles menu, select Create Emitter.
| 2. | In the Channel Box, change the Emitter Type to Directional (Figure 18.10).
Figure 18.10. You can change the emitter type at any time from the Channel Box or Attribute Editor. 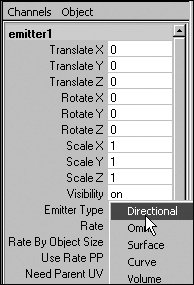
The emitter now emits a stream of particles in the positive x direction.
| 3. | Press  to select the Show Manipulator tool. to select the Show Manipulator tool.
| 4. | Set the Rate to about 200 by dragging the yellow square (Figure 18.11).
Figure 18.11. The Rate controls the number of particles emitted per second. 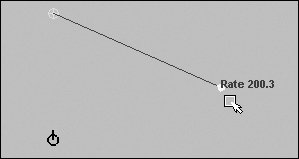
Now the emitter emits particles twice as fast.
| 5. | Click the input node ring to bring up the Direction manipulator.
| 6. | Adjust the manipulator to where you want the emitter to aim (Figure 18.12).
Figure 18.12. The aim of the emitter adjusts like a spotlight. 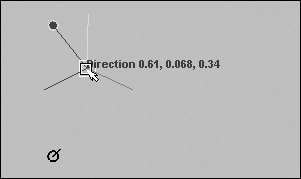
| | | 7. | Click the input node ring again, and adjust the spread of the emitter by clicking and dragging the yellow square (Figure 18.13).
Figure 18.13. Particles are randomly emitted within the angle of the cone. A spread of 1 is 180 degrees. A spread of .5 is 90 degrees. 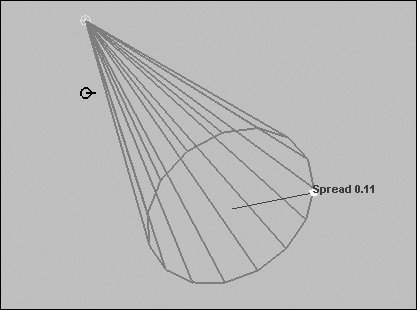
The spread of the emitter determines the initial direction of any particles it emits.
| 8. | Click , and watch the particles in their new shape (Figure 18.14).
Figure 18.14. With the changes made, the particles now emit rapidly in a cone-shaped pattern. 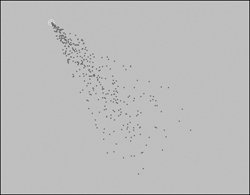
|
 Tips Tips
You can also use the Attribute Editor to adjust these inputs. Each emitter type has its own attributes dealing with controls specific to that type of emitter. Attributes with a random input vary their source attribute by that amount. For instance, with Speed set to 1 and Speed Random set to .4, the Speed of any particle will be a random number from .8 to 1.2. This approach is great for adding organic variation to an emitter, because it adds irregularity and detail.
Unlike standard emitters, which emit from a few simple forms, emitting particles from an object allows you to precisely control the direction and shape of an emitter. The object can be hidden at render time or kept as a background. Emitting particles from an object can be useful when used in combination with instancing of particles. You might use these two functions to populate a field with flowers, for instance. To emit particles from an object: 1. | Make a simple ground plane (Figure 18.15).
Figure 18.15. Create a simple ground plane. Be sure to add some hills so the effects of the emitter will be visible later. 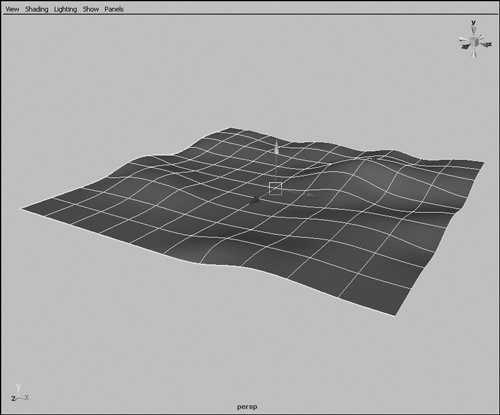
The plane in this example was made by first creating a NURBS plane with 10 subdivisions and then pulling some CVs to make gentle slopes.
| 2. | From the Particles menu, select the box next to Emit from Object (Figure 18.16).
Figure 18.16. Select the option box for Emit from Object. 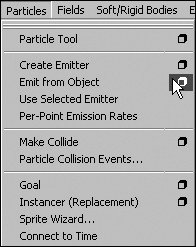
| 3. | Set the Emitter Type to Surface (Figure 18.17).
Figure 18.17. Surface emitters are a great way to specify a precise area from which particles should originate. 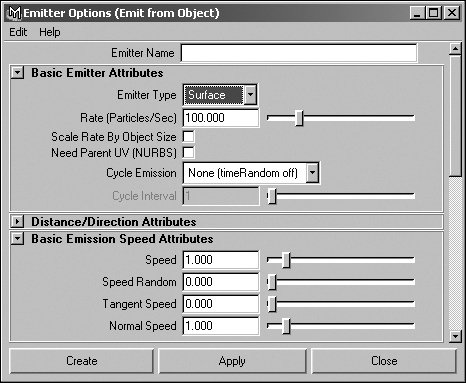
This option causes the particles to be emitted in the direction of the surface normal.
| 4. | Click Apply, and play your scene .
The particles emit evenly from the plane (Figure 18.18). Some particles are sent out at an angle because they emit from the slope of the hills.
Figure 18.18. Particles flow from the plane. The rate can be controlled on a per-square-centimeter basis for a surface emitter. 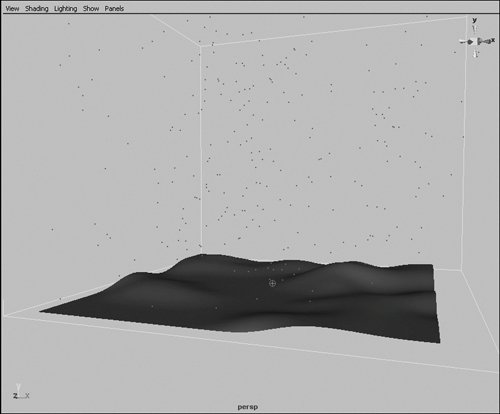
|
To instance particles: 1. | Start with the scene from the previous task.
| 2. | Select the emitter, and press to open the Attribute Editor.
| 3. | Under the emitter1 tab, set the Basic Emission Speed Attributes as shown (Figure 18.19).
Figure 18.19. Set the Speed and Normal Speed to 0. 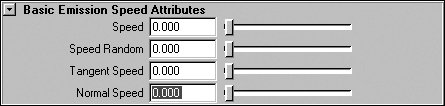
Tangent Speed and Normal Speed are relative to the surface of the object. Setting all the speeds to 0 means the particles won't move once created.
| 4. | Press to see the effects.
Small dots appear on the surface but don't move (Figure 18.20).
Figure 18.20. Speckled dots appear on your surface as the scene plays. 
| 5. | Create a simple NURBS cone.
| 6. | Select the cone and then particle1.
When using the Instancer, the last object selected must be the particle system that will be used to place the instances.
| 7. | From the Particles menu, choose Instancer (Replacement) (Figure 18.21).
Figure 18.21. The Instancer places instanced geometry instead of basic particles. 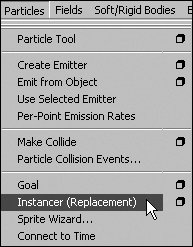
| 8. | The dots on your surface are now cones, and the scene looks like a forest (Figure 18.22).
Figure 18.22. With just a few clicks, you now have a forest! 
|
Tip
|