| Light linking is Maya's way of giving you endless flexibility when it comes to lighting your scene. It lets you define a surface to be lit by only specific lights, or you can define a light to hit only certain surfaces, both of which let you isolate and control the lighting of a specific area of your scene. Light linking works particularly well for character lighting when you want some lights to illuminate the character but not the rest of the scene. In addition, it speeds rendering times because Maya does not need to examine the entire scene to see which surface is being hit by each light and by how much. To link a light to an object: 1. | Start a new scene with two spotlights and three primitives aligned as in Figure 14.61; save this scene for later use.
Figure 14.61. Create a simple scene to use for light linking. 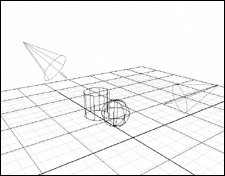
| 2. | From the Lighting/Shading menu, select Light Linking > Light-Centric (Figure 14.62).
Figure 14.62. Choose Light-Centric to control the linking of one light to multiple objects. 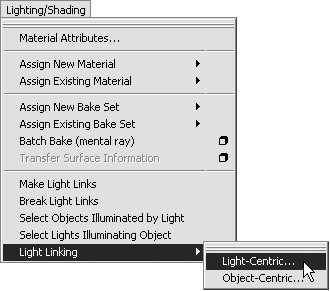
The Relationship Editor opens.
| 3. | On the left side of the Relationship Editor, select the light for which you want to specify objects.
| 4. | On the right side, select the objects you want the light to hit, and, if necessary, deselect any objects you do not want the light to hit (Figure 14.63).
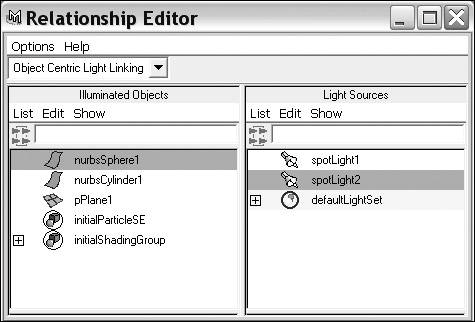
Figure 14.63. Spotlight1 will illuminate only nurbsCylinder1. 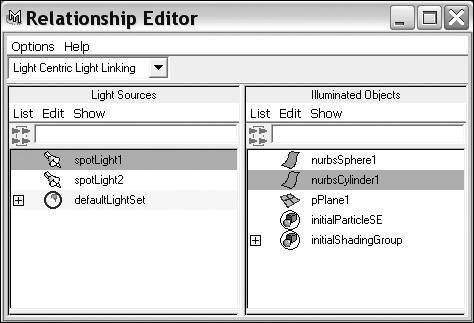
| 5. | Repeat steps 3 and 4 for each light to which you want to link objects.
| 6. | Render the scene to see the results.
|
 Tip Tip
To link an object to a light: 1. | Open the scene created for the previous task, "To link a light to an object."
| 2. | From the Lighting/Shading menu, select Light Linking > Object-Centric.
The Relationship Editor opens.
| 3. | On the left side of the Relationship Editor, select the object for which you want to define lighting (Figure 14.64).
Figure 14.64. Select nurbsSphere1 on the left side and the lights you want to illuminate nurbsSphere1 on the right side. Here spotlight2 will be the only light hitting nurbsSphere1. 
| 4. | On the right side, select the lights you want to hit the object, and, if necessary, deselect any lights you don't want to light the object.
| 5. | Repeat steps 3 and 4 for each object to which you want to link lights.
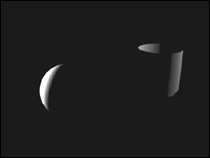
| 6. | Render the scene to see the results (Figure 14.65).
Figure 14.65. The lights in this scene are linked to specific objects, so no light is hitting the plane below. 
|
|


 Tip
Tip