| The larger the movie file, the longer the download time. When you identify frames that are too large to stream efficiently , as indicated by the Bandwidth Profiler, you might want to optimize your movie. You can take several steps to prepare your movie for optimal playback. As part of the publishing process, Flash automatically performs some optimizing on movies, including detecting duplicate shapes on export and placing these shapes in the file only once, and converting nested groups to single groups. In the following exercise, you will do a few things to optimize your movie and reduce the file size , making the download time much less. -
Right-click (Windows) or Control-click (Macintosh) the Frame layer, and choose Hide Others from the contextual menu. Right-click or Control-click the Frame layer again, and choose Lock Others. 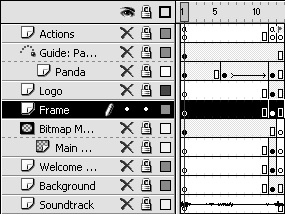 When you choose Hide Others and Lock Others from the contextual menu, all of the layers except the Frame layer should be hidden and locked. This will make it easier to work with. -
Select frame 12 and choose Edit > Select All. In the Property inspector, set the Stroke Style to Solid. Choose Control > Test Movie. 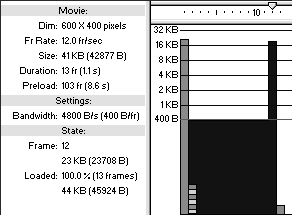 One of the many things you can do to reduce the file size of your Flash movie is reduce the amount of vector information in it. A dotted line requires considerably more information, and thus a greater file size, than a solid line. So by simply changing the outline around the graphics in the Frame layer, you can significantly reduce the size of your file. When you test the movie, the Bandwidth Profiler should now indicate that your file is approximately 41 KB. -
Close the Test Movie window. Locate the loop.aif or loop.wav sound in the current movie's library. Double-click the icon to the left of the sound to open the Sound Properties dialog box. 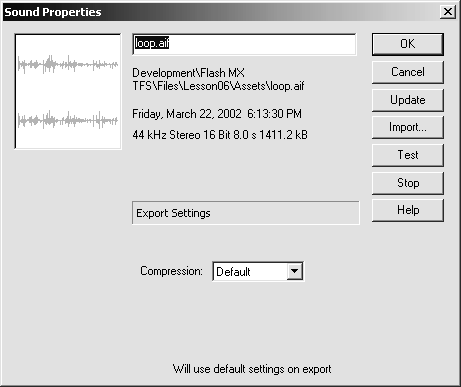 Graphic elements aren't the only thing to consider when it comes to optimization. Sounds can also add a significant amount of file size. You can modify the compression settings for each of your sounds individually using the Sound Properties dialog box. You can also modify the compression settings for all of the sounds in the movie at one time using the Publish Settings dialog box, as you'll learn in Lesson 12. TIP You can also open the Sound Properties dialog box by selecting a sound and clicking the Properties button at the bottom of the Library panel. 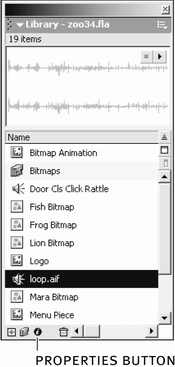 -
In the Sound Properties dialog box, set the Compression to MP3 and the Bit Rate to 16 Kbps. Click OK. 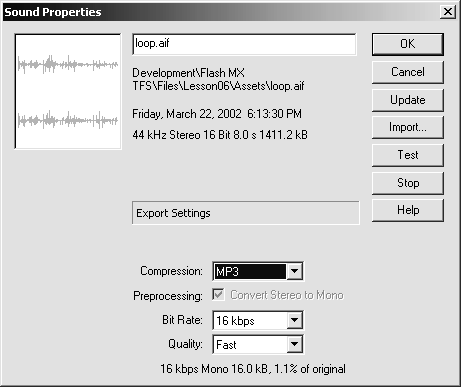 The loop.aif or loop.wav sound plays when the movie starts playing. You can apply compression, which normally sacrifices too much sound quality, because the distortion that occurs with the compression doesn't adversely affect this sound. If you were to set the bit rate to 8 Kbps, you might find that the sound distortion is unacceptable. You can test the compression settings, and get some idea of the finished size of the compressed sound, by clicking the Test button in the Sound Properties dialog box. The Sound Properties dialog box provides a lot of information about a selected sound. It displays the sound's original location on the file system when it was imported, as well as the last date and time the file was updated (which you can access using the Update button) or imported (available by using the Import button or by choosing File > Import). The sample rate, bits, sound length, and original sound file size are also displayed in the Sound Properties dialog box. In addition to displaying properties for a sound, you can use the Sound Properties dialog box to modify the Compression setting for individual sounds. By default, sounds are exported using the settings in the Publish Settings dialog box, which you'll work with in Lesson 12. However, you may find that some sounds require a little tweaking to decrease the file size, or to simply increase the quality (and file size) of a particular sound. The Compression setting has five options: Default, ADPCM, MP3, Raw, and Speech. All of these, except Default, have additional settings you can modify in the Sound Properties dialog box. The Raw option exports the sound without compression. When you use ADPCM (Adaptive Differential Pulse Code Modulation) Compression, which is most useful for short sounds, the Preprocessing, Sample Rate, and ADPCM Bits settings appear. Deselect the Preprocessing option to keep stereo sounds stereo otherwise this option will convert stereo sounds to mono. The Sample Rate setting controls the sound fidelity. A lower sample rate results in a lower-quality sound and smaller file size, while a higher sample rate results in a higher-quality sound and larger file size. You can't increase the sample rate above the sound's original rate. The Sample Rate can be set to 5 kHz (very low quality), 11 kHz, 22 kHz, or 44 kHz (CD quality). The ADPCM Bits setting represents the number of bits used in ADPCM encodinga lower number results in a smaller file size and lower quality, while a higher number results in a larger file size and higher quality. 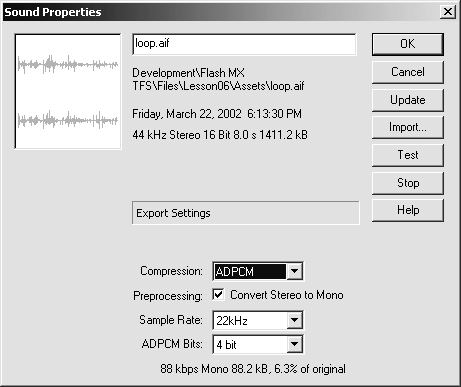 MP3 compression is ideal for longer streaming sounds in Flash. When you select this option from the Compression menu, the Preprocessing, Bit Rate, and Quality settings appear. The Preprocessing option is the same for MP3 compression as it is for ADPCM compression, but it is only enabled if you select a Bit Rate of at least 20 Kbps. The Bit Rate setting represents the bits per second in the compressed sound. You should use a Bit Rate of at least 16 Kbps for music, but keep in mind that while a higher value for this setting will result in better sound quality, it will also result in a larger file size. The Quality setting determines the speed at which the sound is compressed, and it also affects the sound's quality. Setting the Quality to Fast results in a lower quality sound that is compressed at a faster rate. Medium results in a better quality sound that's compressed at a somewhat slower rate. Finally, Best results in the highest quality sound, but it's compressed at a much slower rate.  Speech compression is intended for sounds containing speech. If you choose this option from the Compression menu, the Preprocessing and Sample Rate settings appear. These settings are the same as those settings for ADPCM compression. 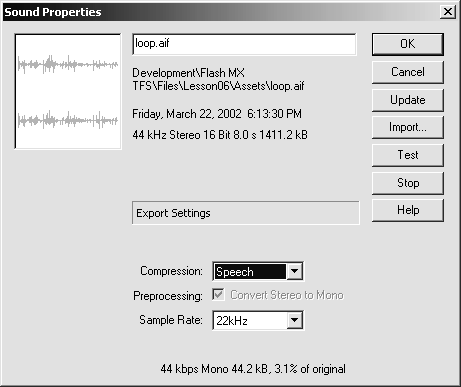 -
Choose Control > Test Movie. 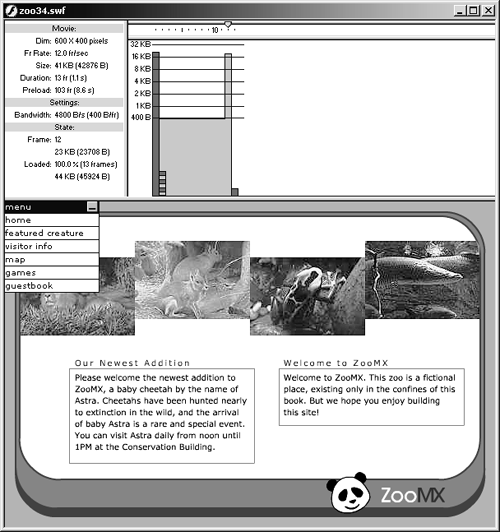 In this case the file size was probably not reduced. That's because the settings you provided in the Sound Properties dialog box for the loop.aif or loop.wav sound are the default compression settings for the whole movie, as you'll learn in Lesson 12. It's useful to know how to access the individual sound-compression settings, because you may find that some sounds require higher quality and lower compression. -
Close the Test Movie window. Open the Bitmaps folder in the library, and double-click the icon to the left of the fish.jpg bitmap to open the Bitmap Properties dialog box. 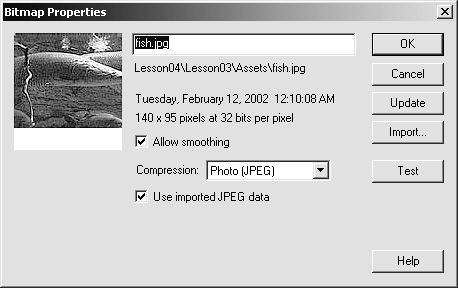 Bitmaps can add significantly to the size of your file. It's a good idea to optimize your images before you import them into Flash, but once the images are inside, you can optimize them even further using the Bitmap Properties dialog box. -
Deselect the "Use imported JPEG data" option, and set the Quality to 50. Click OK. 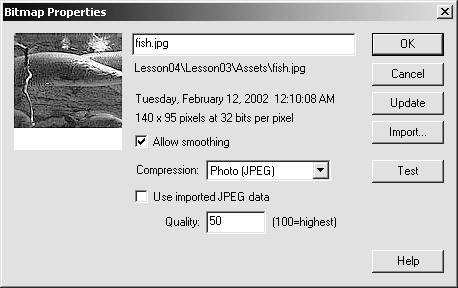 You can use the Bitmap Properties dialog box to modify the compression settings for each individual bitmap in your library. The lower the value in the Quality setting, the smaller the file size in the movie. Of course, if you set the Quality too low, you may end up with a grainy bitmap image. So you have to use this setting wisely. You can preview the bitmap with the new Quality setting, and get an idea of how much the imported bitmap will add to the movie's file size, by clicking the Test button. Then the compressed bitmap size and percentage of original file size are displayed at the bottom of the Bitmap Properties dialog box. NOTE You cannot set all the compression for all the imported bitmaps at once in the Publish Settings dialog box. You'll learn more about this in Lesson 12. The Bitmap Properties dialog box works similarly to the Sound Properties dialog box. It displays information about the imported bitmap, such as its file name , original location on the hard drive, dimensions, resolution, and when it was last imported or updated. The Bitmap Properties dialog box also has a few settings you can use to modify the compression and appearance of an imported bitmap in Flash. Take a moment to look at those settings before you continue to the next step. There are two Compression settings for imported bitmaps: Lossless (PNG/GIF) and Photo (JPEG). Lossless compression is great for images that have relatively few colors and simple shapes. With lossless compression, none of the data for the image is discarded when it's compressed. Photo compression is for complex images, such as photographs and images with gradient fills. When you select the JPEG option from the Compression menu and deselect the "Use imported JPEG data" option, a Quality setting text box appears. You can enter a number between 0 and 100the larger the number, the better the quality and the larger the file size. If you leave the "Use imported JPEG data" option selected, Flash will use the quality that was set for the JPEG when it was created in an image editor such as Macromedia Fireworks. -
Choose Control > Test Movie. Save your file as zoo35.fla in the FlashTFS folder on your hard drive. 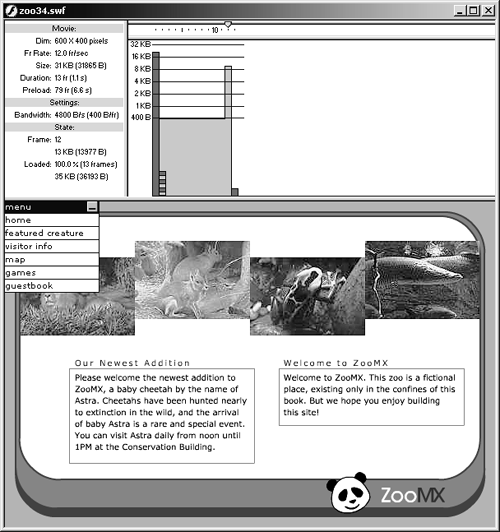 When you test the movie, check the Bandwidth Profiler to see how much changing the Quality setting for the fish.jpg bitmap reduced the size of the movie. Try playing with the Quality settings for all the bitmaps in the Bitmaps foldersee how much you can reduce the file size without adversely affecting image quality. Keep the optimized version of your movie open for the next exercise. NOTE All of the imported bitmaps have been optimized in zoo35.fla in the Lesson11/Intermediate folder on the CD-ROM. You can duplicate this by repeating steps 6 and 7 for every bitmap in the library. |


