In this exercise you will build the zoo map that you will use throughout this lesson. The graphic for the map has already been created, but you will add some PushButton components so that users will have a place to click. You'll also add a ListBox component to display the list of animals in the zoo.
-
Create a new Flash movie based on the Flash TFS Zoo Template.
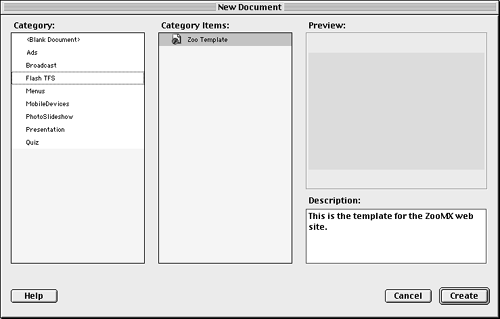
Choose File > New From Template. In the New Document dialog box, set the Category to Flash TFS and make sure the Zoo Template is selected. Click Create, and a new movie, based on the Zoo Template file, appears.
-
Select the Contents layer, and import map.swf from the Lesson09/Assets folder on the CD-ROM.
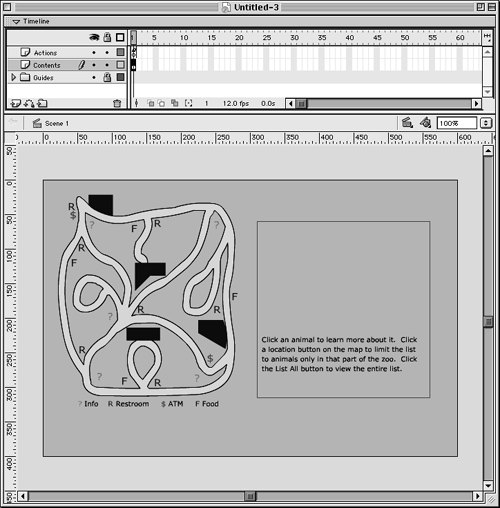
To import the file, choose File > Import and browse to the Lesson09/Assets folder. Select map.swf and click Open. This file contains the map graphic you'll use to let visitors know where the animals are located. You can re-create the contents of map.swf for more practicejust use the figure above as a guide.
-
Set the name of the Contents layer to Map, and lock it. Add two new layers above the Map layer, and name them Locations and List.
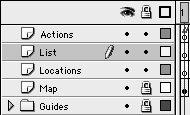
Double-click the name of the Contents layer to select it, and change its name to Map. Lock the Map layer by clicking the dot under the Lock/Unlock All Layers icon to the right of the layer's name. Then add a new layer called Locations, and place it above the Map layer in the layer stacking order. In the next step you are going to place the location markersinstances of the PushButton UI componentin the Locations layer. Next add the List layer above the Locations layer. In step 6 you're going to add an instance of the ListBox component to the List layerby default this instance will display a list of all the animals in the zoo. When you click an instance of the PushButton component, the list will change to display only the animals in that part of the zoo.
-
Add five instances of the PushButton component to the Locations layer.
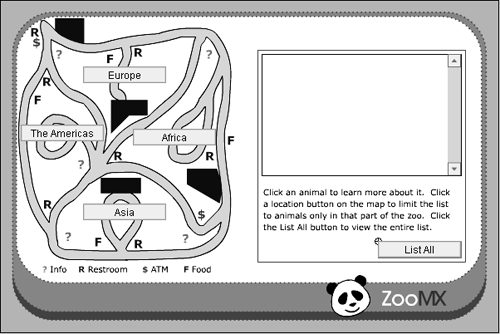
Make sure to select the Locations layer before you add any instances of the PushButton component. You can add a single instance of the PushButton component to the Locations layer, then press Ctrl+D (Windows) or Command+D (Macintosh) four times to make a total of five copies.
Each instance of the PushButton component will mark one area in the zoo. Use the Property inspector to set the instance names of the PushButton component instances to all , americas , africa , asia , and europe . Set the X and Y of the all instance to 455 and 290, and enter List All in the Label parameter field. Then set the X and Y of the americas instance to 25 and 150, and enter The Americas in the Label parameter field. Next set the X and Y of the africa PushButton instance to 160 and 155, and enter Africa in the Label parameter field. Now set the X and Y of the asia instance to 100 and 245, and enter Asia in the Label parameter field. Finally, set the X and Y of the europe instance to 100 and 80, and enter Europe in the Label parameter field.
-
Set the Click Handler parameter for each instance of the PushButton component to getList .

Now when you click any of the PushButton component instances, the getList function will be triggered. You haven't added this function yet, but you will in the next exercise.
TIP
You're finished working with the Locations layer, so it would be wise to lock it. You don't want to accidentally mess up anything as you work in the List layer.
-
Add an instance of the ListBox component to the List layer.In the Property inspector type animalList in the Instance Name text box, and set the Width to 240, the Height to 150, X to 315, and Y to 65.
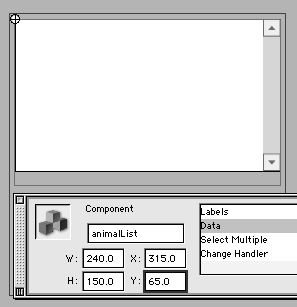
You can find the ListBox component in the Components panel. Make sure you have the List layer selected, click the ListBox component in the Components panel, and drag the component onto the stage.
Or you can double-click ListBox in the Components panel to add an instance of the component to the stage. Then use the Property inspector to modify its Name, Width, Height, X, and Y settingsjust like any other UI component instance. In this case, type animalList in the Instance Name text box.
NOTE
Make sure the Instance Name is animalList and not animalist or animaList . You need both L's in the name in order for the code you'll add later in this lesson to work.
This instance of the ListBox component will display a list of animals in the zoo. You can use the ListBox component to create list boxes, which will display lists of data. You can modify the parameters of each instance so that the user can select only single items or multiple items from the list. This component contains a copy of the ScrollBar component, which you'll work with later, so if there are more list items than can fit in the ListBox component's viewable area, a scroll bar will allow the user to scroll through the items.
Like the ComboBox component you worked with in Lesson 8, the ListBox component has several keyboard controls built in. The up and down arrow keys move the selection up or down one line in the scroll list. The Page Up and Page Down keys move the selection up or down one page. The size of the page is set by the height of the list box. The Home key selects the first item in the list, and the End key selects the last item in the list. You have to click an instance of the ListBox component to use these keyboard controls.
-
Set the Change Handler for the instance of the ListBox component to getDetail .

The ListBox component has only four parameters: Labels , Data , Select Multiple , and Change Handler . The Labels and Data parameters can contain arrays, much like the Labels and Data parameters for the ComboBox component you worked with in Lesson 8. Leave the Labels and Data parameters alone for this instance of the ListBox componentyou'll add some ActionScript to add labels and data for this instance later in this lesson. The Select Multipl e parameter can have a value of true or false true allows the user to select more than one item in the list, while false , the default, allows the user to select only one item in the list. The Change Handler, which you should set to getDetail , is the function that will be called when you select an item in the list box. The function, which you will define later in this lesson, must be in the same timeline as the instance of the ListBox component.
-
Select frame 1 of the Actions layer, and add the following ActionScript to the Actions panel:
// arrow color globalStyleFormat.arrow = 0xFFFFFF; // text styles globalStyleFormat.textColor = 0xCC0000; globalStyleFormat.textFont = "Verdana"; globalStyleFormat.textSize = 10; globalStyleFormat.textSelected = 0xFFFFFF; // component colors globalStyleFormat.face = 0xFF6600; globalStyleFormat.darkshadow = 0x000000; globalStyleFormat.highlight = 0xCC0000; globalStyleFormat.highlight3D = 0xFFC055; globalStyleFormat.shadow = 0xCC0000; globalStyleFormat.selection = 0xFF9933; globalStyleFormat.applyChanges(); // modify push button style pbStyle = new FStyleFormat(); pbStyle.textColor = 0xFFFFFF; pbStyle.addListener(americas, africa, asia, europe, all);
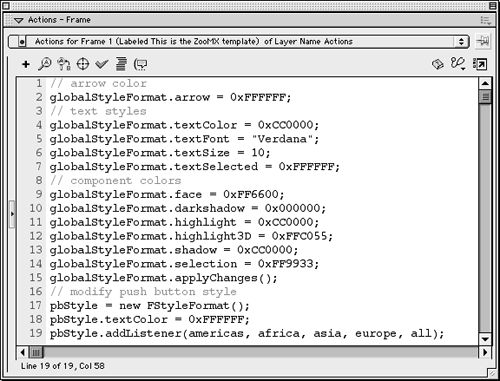
This ActionScript should look somewhat familiar to you. It's nearly identical to the ActionScript you used to modify the appearance of the components in Lesson 8.
If you don't want to type all this ActionScript in the Actions panel, you can import it from the Lesson09/Assets folder. Click the Actions panel's Options menu control, and select Import From File. When the Open dialog box appears, browse to the Lesson09/Assets folder, select style.as, and click Open. The ActionScript appears in the Actions panel.
-
Save the file as map1.fla in the FlashTFS folder on your hard drive.
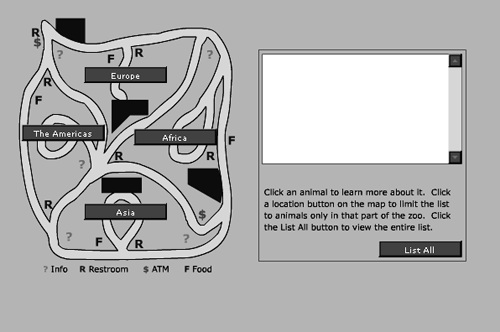
You can test the movie before you save it by choosing Control > Test Movie. You should see that each component uses the styles you specified in frame 1 of the Actions layer.
The map is set, and the movie is ready for some ActionScript to get data about the animals in each section of the zoo. Once you have the data, you'll use ActionScript to display the data in the instance of the ListBox component.


