Clicking the Edit button in the Sound panel opens the Edit Envelope dialog box, where you can modify existing sound effects and create your own custom effects. You can use the Edit Envelope dialog box, to change the in point and out point of the sound, as well as control the volume of each sound channel. If you want to do to perform a more complex sound edit, you'll need another program such as Macromedia's SoundEdit and Sonic Foundry's Sound Forge.
-
Select frame 1 of the Soundtrack layer in zoo27.fla, and click the Edit button in the Property inspector.
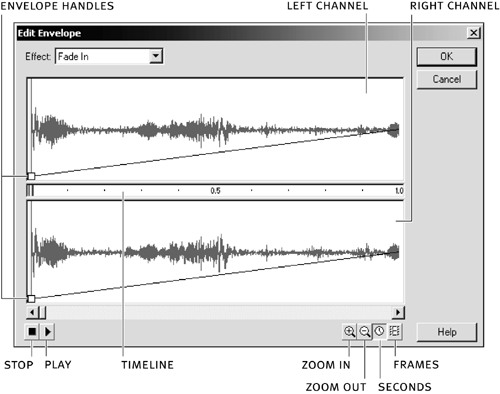
The Edit Envelope dialog box opens. This dialog box has several controls you can use to customize your sounds, as well as three windows . The top window controls the sounds for the left channel. The bottom window controls the sounds for the right channel. The center windowa bar between the channel windows is the timeline for the sound.
-
Click the Zoom Out button in the bottom-right corner of the Edit Envelope dialog box until you can see one complete loop of the sound file.
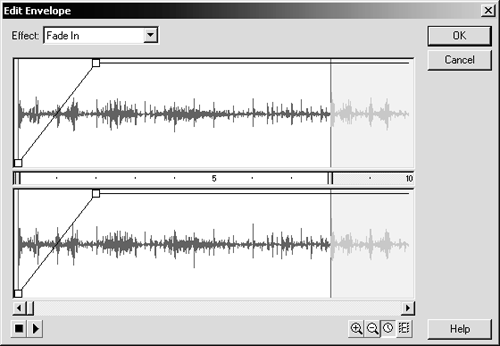
The end of the loop is marked by a vertical line. Right now the sound fades in, starting at no volume and ending at full volume. This end of the loop setting is indicated by a solid black line (the envelope line) that goes from the bottom to the top of each channel. The line indicates the volume of the sound in that channel. Each line features two white squares called envelope handles at either end. You can move the envelope handles to change the volume in each channel.
-
From the Effect drop-down menu, choose Fade Left to Right.
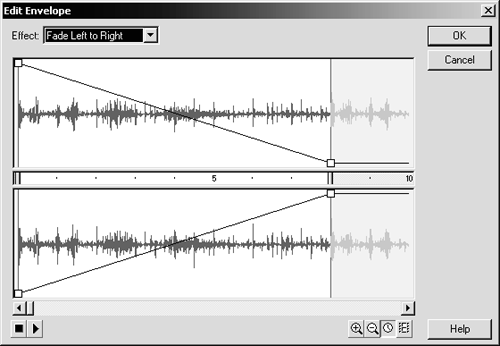
The envelope handles move to new positions . The first envelope handle in the left channel is now at the top of that channel's window, indicating that the left channel starts at full volume. The line in that channel slopes down and eventually meets the bottom of the window, indicating that over the course of the first loop, that channel fades out to no volume. The opposite is true of the right channel; it starts at no volume and moves up to full volume. You can click the Play button in the bottom-left corner of the dialog box to test the sound.
-
Drag the first envelope handle in the right channel window to the top of that channel's window. Do the same for the second envelope handle in the left channel window.
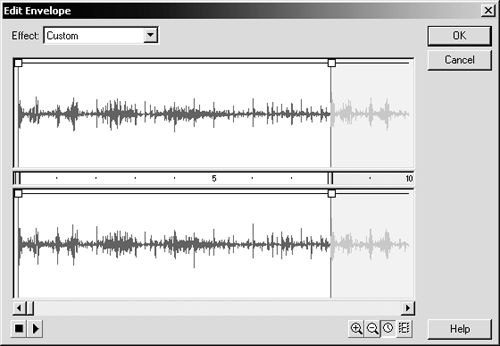
Now both channels start at full volume, and continue to play at full volume for the duration of the sound. You can click the Play button in the Edit Envelope dialog box to make sure.
-
Click the envelope line between the existing envelope handles in the left channel.
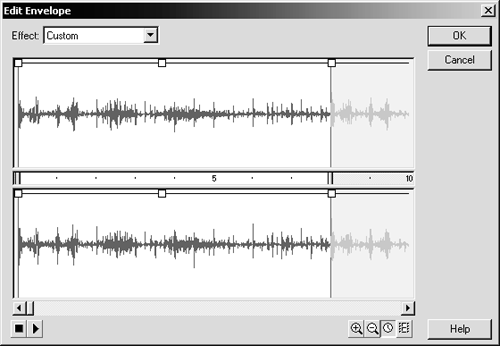
When you click the envelope line, in either channel Flash adds another handle to both channels. You can have up to eight envelope handles in each channel.
-
Drag the envelope handle you just added off the top of the left channel window.
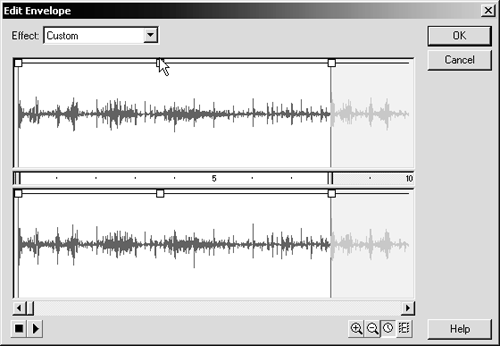
When you drag an envelope handle that is not an end point (the first or last envelope handle) off the channel, it removes that envelope handle from both channels.
-
Click OK, and save your movie as zoo28.fla in the FlashTFS folder.
Now that you're a sound effects pro, it's time to move on to some video. You will learn more about working with sound in Lesson 12. You can close zoo28.fla, since you're going to work with a new file in the next exercise.


