| When you work on a large project, as you're doing over the course of this book, you might find it useful to create templates to maintain consistency across the various pieces of the project. You can save a Flash movie as a template, and then use the template to create a new Flash document. The template can contain special layers, called guide layers , which you can use to position the elements in your template-based movies. They can also contain comments, to provide information to others using the template. -
Delete the Menu, Guide: Panda, Bitmap Mask, Main Page Bitmaps, and Welcome Text layers. 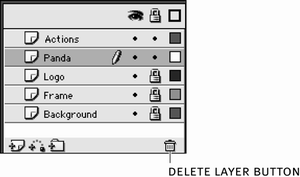 You can delete a layer by selecting it, and clicking the Delete Layer button at the bottom of the timeline. If you want to delete all these layers at one time, click the first one, hold down Ctrl (Windows) or Command (Macintosh), and click each of the other layers. After you delete the layers listed, your movie should have only the Actions, Panda, Logo, Frame, and Background layers remaining. Before the end of this exercise, you are going to save this file as a template, and you don't need the content in the layers you just deleted. You saved the file as zoo23.fla in the last exercise, so you'll be able to open the file to get back to work on the Web site. But you need to make a template so you can create additional content that will be loaded into this movie later. -
Remove frames 1 through 12 of every layer. Select frame 1 of the Actions layer and change the frame label to //This is the ZooMX template . 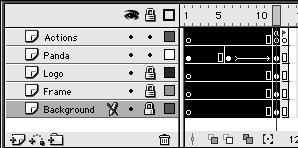 Select frame 1 of the Actions layer, and then Shift click frame 12 of the Background layer. You should have frames 1 through 12 of every layer selected. Once you have the layers selected, choose Insert > Remove Frames to remove frames 1 through 12 of each layer. Frame 13 should take the place of frame 1. 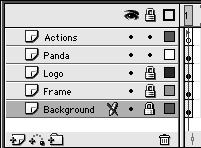 After frames 1 through 12 have been removed, the label in frame 1 of the Actions layer should be info . You don't necessarily need that frame label for movies based on the template you're creating, so you can change the label to a comment. When you create a new movie based on this template, you can add whatever labels the new movie might require. Remember, a frame comment is simply a label preceded by two slashes (//). So typing //This is the ZooMX template in the Frame label setting in the Property inspector should create a comment. 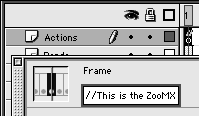 TIP Don't forget to press Enter or Return after you type the comment in the Frame label setting. -
Select the Panda layer and click the Insert Layer Folder button. Name the new layer folder Guides.  Add the layer folder by clicking the Insert Layer Folder button at the bottom of the timeline. Alternatively you could choose Insert > Layer Folder. Once the layer folder has been added, rename the folder the same way you rename a layer. Layer folders make it easy to organize the layers in your Flash movie. You can place layers inside the folders, and then expand and collapse them, without affecting what you see on the screen. You can also lock or hide all the layers in a folder by locking or hiding the folder. -
Move the Panda, Logo, Frame, and Background layers into the Guide folder. 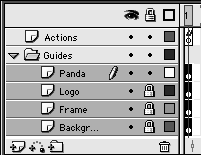 Make sure you keep the layers in the same order they were in before moving them. You can move them quickly and easily by clicking the topmost layer (Panda), and then Shift click the bottommost layer (Background). Then drag all the layers into the Guides layer folderthe layer folder should highlight, indicating that you've dragged something into it. When the folder is highlighted, release the mouse and the layers should appear inside the layer folder. -
Right-click (Windows) or Control-click (Macintosh) the Panda layer and choose Guide. Repeat this step for the Logo, Frame, and Background layers. 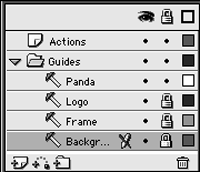 When you choose Guide a small icon should appear to the left of the layer name, indicating that it's now a guide layer. Guide layers are not exported in your Flash Player movie and do not add weight to the final file size . Guide layers are different from the guides you added in Lesson 2. Guides can be straight lines, and they are not actually contained on a layer. Guide layers can contain graphics of any shape, which you can use as visual aids for drawing complex art in Flash. You can now use the Panda, Logo, Frame, and Background guide layers to place elements in your Flash movie. The contents of the guide layers appear only while you are editing; they will not appear in the finished movie. If you want to test this, choose Control > Test Movieyou should see only the orange color of the stage. -
Unlock and unhide every layer and then lock the Guides layer folder. Click the triangle to the left of the Guide layer folder's name to collapse the folder. Select the Guides layer folder and add a new layer named Content.  You can unlock every layer by clicking the Lock/Unlock All Layers icon at the top of the timeline until every layer is unlocked. Remember, a small lock icon appears to the right of a layer's name when it's locked, so just make sure there are no lock icons next to the layer names . You can click the Show/Hide All Layers icon at the top of the timeline until every layer is visible. A small X will appear to the right of a hidden layer's name, under the Show/Hide All Layers icon. Just make sure no X's appear there. After every layer is unlocked and unhidden, lock the Guides layer folder. All the layers inside the folder should be locked. 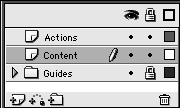 When you collapse the folder, the layers inside the folder disappear from the timeline, but their contents do not vanish . Since the folder and all the layers inside it are locked, you won't be able to change the contents of these layers. Having the folder locked but still visible makes the contents of the Guides folder useful for positioning elements on the stage. Finally you need to add a new layer above the Guides folder. You are going to use the new layer to place the content for movies based on the template you're about to create. NOTE When you add the layer, it should appear above the Guides layer folder, not inside it. If you accidentally place the new layer inside the Guides layer, make sure you drag it out of the Guides layer before you continue. -
Choose File > Save as Template. When the Save as Template dialog box opens, set the Name to Zoo Template and Category to Flash TFS. Click Save.  You just made a template! You can use this template to create other Flash movies. Because you have a layer folder full of guide layers in the template, you can position elements in movies that use the template so they'll look good in the context of the ZooMX Web site. This template will be important in future exercises, as much of the remaining content for the site will be created in new movies. -
Close the movie. You're finished with the template, so you can close it. You're going to create a movie based on the template in the next exercise.  |