Appendix A -- Setting Up Virtual Directories in IIS
How you set up a virtual directory affects how you create and secure a Web application. While some Web applications that require security will require you to create custom security, a properly configured virtual directory can suffice in many cases.
To create a new virtual directory, open the Internet Services Manager and select Default Web Site, as shown in Figure A-1.
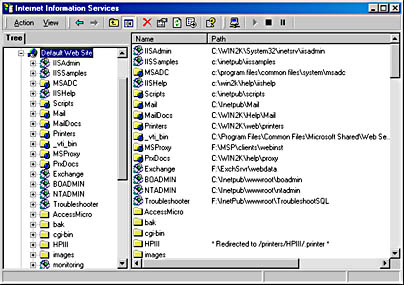
Figure A-1 The Internet Services Manager.
Right-click on Default Web Site, select New, and then select Virtual Directory. The Virtual Directory Creation Wizard will appear. In the screens that follow, the wizard will request, in turn , the following pieces of information:
- Site Alias. This is the name that will follow the site name in a URL. For example, if you enter NewSite on a server named PRO , intranet users can access the site using http://PRO/NewSite.
- Directory. This is the physical directory where the files used by this virtual directory will reside. The directory can be on the local drives or on a remote drive. Most often, the directory is a local drive under the \InetPub\wwwRoot directory.
- Access Permissions. These specify what can be done in the directory. Figure A-2 shows the possible permission settings. Note the distinction between running scripts and executing ISAPI applications or CGI programs. Failure to allow execute rights in a directory in which an ISAPI DLL is called will result in the failure of that call, possibly allowing the user to download the DLL ”something you likely don't want to allow. Write and Browse rights are virtually never given, except in a development environment.
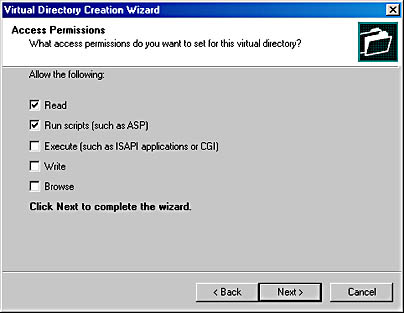
Figure A-2 Setting access permissions in the Virtual Directory Creation Wizard.
Once you've created the virtual directory, you can right-click on the directory in the Internet Services Manager and select Properties. This brings up a dialog like the one shown in Figure A-3. The Virtual Directory tab allows you to change some of the information requested by the wizard. The radio button group at the top of the tab controls where files for the virtual directory will reside. As the selected radio button changes, the balance of the controls in the dialog changes to reflect appropriate questions for the type of file source indicated.
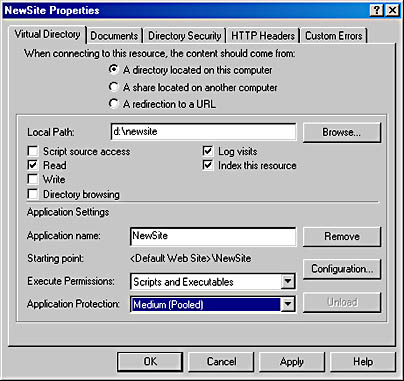
Figure A-3 Setting virtual directory properties.
One setting that the wizard does not allow you to set is Application Protection, shown at the bottom of the dialog in Figure A-3. Changing the Application Protection level allows you to control how your application will run, whether in the same process as other Web services (Low), pooled in a process with other Web applications (Medium ”the default), or in its own process (High). In a production environment, you should start an application at a high protection level and move it to less restrictive levels as the application proves itself trustworthy.
Clicking on the Configuration button shown in Figure A-3 brings up a dialog with three tabs. The first tab controls the DLL that individual file extensions are bound to. For example, requesting a file with an asp extension calls Asp.dll. The second tab allows you to control session state management and timeouts as well as the default language for ASP files. The third tab, shown in Figure A-4, allows you to control debugging of ASP applications. You can enable client-side script debugging, server-side script debugging, or both. You can also control the information returned to the client when an error occurs. The default error information is important while debugging the application, but you might want to hide error information when the application is in production.
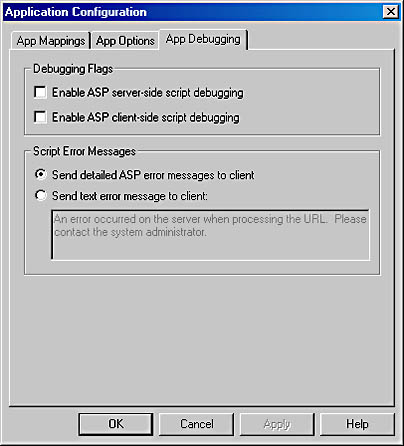
Figure A-4 The Application Configuration dialog.
Take a look back at the dialog in Figure A-3 .You'll notice several other tabs. Figure A-5 shows the Documents tab. From this screen, you can control the default form of the application. I commonly remove all but Default.asp, or whatever is the name of the first page I want visitors to see. Allowing multiple default documents makes the site vulnerable to the possibility of alternate paths to the application.
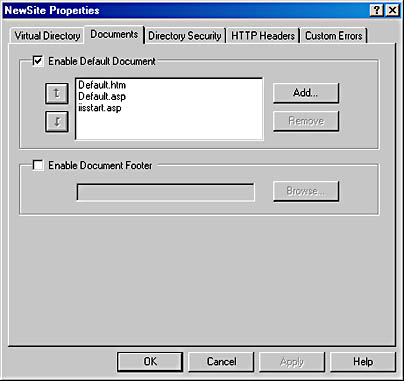
Figure A-5 The Documents tab of the NewSite Properties dialog.
The third tab of the NewSite Properties dialog from Figure A-3 is Directory Security, shown in Figure A-6. The first button on that tab brings up the dialog shown in Figure A-7.
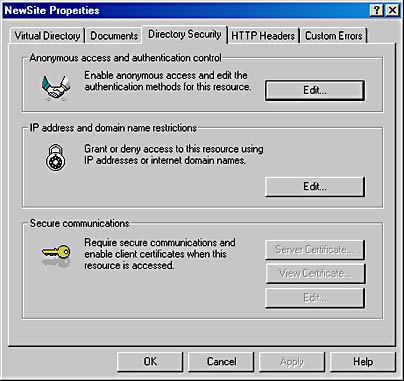
Figure A-6 The Directory Security tab of the NewSite Properties dialog.
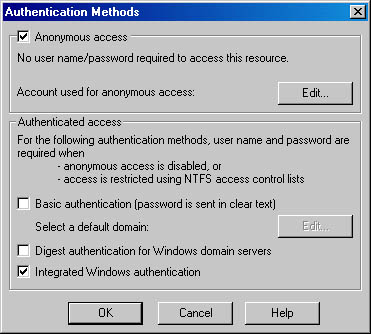
Figure A-7 The Authentication Methods dialog.
When checked, the first check box in Figure A-7 allows anonymous access to the Web site. In fact, allowing anonymous access really allows all visitors who are not otherwise authenticated to access the site using an account that can be set by clicking on the Edit button labeled Account Used for Anonymous Access. Commonly, this account is named IUSR_servername . For instance, on my server named Pro, the user name is IUSR_PRO .
The second group box shown in Figure A-7 allows you to control other authentication methods. Basic Authentication sends the user name and password in clear text. The user names and passwords are then authenticated against a domain's user database. Obviously, this option has security implications. It is not an optimal authentication method if your site requires high security or the domain that will be used to authenticate the password has other resources that require bulletproof security. The Edit button to the right of the Basic Authentication check box allows you to select the default domain to use when authenticating the user names and passwords.
Digest Authentication sends a hash value representing the password ”rather than the clear text password ”across the wire. This option is new to IIS 5. The final authentication method is Integrated Windows Authentication. When you select this option, a relatively secure method is used to establish the user's identity. This more secure method is only used if anonymous access is disabled or if Windows file security has been set on the requested file. In practice, this authentication method is perfectly appropriate for an intranet application, but less so for an Internet application.
Looking again to Figure A-3, you'll see that the fourth tab, HTTP Headers, allows you to enable content expiration, add custom HTTP headers, set content ratings, and control MIME file types. The last tab, Custom Errors, allows you to set a page to be displayed to the user when certain HTTP errors occur. Thus you can control what the user sees when HTTP errors occur while the user is accessing the page. Rather than displaying the default "Forbidden-Directory Access Denied" for a 403.14 error, you can display a page of your choice.
EAN: 2147483647
Pages: 91