23.5 Using SAM to Back Up and Restore Data
| |
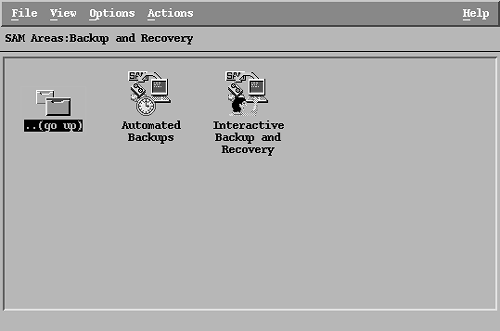
SAM can be used to create automated or interactive backup. When you go to the SAM Backup and Recovery area, a window like the one shown in Figure 23-1 appears.
Figure 23-1. SAM Backup and Recovery area.
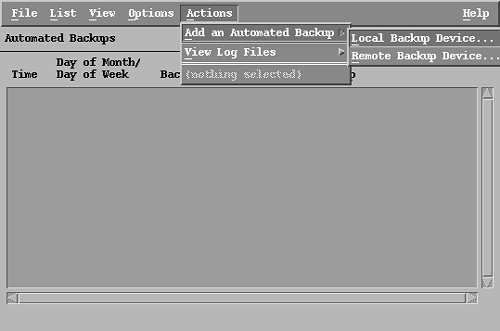
Click on the Automated Backups icon, and the window shown in Figure 23-2 will appear. Here an empty screen shows that there is no automated backup scheduled. To schedule a backup, first you need to add a device on which the backup will be created. This is done using the Actions menu as shown in the figure.
Figure 23-2. Adding a device for Automated Backup .
When you move to the window shown in Figure 23-3, you will put in the information for the backup device, backup scope, and backup time.
Figure 23-3. Option selection for Automated Backup .
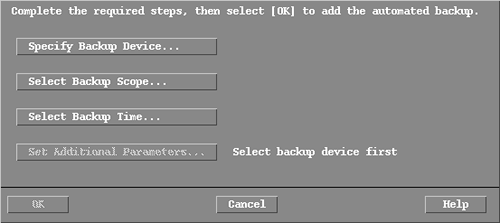
When you click on the Specify Backup Device button, SAM will search for valid devices and will show you a list of the devices, as shown in Figure 23-4.
Figure 23-4. List of detected backup devices.

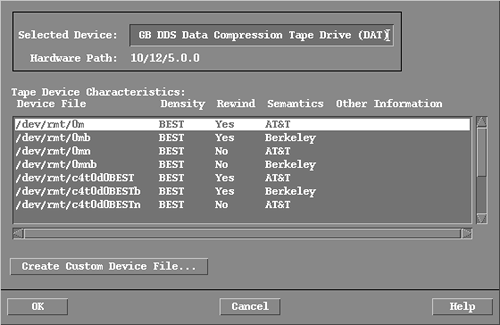
You have to select one of the displayed devices in Figure 23-4 and press the OK button. Since the device shown here is a tape backup device and you can use different tape characteristics, the window shown in Figure 23-5 will appear, where you can select a tape device for a particular set of characteristics. Let's select the 0m device for the tape drive.
Figure 23-5. Selecting tape device characteristics.
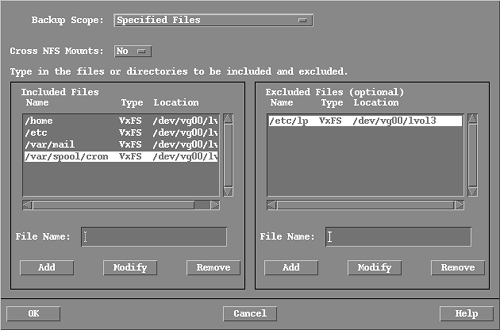
Now you will select Backup Scope . Here you select directories to be included or excluded from the backup as shown in Figure 23-6. This will help in creating a graph file for the backup.
Figure 23-6. Selection of directories to be included or excluded from the backup.
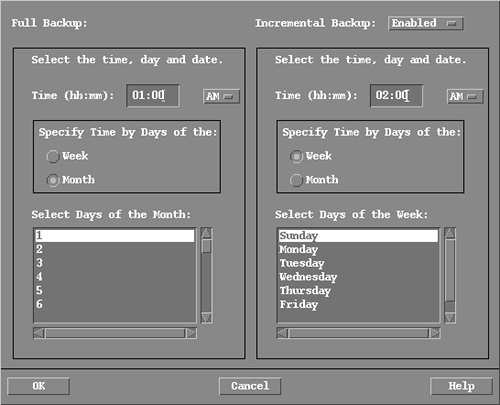
In the last step, you have to select the backup time, as shown in Figure 23-7.
Figure 23-7. Selection of the backup time.
After making these selections, you go back to the window shown in Figure 23-2, but now a list of scheduled backups appear in the window, as shown in Figure 23-8. The first line shows that a full backup will be performed on the first day of the month at 1 a.m. The second line shows that an incremental backup will be done on the days from Monday to Friday at 2 a.m.
Figure 23-8. List of scheduled backups.

During the scheduled backup time, a tape cartridge must be present in the tape drive. You can replace the tape cartridge during the daytime, and the backup may be unattended in the night.
| |
| |
| Top |
EAN: 2147483647
Pages: 390