| You have probably seen the preference files created by Mac OS X applications. They appear in a user's Library/Preferences folder and are named similar to this: com.apple.Dock.plist. This naming convention can be viewed in reverse, as Top level domain (TLD-com in this case), company (Apple), and application (Dock). When applications follow this method of saving their preferences, those applications may also be able to have their preferences managed similar to that of Mac OS X managed settings, like the Dock. To view the preference files, first click the Preferences icon in the Toolbar of Workgroup Manager and then click the Details tab adjacent to the Overview tab (Figure 13.74). When viewing a preference, such as the Dock, you can see that various parameters can be changed that are not present in the user interface of Workgroup Manager. Some keys are not even shown or listed, but can be added to further manage these items. For example, if you click the Dock item and click Edit, you are shown three sets of settings: one for Once, one for Always, and one called Often (Figure 13.75). Figure 13.74. Clicking the Details tab reveals managed preference property lists. 
Figure 13.75. Viewing the three main settings in a property list. 
Often Enough? The Often setting is a bit ambiguous. When keys are used in the Often setting, the logged-in user can change those settings, but when they log out and log back in, the settings are returned to the default and any modifications the user made to the preferences while they were initially logged in are not saved. |
Depending on your method of management, you will see several keys beneath one or more of these sets. In this example, you can see that the Always set has several parameters (Figure 13.76). Figure 13.76. Clicking the disclosure triangle displays all the keys for that setting. 
One aspect of these files is the ability to add keys that do not exist yet. In the case of the Dock, you can click New Key to add a key called pinning, where the String is start, middle (default for Mac OS X), or end. This places the Dock in the corner of your screen, depending on what side your Dock is on (Figure 13.77). Figure 13.77. Adding a key that did not previously exist. 
Another extremely useful aspect of preferences here is the Preference Manifest, which allows other applications to actually have their preferences managed. This has great potential, as application developers write their preferences to Apple's manifest requirements. One of the first applications to take advantage of using manifests is Safari. To add Safari Manifest to the Preference/Manifest list 1. | In Workgroup Manager, select the LDAP directory from the directory list.
| 2. | Click the Preference icon in the Toolbar, select the user, group, or computer list accounts that you wish to manage, and click the Details tab in the main Preferences window (Figure 13.78).
Figure 13.78. The Details tab is also where Preference Manifests can be viewed and edited. 
| 3. | Click Add, navigate to the /Applications folder, and select Safari.
Two additional items have been added to the manifest list (Figure 13.79).
Figure 13.79. Selecting a preference manifest from the list. 
| 4. | Select com.apple.Safari from the list and click Edit.
| 5. | Click the disclosure triangle next to the Often text and select a line of text (Figure 13.80).
Figure 13.80. Choosing an attribute in the Preference Manifest. 
There are several keys that will be set for multiple users.
| 6. | Click Done to close the window and return to the Details tab.
|
Using network views Often users get frustrated when clicking the Network icon because several domains and servers present themselves. In most cases, you want all users to search the entire network for the relevant servers. But what if users only go to a fraction of those servers? Waiting for the list to fully download and searching that entire server list can be tedious. It also may be unsecure as there may be some servers you do not wish others to see. With network views, you can decide what can be seen and how it can be seen. To add a network view 1. | In Workgroup Manager, click the Network icon in the Toolbar and click the New Network View icon (Figure 13.81).
Figure 13.81. Creating a new network view with Workgroup Manager. 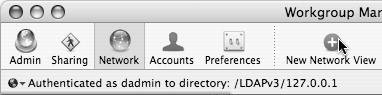
Several types of views can be set (Figure 13.82):
- Named view These are views with names you specify.
- Default view If a client is not part of any computer list but still bound to the server, this is the view they see.
- Public view Clients are not bound to the server but do have access to the directory.
Figure 13.82. The three options for creating a new network. 
You can have many Named views but only one Default view and one Public view.
| 2. | Click the Add button to add a Network Neighborhood, if desired (Figure 13.83).
Figure 13.83. Adding a new neighborhood to a named network view. 
| | | 3. | Give the neighborhood a name directly in the window (Figure 13.84) and then decide what type of computers to add to the view: specific and/or local.
Figure 13.84. Naming the new neighborhood. 
Local computers are on the local subnet or advertised via SMB (Figure 13.85).
Figure 13.85. Choosing local discovery services such as Bonjour and SLP. 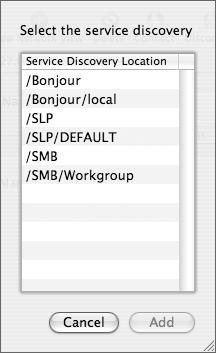
| 4. | To restrict a network view to a specific computer or computer list, click the network from your list and choose Show Computers from the plus button pull-down menu (Figure 13.86).
Figure 13.86. Selecting the Show Computers option... 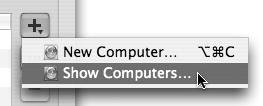
A window appears showing all of the previously added computers (Figure 13.87).
Figure 13.87. ...reveals a drawer that lists all computers within any computer lists. 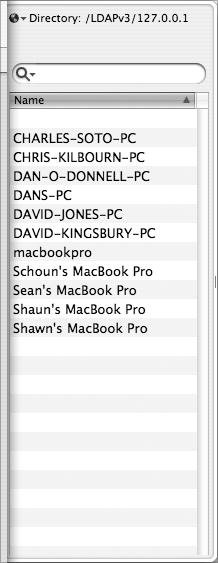
| | | 5. | Select the computers you want to see in this particular network view and drag them into the main window (Figure 13.88).
Figure 13.88. Dragging over selected computers into the main Settings window. 
| | | 6. | Decide how you want the network view to update and whether or not to replace or add to the existing network view; then click Save (Figure 13.89).
Figure 13.89. Choosing how the new network view will be displayed on the bound Mac OS X computers. 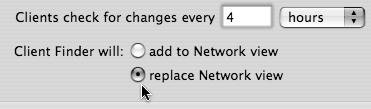
Test from a Mac OS X computer that is both bound, and then unbound, to the server (depending on the network view configuration).
|
 Tips Tips
When properly implemented, network views can have a tremendous impact in segregating servers based on logical roles, rather than alphabetical or cryptic names (Figure 13.90). Figure 13.90. Viewing the final list for a specific network view.  Keep in mind that when setting up network views, planning plays the most critical role. For views that show specific servers, it's best to ensure a written policy is in place before implementation goes to the final stage.
|