| A computer list, as its name implies, is a list of computers. You use computer lists to manage preferences based on computers. In Workgroup Manager, you can add any Mac OS X computer to the computer list based on its hardware Ethernet address or Media Access Control (MAC) address. You can have as many computer lists as you want, but a computer may be in only one list and each list is limited to 2,000 computers. Any computer outside of a list is automatically in the Guest Computers list. Windows computers have their own list (which is discussed in more detail in "Using Windows computer lists" later in this chapter). You can configure computer lists on any Mac OS X Server. However, computer lists are only functional on the server acting as an Open Directory master, because such servers are configured to share their directory information with other computers. Also, your client computers must be configured as clients of this directory service system. For more information about directory services and Open Directory, refer to Chapter 3, "Open Directory." To create a computer list 1. | Launch Workgroup Manager and authenticate as the administrator.
| 2. | Click the Accounts icon in the Toolbar and then click the Computer Lists tab, located with the other account type tabs (Figure 13.1).
Figure 13.1. Using Workgroup Manager to select the Accounts icon and the Computer accounts button. 
| 3. | Click the directory authentication icon and select the LDAP directory from the pop-up menu (Figure 13.2).
Figure 13.2. Select the LDAP directory database from this pop-up menu. 
| 4. | Click the New Computer List icon.
The information in the List window is populated with a new untitled computer list (Figure 13.3).
Figure 13.3. A newly created computer list shows up as Untitled_1. 
| | | 5. | Enter an appropriate computer list name (Figure 13.4).
Figure 13.4. The name of the computer list can be used to define physical or logical computer collections. 
| 6. | To add computers to this computer list, do either of the following:
- Click the plus button, and in the dialog that appears, enter the computer's Ethernet address, name, and optional comment in the appropriate fields (Figure 13.5). Click Save.
Figure 13.5. Manually adding a computer to the list. 
or
- Click the ellipsis button (Figure 13.3), and in the browse dialog that appears, select the computer you wish to add to the list (Figure 13.6). Click Connect.
Figure 13.6. Browsing all local computers that can be added to the list. 
| 7. | In Workgroup Manager, verify that the computers have been added to your computer list and click Save (Figure 13.7).
Figure 13.7. Verifying computers were indeed added to the list. 
|
Adding keywords Once you have added all your computers to their appropriate lists, you may wish to add comments or keywords to various computers, allowing you to search or filter based on keywords. To add comments and keywords to computer list accounts 1. | In Workgroup Manager, click the Accounts icon and the Computer Lists tab.
| 2. | Select a computer from the list and click the pencil icon (edit button) or simply double-click the account.
| 3. | In the dialog that appears, click the More Options triangle to display additional options (Figure 13.8).
Figure 13.8. Viewing additional options such as comments and keywords. 
| 4. | Add your comments in the Comment field (Figure 13.9).
Figure 13.9. Adding a comment to a computer list account. 
| 5. | Select the add/edit keyword button and choose Add Keyword from the pull-down menu (Figure 13.10).
Figure 13.10. Using the button to add keywords to a computer list account. 
| | | 6. | Add the keyword(s) in the keyword window and click OK (Figure 13.11).
Figure 13.11. Choosing keyword(s) to add from the list. 
| 7. | In the Computer List settings dialog, click OK to close the dialog (Figure 13.12).
Figure 13.12. Viewing the final computer list account information. 
| 8. | In the main Workgroup Manager window, click Save to save your changes.
You can change or modify the comments or keywords at any time by double-clicking the computer list account(s) you wish to edit.
|
 Tips Tips
You may wish to explore the restricted workgroup access settings, the cache settings, and the managed preference settings for your computer list. Refer to the remaining tasks in this chapter for more information. You can select more than one item in a list by holding down the Shift or Command key while making your selections. As is the case for user and group accounts, you can use account presets to automatically configure new computer lists. See Chapter 4, "User and Group Management," for more information.
Using the Guest Computers list Any Mac OS X computer that isn't defined in a custom computer list automatically uses the settings from the Guest Computers list. Generally, it's considered bad practice to allow any of your managed computers to fall into the Guest Computers list, because you should reserve this list for computers you don't want to manage. Take great care with your choices or you may inadvertently control computers you didn't intend to manage. To manage the Guest Computers list 1. | In Workgroup Manager, click the Accounts icon and the Computer Lists tab, and then select Guest Computers.
| 2. | Click the List tab, and choose one of the following options (Figure 13.13):
- Inherit preferences for Guest Computers, the default setting, allows guest computers to inherit their managed preferences from your Open Directory server.
- Define Guest Computer preferences here lets you configure specific managed preferences, restricted workgroup access settings, cache settings, and managed preference settings for guest computers (these options will be discussed in more detail in the "Managing Preferences" section, later in this chapter).
Figure 13.13. Locating guest computer options. 
|
Using the Windows Computers list One of the default computer lists automatically created by the server tools is the Windows Computers list. If your Mac OS X Server is configured as a Windows Primary Domain Controller (PDC), any Windows client supported by your server needs to be in this list. (See Chapter 5, "File Sharing," for more about configuring your Mac OS X Server as a PDC.) Windows computers can be in only one list. The first time a Windows client joins your server's PDC, it's automatically added to this list. You can also manually configure Windows computers in this list. To manage the Windows Computers list 1. | In Workgroup Manager, click the Accounts icon and the Computer Lists tab, and then select Windows Computers (Figure 13.14).
Figure 13.14. Managing Windows computer list accounts from Workgroup Manager. 
Because you can only manage the computer list in the Windows Computers window, the Access and Cache tabs are unavailable. Also, any Windows computer that has already joined your server's PDC is automatically added to this list.
| 2. | To manually add a Windows computer, click the Add button.
| | | 3. | In the dialog that appears (Figure 13.15), enter the Windows computer's NetBIOS name and an optional description in the appropriate fields. Click Save.
Figure 13.15. Manually adding Windows computer list accounts. 
| 4. | In Workgroup Manager, click Save.
|
Tips You can't modify the NetBIOS name of a Windows computer in the list. You can, however, modify the description by double-clicking the description you wish to edit and entering the new value. When you've finished, press Enter or click anywhere else. To delete a computer from the list, select it from the Windows Computers list and then click the Delete button. Don't delete the entire Windows Computers list! Windows uses NetBIOS names to identify client computers. These names are typically in all uppercase letters and limited to 25 characters. You can try to apply managed preference settings for these Windows computers, but they will ignore your settings. Windows is so different from Mac OS X that Workgroup Manager settings don't apply to Windows computers.
Restricting login access By default, any user in any group can log in to any client computer that is connected to your directory system. You can restrict user logins to your computers by combining computer lists with workgroups. In Workgroup Manager, you restrict user login to certain workgroups of users for a computer list. In other words, you assign users to workgroups, and then you assign workgroups to computer lists. Obviously, in order for this approach to work, you must have already configured workgroups and computer lists. See Chapter 4 for more information. To restrict login access 1. | In Workgroup Manager, click the Accounts icon and the Computer Lists tab, and then select a computer list that you created (Figure 13.16).
Figure 13.16. Selecting a computer list using Workgroup Manager. 
| 2. | Click the Access tab to view this computer list's workgroup access settings (Figure 13.17).
Figure 13.17. Viewing access control options when dealing with a computer list. 
By default, any user belonging to any workgroup can log in to the computers in this list.
| 3. | Select the "Restrict to groups below" radio button and click the Add button.
A window appears in which you can select the workgroups you wish to assign to this computer list (Figure 13.18).
Figure 13.18. Viewing the Group drawer from the Computer List Accounts tab within Workgroup Manager. 
| 4. | Click the directory authentication icon at the top of the window and select the appropriate directory database from the pop-up menu (Figure 13.19).
Figure 13.19. Select the LDAP directory database from this pop-up menu. 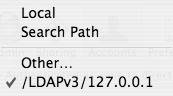
The directory you are currently managing will be the default selection and, most likely, will be the one you want to use.
| | | 5. | Drag workgroup(s) from the window to the restricted groups list (Figure 13.20).
Figure 13.20. Dragging a group from the group list into the Restricted Groups window to restrict that group to using the selected computer list. 
Here, you are restricting the computer list called Marketing to a workgroup called Marketing. It's a good idea to use the same name when you intend to restrict access.
| 6. | To permit access to these computers, select one or all of the following options at the bottom of the Access tab:
- Click the "Allow users with local-only accounts" check box to let users with local accounts log in.
- Click the "Local-only accounts pick workgroups from the above list" check box to let local accounts pick from the workgroup list.
- Click the "Allow computer administrators to disable management" check box to let individual administrators disable management for their workgroups.
or
To make restrictions as tough as possible, leave all of these options unchecked.
| 7. | When you've finished making changes, click Save.
Now, when users attempt to log in, their accounts will be compared to the workgroups assigned to the computer list in which the computer resides. If users aren't part of a workgroup allowed to use this computer, then they won't be allowed to log in. If they belong to one of the allowed workgroups, they will continue to log in as normal. However, if users belong to more than one workgroup, they will be required to specify which workgroup they want to use for this session.
|
Tip
Configuring computer caches To facilitate computers that may occasionally disconnect from your directory server, like laptops, and to improve directory service performance, managed preference settings are cached locally on client computers. In Workgroup Manager, you can configure how often this cache is automatically updated to the client if any changes are made on the parent directory server. Otherwise, the next time a user logs in to an account, the new account settings will be read, and the local cache file will be updated. To configure computer cache settings 1. | In Workgroup Manager, click the Accounts icon and the Computer Lists tab, and then select a computer list that you created.
| 2. | Click the Cache tab to view this computer list's cache settings (Figure 13.21).
Figure 13.21. Viewing the Cache tab of a chosen computer list. 
| 3. | To change the cache intervals, enter a different value in the appropriate field, and select a unit of time from the pop-up menu (Figure 13.22).
Figure 13.22. Making changes to the Cache tab for a chosen computer list. 
| 4. | To immediately update the cache files on the computers in this list, click Update Cache.
| 5. | In Workgroup Manager, click Save.
The cache files will be automatically updated based on the schedule you set or whenever a user logs in.
|
Tip
|