| The first thing you'll need to do when setting up the QTSS is make a few key decisions. These decisions can always be changed later, but you should always prepare for growth. A Mac OS X Server running other services like DHCP and file sharing and acting as an Open Directory Master isn't the best possible solution for a full-blown QTSS setup. When you're seriously considering multiple connections and high-quality video, you must decide if a separate Xserve running Mac OS X Server with at least 1 GB of RAM is within your budget. Less busy QTSS servers can be run alongside two or three other services with only 512 MB of RAM installed. Taking a tour of the QTSS setup is easy; you can do so using the Server Admin tool or even a Web browser. After you've launched Server Admin and authenticated as an administrator, choose QuickTime Streaming Server from the Computers & Services list. From there, you have access to the following settings under the Settings tab: - The General tab contains the settings for the streaming media directory, the maximum number of client connections, and the maximum network throughput. When preparing to deploy a QTSS server, make sure the maximum throughput setting is set no higher than the actual network connection speed of your server. The default settings are too high for all but streaming to clients on a local area network (LAN) (Figure 12.3).
Figure 12.3. Click the General tab under the Settings tab of the QuickTime Streaming Service using the Server Admin tool. 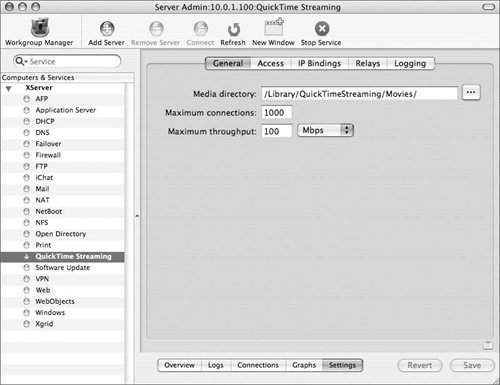
- The Access tab lets you set a password to restrict who can use your server to broadcast MP3 streams (via the bundled Icecast server) or MPEG-4/QuickTime streams. This tab also lets you enable home directory streaming that provides users with accounts on the server the ability to stream files from within their home folder (/Users/<username>/Sites/Streaming). Here you can also enable Web-based administration, allowing you control QTSS from a remote Web browser (Figure 12.4).
Figure 12.4. The Access tab under the Settings tab of the QuickTime Streaming Service shows the password home directory streaming options. 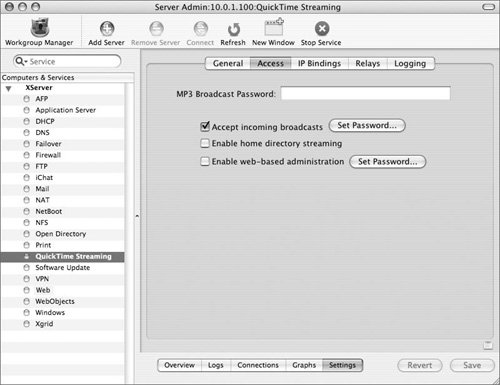
- The IP Bindings tab provides control over which of your server's IP addresses will be used to provide streaming services. Enabling port 80 streaming allows clients connecting from behind corporate firewalls to have the best opportunity to receive your stream (Figure 12.5).
Figure 12.5. The IP Bindings tab under the Settings tab of the QuickTime Streaming Service permits the binding of the QTSS to more than one IP address. 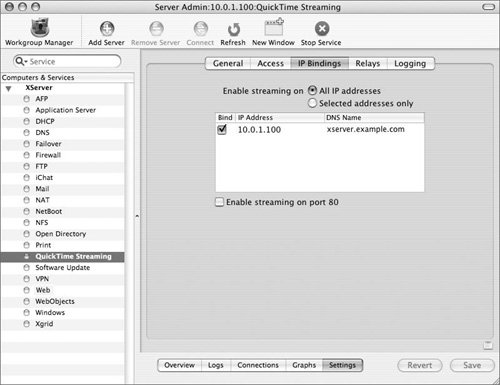
Keep in mind that using port 80 to stream will interfere with any existing Web sites you may be hosting.
- The Relays tab lets you create, configure, and delete relays. Relays allow streaming servers to pass a stream from one to another in order to assist with the propagation of that stream. Relays are often used to support streams with a great number of client connections, or to propagate a stream to a remote location that has a limited network connection (Figure 12.6).
Figure 12.6. The Relays tab shows the currently configured relays. 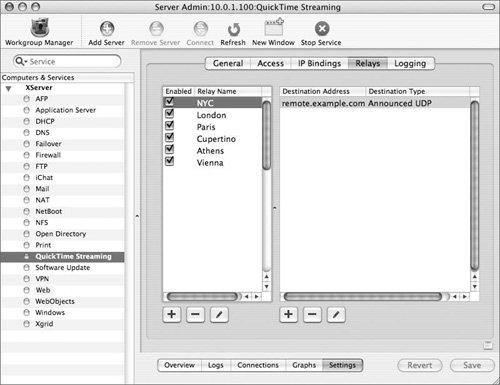
- The Logging tab lets you enable both the Access and Error logs. It is recommended you have Access and Error logs enabled (Figure 12.7).
Figure 12.7. Error and access logging are enabled on the Logging tab. 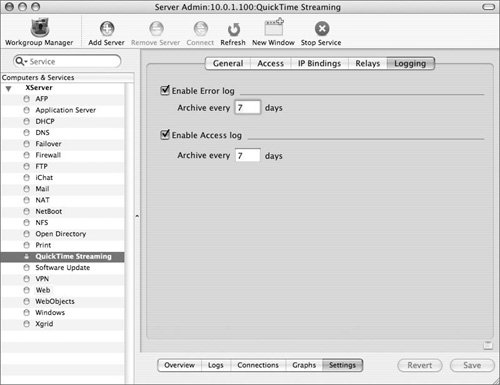
Once you understand the settings, you can perform the proper configuration to enable the QTSS. To enable a QTSS 1. | Launch the Server Admin tool from within /Applications/Server, and authenticate as the administrator (Figure 12.8).
Figure 12.8. Launch the Server Admin tool, and authenticate. 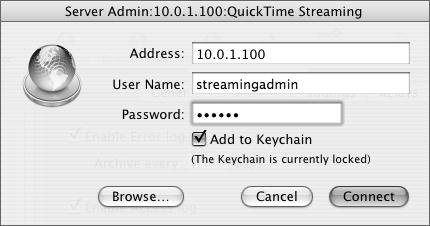
| | | 2. | Select the QuickTime Streaming service from the Computers & Services list.
Notice the five tabs at the bottom of the screen (Figure 12.9):
- Overview shows whether the service is running, the current throughput, the current number of connections, and the last time the service was started.
- Logs displays both the Error and Access logs, assisting you in monitoring your QTSS server (Figure 12.10).
- Connections shows, in list form, currently connected users as well as the status of any active relays (Figure 12.11).
- Graphs indicates both the throughput and the number of active users in a chart spanning up to the last seven days (Figure 12.12).
- Settings displays five more tabs, discussed earlier (Figure 12.13).
Figure 12.9. The QuickTime Streaming service Overview tab shows the status of the QTSS. 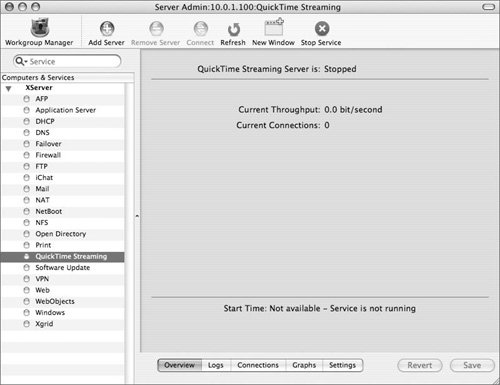
Figure 12.10. The QuickTime Streaming Service Logs tab shows the Access and Error logs. 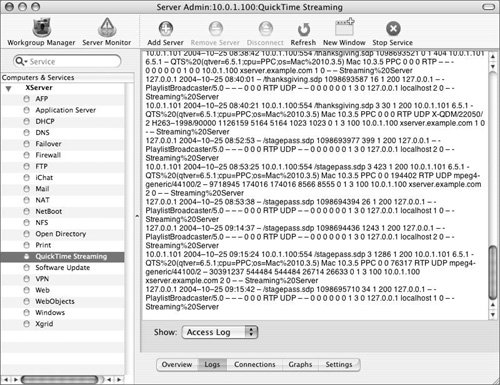
Figure 12.11. Choose the type of connections to be listed using the Connections tab. 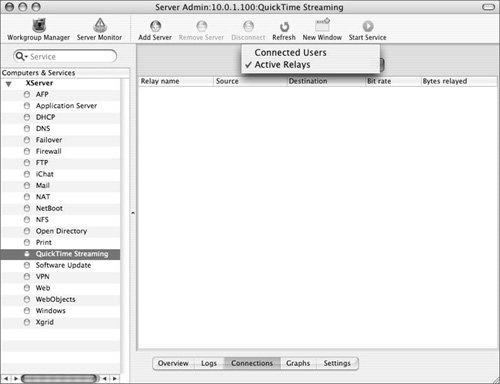
Figure 12.12. Choose the type of graph to be viewed using the Graphs tab. 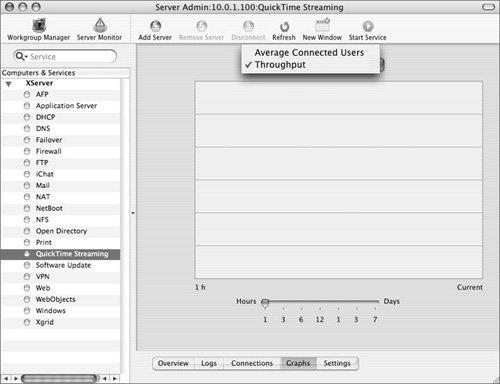
Figure 12.13. The General tab under the Settings tab shows the path to the movies and the settings for maximum number of client connections and maximum server throughput. 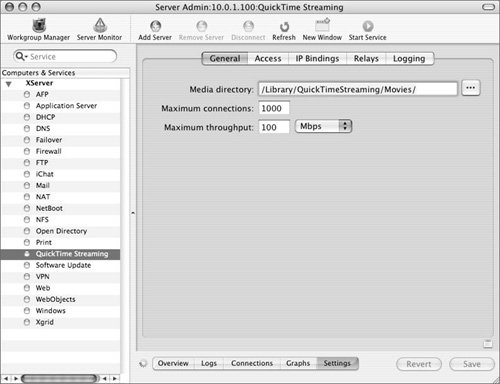
| 3. | Select the Settings tab and then the General tab.
Be sure the movies to be streamed are in the correct directory listed in the Media Directory field (Figure 12.13).
| | | 4. | Select the IP Bindings tab, and be sure streaming is permitted on the IP address you want (Figure 12.14).
Figure 12.14. Check the IP bindings to be sure the correct IP address is being used for streaming. 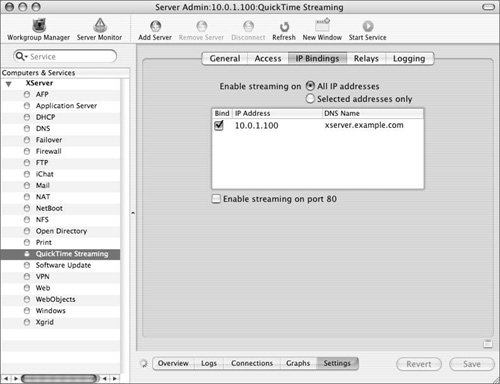
| 5. | Select the Logging tab to enable both the Access and Error logs for later trouble-shooting and analysis (Figure 12.15).
Figure 12.15. Enable logging to help troubleshoot and monitor your streaming. 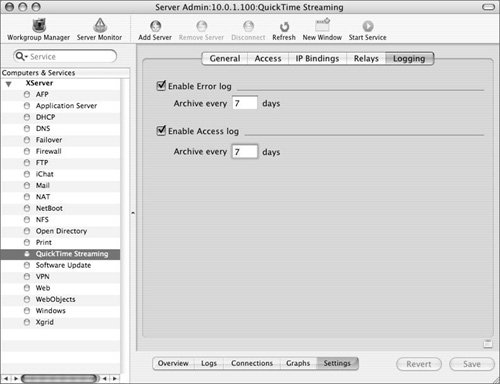
| 6. | Click Start Service in the Toolbar to start the QuickTime Streaming Server service (Figure 12.16).
Figure 12.16. Click the Overview tab to view the QTSS's status. 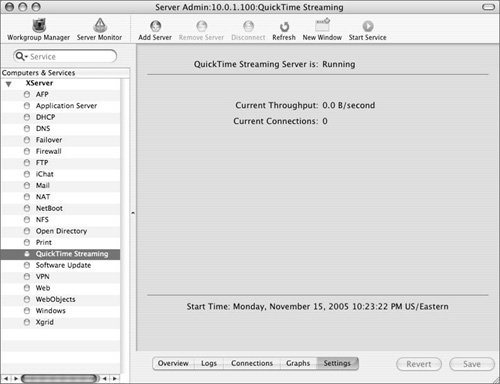
| 7. | View your QTSS's status by clicking the Overview tab.
|
 Tips Tips
There are two ways to do QTSS Administration: either through Server Admin or by using Web-based administration. It is wise to be familiar with both methods for administering your streaming server. QTSS provides some sample media files in order to let you test your new server. They are located in the default media directory located at /Library/QuickTimeStreaming/Movies.
Testing the streaming server Once your QTSS service is running, you need to make sure it is functioning properly. To test your QTSS server 1. | Open the QuickTime Player application in the Applications directory.
| 2. | Select File > Open URL and enter a URL to a sample file on your server (Figure 12.17).
Figure 12.17. In the dialog, enter the URL rtsp://<hostname>/sample_300kbit.mov, where hostname is the hostname or IP address of your server. 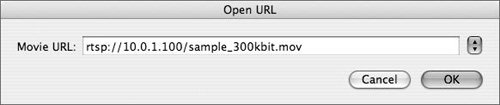
| 3. | View your stream in the QuickTime Player window (Figure 12.18).
Figure 12.18. The sample video should appear in a new player window. 
|
|