| Devices like computers, printers, routers, and servers all communicate via IP addresses. But where do these addresses come from? There are routable addresses and nonroutable addresses, or public and private addresses. Chapter 3, "Open Directory," discusses these address ranges. You now need to decide how you can best manage computers connected to your network. Perhaps they will obtain an address from your server; if that's the case, then understanding how to setup DHCP services is an essential piece of Mac OS X Server. Prior to turning on your DHCP service, you need to ask anyone else on your network if their computer is acting as the DHCP server. Having two DHCP servers on the same network can wreak havoc on the network and should be avoided at all costs. You can also quickly change the setting of any client computer to DHCP and see if it obtains anything but a 169.254.x.x address. Getting a 169.254.x.x address is called a self-assigned address, indicating that there is no DHCP server on the local network. Passing out information via DHCP Assuming you've done your homework and you wish your Mac OS X Server to be a DHCP server for your network, decide what addresses you want to pass out to the client computers. You should also decide whether passing out extra information with the address is necessary for your network. For example, Mac OS X DHCP server can pass out the following information to a client: IP address Subnet mask Router address DNS addresses Search domains LDAP information Windows WINS information
All this information is transferred from the server to the client when the client asks for an address. DHCP basics Before you begin to dole out addresses, let's examine what takes place when a DHCP server is on the network: The client machine starts up and searches for a DHCP server. The DHCP server responds to the client and offers the client an IP address and other information. The client formally requests the information from the server, and the server sends it down to the client. The client asks anything else (other computers, printers) on the network if the address offered is already taken. If no one responds that they have the IP address in question, the client then proceeds to commit the information to memory. The client is leasing the address from the server.
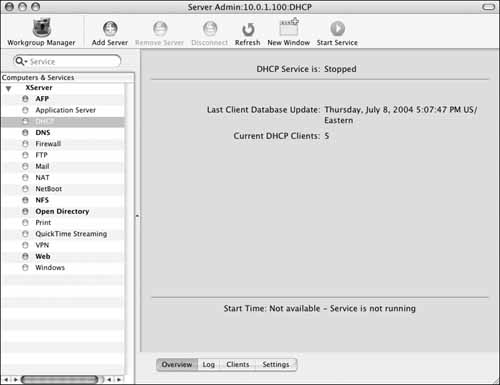
This process takes place every so often during the day. If you tell your server to give out addresses for eight hours, then your client will ask the server if it can renew the address it has at four hours, or half the lease time. Having leases that run for six months can be useful when you have only a handful of computers; but if you have laptops that come and go, and people hopping on and off their computers all day, a better idea for the lease time is to set it for 16 hours. This way, during a standard eight-hour day, you're assured the client computers will ask for a renewal, thus potentially freeing up addresses for others to use the following day. This feature is examined in the following task, "To change DHCP service settings." Again, before you start the DHCP service on your Mac OS X Server, be sure no one else is providing DHCP services on your network. To change DHCP service settings: 1. | Launch the Server Admin tool from /Applications/Server, and authenticate as the administrator (Figure 6.26).

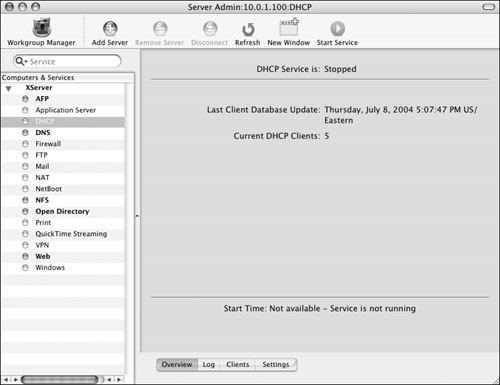
| 2. | Choose the DHCP service from the Computers & Services list (Figure 6.27).
Notice the four tabs at the bottom of the window:
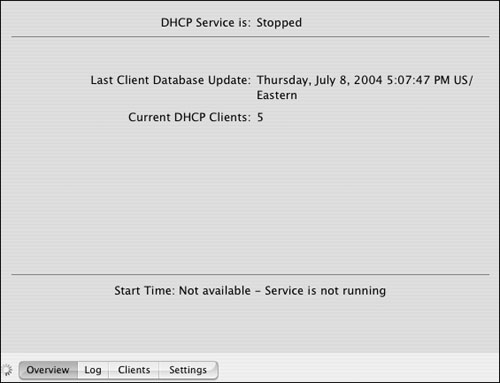
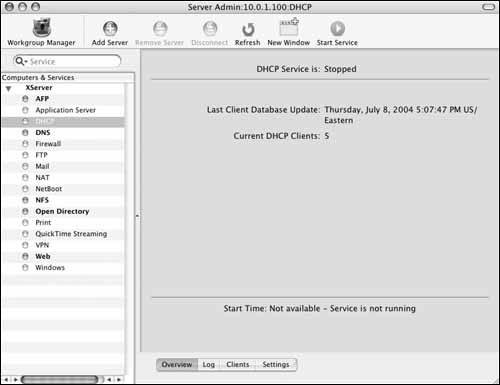
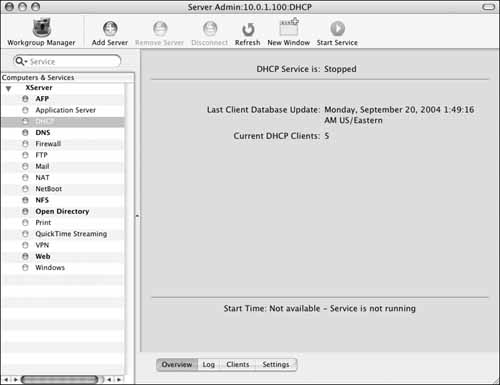
Overview shows whether the service is running and the current number of leases (Figure 6.28).
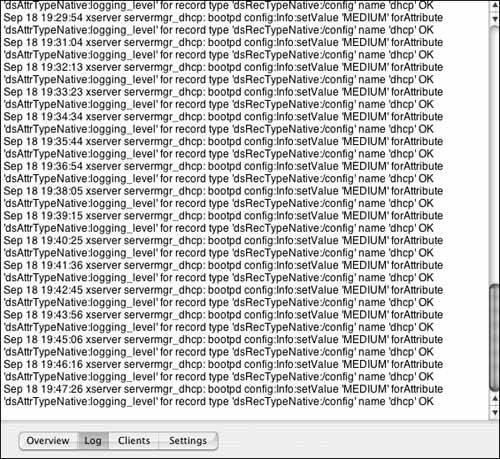
Log displays the current log file for the DHCP service (Figur 6.29).
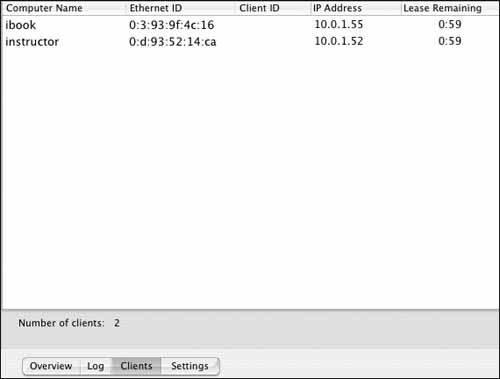
Clients shows all the client machines that are using an address given to them by the DHCP service (Figure 6.30).
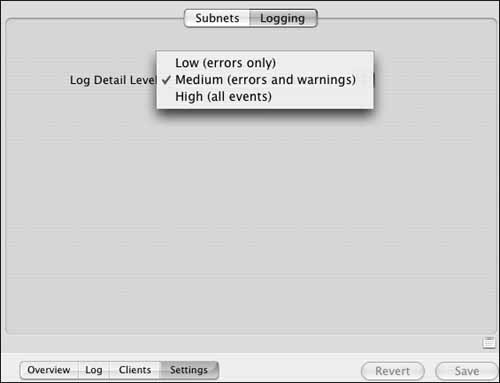
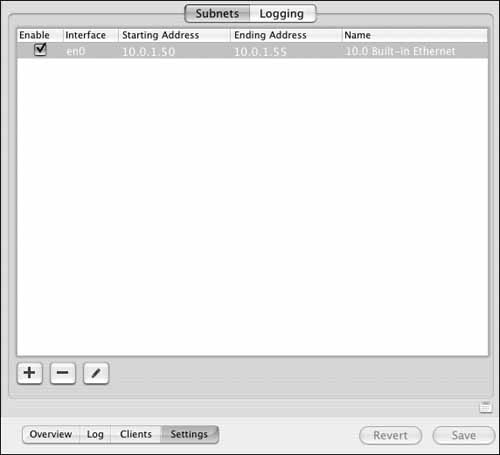
Settings shows how many networks (called subnets) you're serving addresses to and what network interface you're using for each address range. This tab also lets you set the level of logging desired (Figures 6.31 and 6.32).
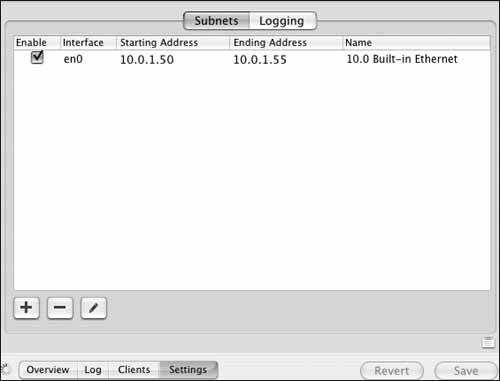
| 3. | Select the Settings tab, select the Subnets tab, double-click the General tab or select the subnet you wish to edit, and click the Edit icon  . .
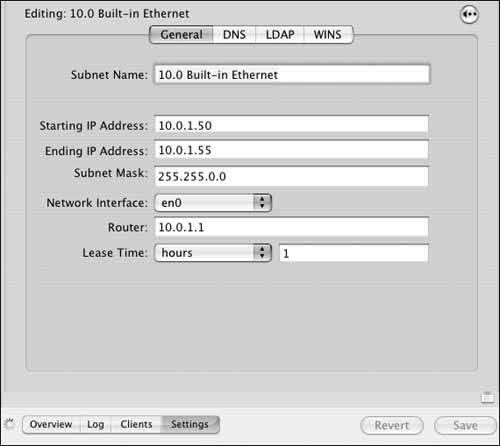
The Editing Subnet window appears (Figure 6.33). Click the return arrow  to return to the subnet window. For first-time setup, you can use the default subnet shown earlier in Figure 6.31. to return to the subnet window. For first-time setup, you can use the default subnet shown earlier in Figure 6.31.
To create a new subnet, click the Add button  . .
Clicking the Delete button  with a subnet selected deletes that subnet. with a subnet selected deletes that subnet.
| 4. | Enter the information necessary in the General window (Table 6.1).
Table 6.1. General DHCP Service ParametersNAME | FUNCTION |
|---|
Subnet Name | Name to identify the network | Starting IP Address | IP address to begin the range | Ending IP Address | IP address that ends the range | Subnet Mask | Mask that allows the network to be segmented | Network Interface | Built-in Ethernet 1 or 2, or any other interface card recognized by Mac OS X Server | Router | IP address of the router that clients will receive | Lease Time | Time in months, weeks, days, or hours until the lease for that address expires |
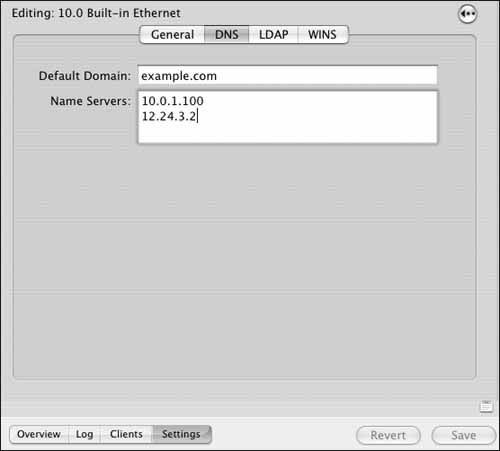
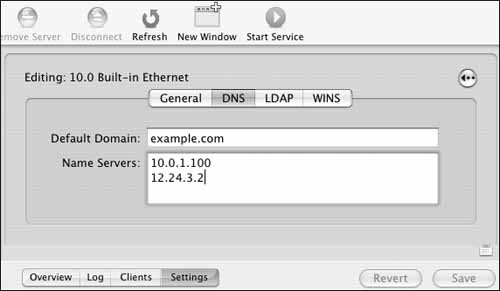
| 5. | Click the DNS tab, and enter the appropriate DNS information you want the client computers to receive.
You may enter more than one DNS and search domain (Figure 6.34).
| 6. | Save your changes by clicking the Save button  . .
| 7. | Start the DHCP service by clicking the Start Service arrow button  (Figure 6.35). (Figure 6.35).
|
 Tip Tip
You can set up two DHCP subnets on the same interface. You might do this if you already have a printer or a server within the range of addresses you wish to use. For example, if you have a server or a printer with an IP address of 192.168.1.50, you can have two DHCP rangesthe first going from 192.168.1.2 to 192.168.1.49 and the second range going from 192.168.1.51 to 192.168.1.200, thereby skipping the address users already know.
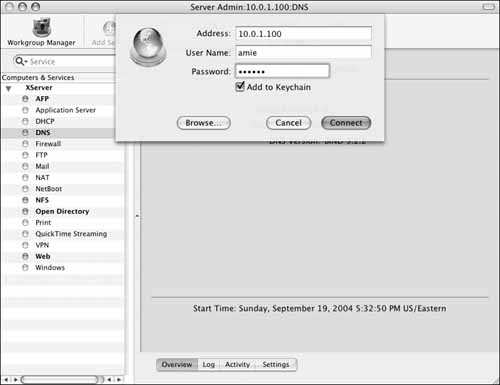
DHCP and LDAP You've just learned how to push down IP address information that allows users to connect to your network. But what if your needs are bigger? What if you have home directories on your server, and you want the client machines to automatically find them? As discussed in Chapter 3, you can make a Mac OS X Server an LDAP server; one function of that is allowing home folders to exist on the server. If you have more than 200 client machines, going to each machine to point it to the server is tedious and time consuming. A better way is to allow the DHCP server to push down the information to each client along with the IP address information. To set up the DHCP service to propagate LDAP information: 1. | Launch the Server Admin tool from /Applications/Server, and authenticate as the administrator (Figure 6.36).

| 2. | Choose the DHCP service from the Computers & Services list (Figure 6.37).
| 3. | Click the Settings tab, and double-click the subnet you want to edit (Figure 6.38).
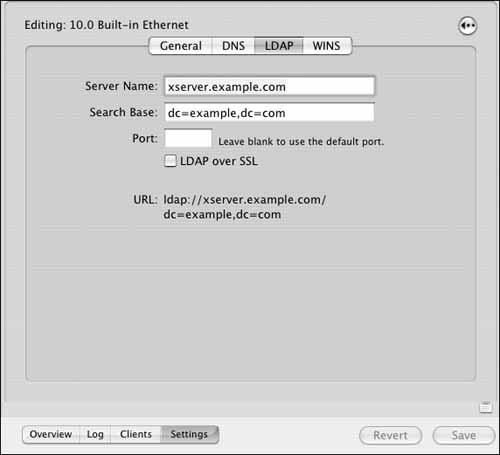
Click the LDAP tab.
| 4. | Enter the appropriate information in the LDAP entries (Figure 6.39):
- Server Name is the fully qualified domain name of your server, such as xserver.example.com (this entry is different than those of DNS and should not have a trailing dot at the end of the name).
- Search Base is the LDAP search base of your server. In most cases, this looks something like dc=example,dc=com, which parses your domain name into standard LDAP structure. You can determine what information to enter here by reading the task "To create a master directory" in Chapter 3.
- Choose another port for the information to go over if you like.
- Choose to secure your connection over Secure Socket Layer (discussed in Chapter 10, "Security").
| 5. | Save the changes by clicking the Save button .
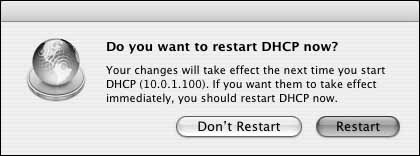
If the DHCP service is already running, you'll be prompted to restart the service. Doing so implements your changes (Figure 6.40).
|
Tip
To set up the client to search for DHCP-supplied LDAP information: 1. | On the client machine(s), open the Directory Access application in /Applications/Utilities, authenticate by clicking the lock  at lower left, and click the Services tab (Figure 6.41). at lower left, and click the Services tab (Figure 6.41).
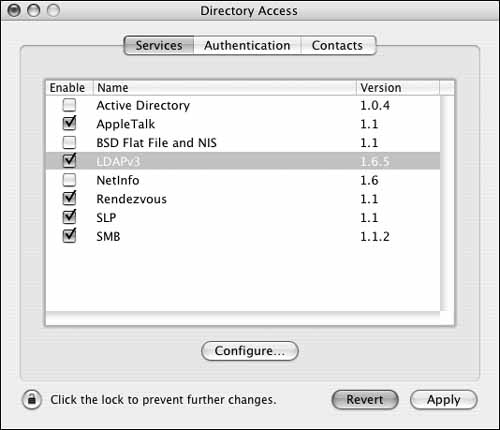
| 2. | Ensure that the LDAP plug-in is selected.
Double-click the LDAP plug-in, and make sure the Use DHCP-supplied LDAP Server check box is selected (Figure 6.42).

Click the OK button.
| 3. | Click the Authentication tab, and ensure that the path which Open Directory searches for authentication information is set to Automatic (Figure 6.43).
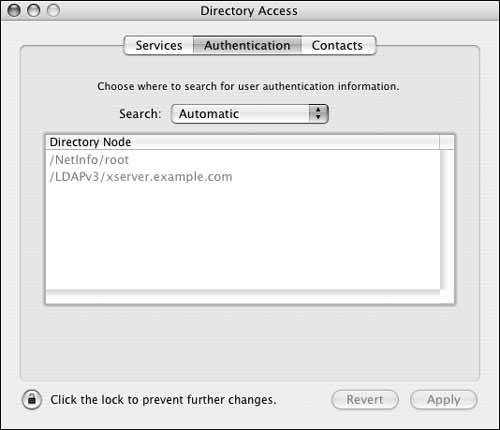
If your client machine is getting the DHCP LDAP information, you should see your server's information in the authentication list. If you don't, be sure your DHCP server is sending down the appropriate information.
Your client machine is now ready to look for LDAP information.
|
Tip One other set of data can be pushed down to a client machine: WINS data. Windows Internet Naming Service (WINS) is used by Windows computers to locate one another on a network across subnets. If you have Windows clients obtaining an address from a Mac OS X Server, you configure the DHCP server to push down the WINS information.
To push WINS information via DCHP: 1. | Launch the Server Admin tool from /Applications/Server, and authenticate as the administrator (Figure 6.44).

| 2. | Choose the DHCP service from the Computers & Services list (Figure 6.45).
| 3. | Click the Settings tab, double-click the subnet you want to edit, and then click the WINS tab (Figure 6.46).

| 4. | Enter the appropriate information given to you by your Windows administrator.
You have the options of adding both primary and secondary WINS server addresses as well as pushing down NetBIOS information.
| 5. | Save the changes by clicking the Save button .
If the DHCP service is already running, you're prompted to restart the service (Figure 6.47). Doing so implements your changes.

|
Tip
| You can always check your server to ensure you're pushing down the appropriate information, but how do you tell from the client side if the information makes it down to the client? When you're utilizing any DHCP server, you can check what information is being handed down to the client by using a command-line tool called ipconfig (Figure 6.48). 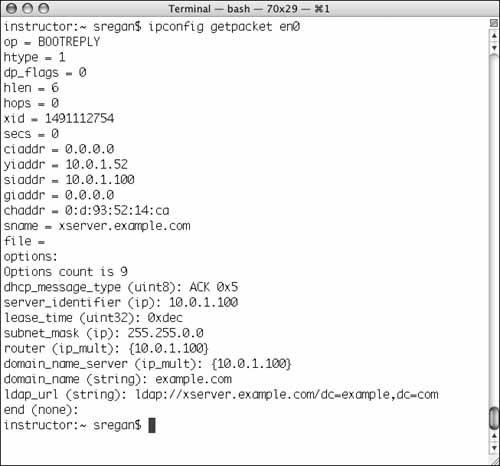
You use the command ipconfig getpacket enx (where x is the number of your Ethernet connectionen0, en1, en2, and so on) to see what information your DHCP server is sending down to your client. To do so, open the Terminal, type the command, and press Return. You'll see all the information your DHCP server is sending you. Using en0 tells the command to look at your built-in Ethernet connection. Use en1 if you want to look at the DHCP information that's gathered from a computer with an airport card. |
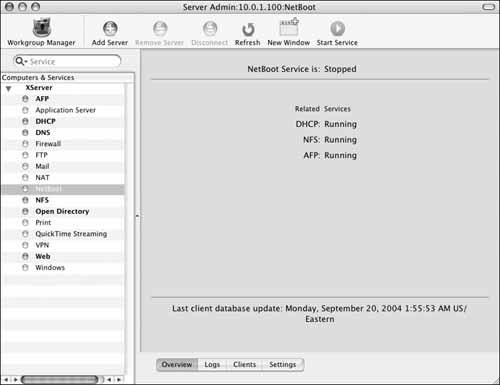
Restricting DHCP There may be a time when you wish to specify which computers receive an IP address. For example, you may have two Mac OS X Servers serving up DHCP to many clients. Perhaps half of these Macs are supposed to obtain their IP address from one server, and the other half will obtain an IP address from the other server. You can restrict which computers receive an IP address from a Mac OS X Server DHCP service by using the NetBoot service interface. To restrict IP addresses to specific computers: 1. | Launch the Server Admin tool from /Applications/Server, and authenticate as the administrator (Figure 6.49).
| 2. | Choose the NetBoot service from the Computers & Services list (Figure 6.50).
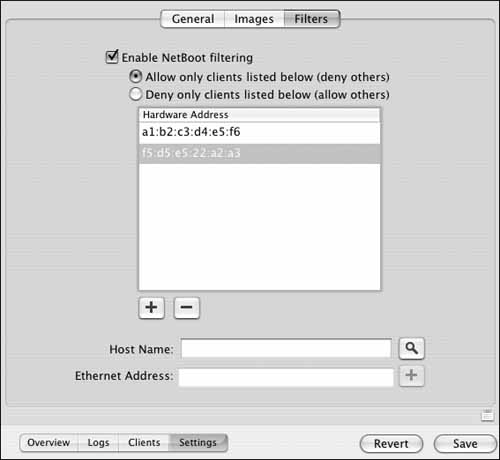
| 3. | Choose the Settings tab and then the Filters tab to get to the NetBoot filter.
Select the "Enable NetBoot filtering" check box (Figure 6.51).
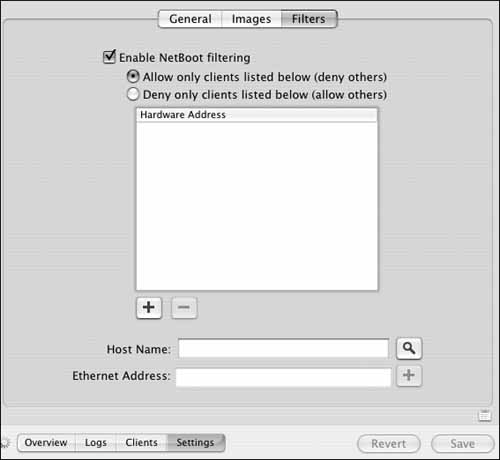
| 4. | Click the Add button , and add the hardware address of the built-in Ethernet interface of the machines you want to allow or deny an address from the DHCP service (Figure 6.52).
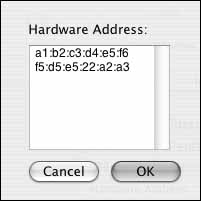
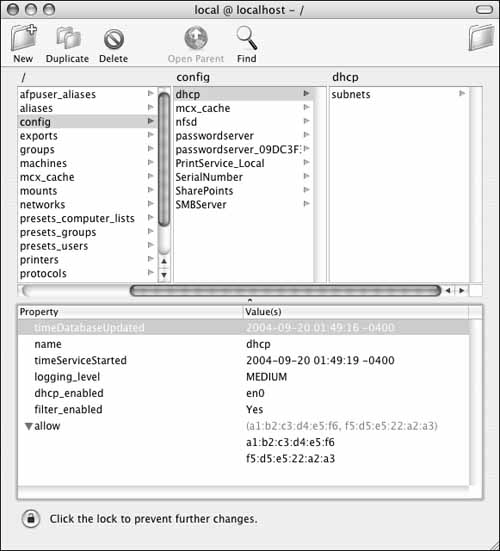
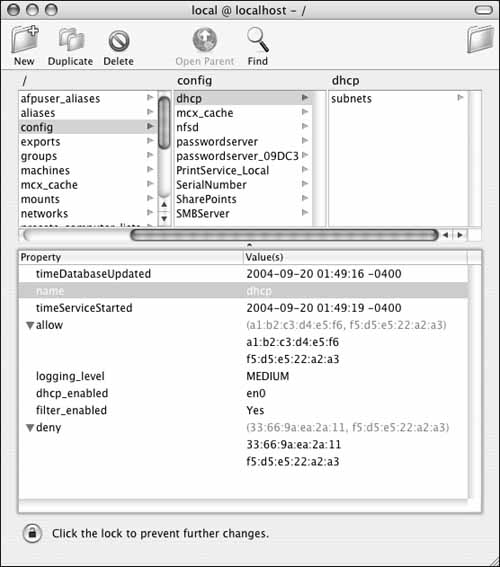
You can only allow or deny all addresses in the list here. It's possible to edit the NetInfo database config record directly to see a list of all Allows and a list of all Denys (Figures 6.53 and 6.54).
| 5. | Click Save to save the changes (Figure 6.55).
It isn't necessary to enable the NetBoot service in order for the filter to function.
| 6. | Choose the previously configured DHCP service from the Computers & Services list, and click the Start Service button to start the DHCP service (Figure 6.56).
Your DHCP service will now only allow addresses (or deny addresses) to the computers in your filter list, although you can't implement this if the DHCP service is already running. You must restart the DHCP service and have the client machines all request a new address; this is easily done by restarting the client machines.
|
Tips The NetBoot filter is really a DHCP filter. It shows up here instead of the DHCP service configuration because many users of NetBoot want to restrict who obtains an IP address from the server. This example uses NetInfo Manager to view and edit data. You can also use Workgroup Manager to do the same thing.
|