Developing Web Applications Using PHP
| < Day Day Up > |
Programming CGI Applications in PerlPerl, which you were introduced to in Chapter 18, "Developing Applications and Widgets Using Scripting Languages," provides a quick and easy way to start developing your own web applications. Although not as elegant as PHP, Perl is an excellent starting point for learning about how web applications work. It is also a nearly universal cross-platform language with thousands of freely downloadable applications.
This section assumes that you either know a reasonable amount of Perl basics, or have diligently read the introduction to Perl scripts in Chapter 18. Enabling CGI Support in ApacheFor many web applications, you can create your CGIs in the Tiger folder /Library/WebServer/CGI-Executables. This location is already configured for CGI execution and can be accessed through the URL http://localhost/cgi-bin/<your cgi name>. CGI-Executables, however, is a special directory that can only contain CGI files. The examples in this chapter use a CGI to display images in the same directory as the CGI and will fail when run from this location. In addition, CGI-Executables is a serverwide repository for CGI scripts. Because this is a learning exercise, it is more appropriate to use your own personal site folder ~/Sites for development. Because CGIs allow your web server to consume additional process resources and, when poorly written, can possibly lead to security holes, you must explicitly enable CGI support for your personal Sites before any web application can be run by Apache. To do this, first edit the /etc/httpd/httpd.conf file and search for the lines: # To use CGI scripts: # #AddHandler cgi-script .cgi Uncomment the AddHandler directive by removing the #. This tells Apache that files ending in .cgi should be treated as CGI applications. AddHandler cgi-script .cgi Next, you must also enable ExecCGI Option for the directory you are programming in. In the case of your personal Sites folder, just open the file /etc/httpd/users/<your username>.conf and edit to read as follows, replacing your username as appropriate: <Directory "/Users/<your username>/Sites/"> Options Indexes MultiViews ExecCGI AllowOverride None Order allow,deny Allow from all </Directory> Finally, save the file restart Apache with sudo /usr/sbin/apachectl restart or the System Preference pane. You're ready to go. Outputting HTTP HeadersLet's start with the most basic CGI example possible: Hello World. Your initial reaction is probably to create a Perl script (helloworld.cgi) in your Sites directory along the lines of #!/usr/bin/perl print "Hello World! I have a Mac, shouldn't you?"; exit; After enabling execution (chmod +x helloworld.cgi), TRy running the application from the command line (./helloworld.cgi) and then by accessing its URL through a web browser (http://localhost/~<your username>/helloworld.cgi). Although the command-line version runs fine, the browser reports an execution error message, as shown in Figure 24.2. Figure 24.2. A simple Hello World isn't quite so simple.
So, what went wrong? Why is this program, which runs perfectly from a command prompt, broken when it tries to send its results over the Web? The answer lies in the way the web servers communicate their results back to a client browser. For the simple Hello World application to work, it must produce the sort of output that a web browser expects. To the browser, it should send the same response as when a standard .html static web page is loaded. The easiest way to see that response is to generate one manually by using telnet to connect to a web server and request a page. For example, to retrieve the primary page from the local Tiger box, you would telnet to localhost (or 127.0.0.1) on port 80, and then use GET / HTTP/1.0 (followed by two carriage returns to complete the request) to retrieve the root level of the website: % telnet localhost 80 Trying 127.0.0.1... Connected to localhost. Escape character is '^]'. GET / HTTP/1.0 HTTP/1.0 200 OK Date: Sun, 10 Apr 2005 03:39:06 GMT Server: Apache/1.3.33 (Darwin) Content-Location: index.html.en Vary: negotiate,accept-language,accept-charset TCN: choice Last-Modified: Wed, 18 Jul 2001 23:44:21 GMT ETag: "81b5e-5b0-3b561f55;3d3ba024" Accept-Ranges: bytes Content-Length: 1456 Connection: close Content-Type: text/html Content-Language: en Expires: Sun, 28 Jul 2002 03:39:06 GMT
There are quite a few interesting lines in the group of headers that are returned, such as the language content and an expiration date (used to keep a page from being cached beyond a certain day and time). Only one of these headers, however, is required. The Content-Type header tells the remote web browser what MIME type of file it is about to receive. When a user requests a JPEG image file, the server sends a header that reads Content-Type: image/jpeg Each type of file has a different MIME type (determined by the file /private/etc/httpd/mime.types). The server can decide what type of file it is about to serve based on the filename. Unfortunately, when working with CGIs, the web server cannot be certain what type of information is going to be sent back. In fact, a single CGI could easily send an image with one request and an HTML page with another. To create a fully working CGI, the first thing that the web application must send is an appropriate MIME type. The initial version of helloworld.cgi did nothing but print out the Hello World message. The browser, however, was expecting a Content-Type header; when the header didn't appear, an error was generated. To correct the problem, the Content-Type header must be printed before any other output occurs: #!/usr/bin/perl print "Content-Type: text/html\n\n"; print "Hello World! I have a Mac, shouldn't you?"; exit; After making the small change to the script, this smallest of web applications will happily run, as demonstrated in Figure 24.3. Figure 24.3. When the appropriate header is added to the CGI script, everything works as planned.
Generating HTML OutputCreating the output of a CGI is the second step of developing a web application. Unlike normal Perl scripts that produce plain text output, web applications produce HTML. This can take a while to get used to, but keep in mind that the goal is to produce a dynamic web page, not a plain text file. When creating output from a CGI script, you can use any tags that you normally would in an HTML document. The trouble with doing this in Perl is that you have to escape all quotes when printing the HTML. For example: <table border="0" cellpadding="0" cellspacing="0"> When printed in Perl, this becomes print "<table border=\"0\" cellpadding=\"0\" cellspacing=\"0\">"; When creating complicated output, this can get a bit tedious. It can also lead to programmers taking shortcuts and leaving out quotes around HTML tag attributes. The easiest way to display large amounts of complex HTML is to use Perl's alternative print method: print <<ENDOFHTML; <table border="0" cellpadding="0" bgcolor="#FFDDDD" cellspacing="0"> <tr><td align="right">This is more HTML</td></tr> </table> ENDOFHTML So, let's take a look at an example of CGI output in action. This is CGI output, so don't think that you won't be able to get information into your web application. We're going to get there; just be patient! Let's start with something simple, such as creating a script that displays all the images and the associated filenames in a given folder. To start the CGI, build a simple Perl script that lists all the JPEG (.jpg) files in a folder. Listing 24.1 shows such a script. Listing 24.1. When Building a CGI, It's Often Easiest to Start with Something That Runs from the Command Line 1: #!/usr/bin/perl 2: 3: $imagedir="imagefolder"; 4: @imagelist=glob("$imagedir/*jpg"); 5: 6: for ($x=0;$x<@imagelist;$x++) { 7: $imagename=$imagelist[$x]; 8: print "Image $x = $imagename\n"; 9: } Line 3 sets the variable $imagedir to the directory that contains the images. In this case, I'm using imagefolder inside my Sites directory, which is also where this script is located. I have not specified the entire path because I'm only interested in the location of the images relative to the script.
Line 4 loads all the filenames within $imagedir that end in .jpg into the array @imagelist. The Perl glob() function takes a path and filename pattern as input and then returns any results that match. Lines 6 9 loop through each element in the @imagelist array, temporarily storing them in the $imagename variable. Print a line that displays the image and its name. When run, the CGI-in-the-making, which I've named showimages.cgi, produces the list we were hoping for: % ./showimages.cgi Image 0 = imagefolder/897.jpg Image 1 = imagefolder/920.jpg Image 2 = imagefolder/921.jpg Image 3 = imagefolder/922.jpg Image 4 = imagefolder/923.jpg Image 5 = imagefolder/924.jpg Image 6 = imagefolder/925.jpg Image 7 = imagefolder/927.jpg Image 8 = imagefolder/928.jpg Image 9 = imagefolder/929.jpg Image 10 = imagefolder/94.jpg Image 11 = imagefolder/940.jpg Image 12 = imagefolder/942.jpg Image 13 = imagefolder/944.jpg Image 14 = imagefolder/945.jpg Image 15 = imagefolder/947.jpg Image 16 = imagefolder/948.jpg Image 17 = imagefolder/949.jpg Image 18 = imagefolder/96.jpg So, how can this be translated into a CGI that displays the actual images in a web browser? The first step, as mentioned earlier, is to produce a Content-Type header. Without this information, the browser has no idea what type of data it is receiving. At the same time, it's a good idea to translate any \n (newline) characters in the program into their XHTML equivalent: <br/>. Listing 24.2 shows the new CGI, which is capable of running in a browser. Listing 24.2. Adding a Content-Type and Fixing Line Breaks Is All You Need to Turn a Simple Command-Line Script into a CGI 1: #!/usr/bin/perl 2: print "Content-Type: text/html\n\n"; 3: $imagedir="imagefolder"; 4: @imagelist=glob("$imagedir/*jpg"); 5: 6: for ($x=0;$x<@imagelist;$x++) { 7: $imagename=$imagelist[$x]; 8: print "Image $x = $imagename<br/>"; 9: }
Figure 24.4 shows the result of running the new CGI in a web browser. Figure 24.4. The command-line application now runs within a web browser.
Unfortunately, things still aren't quite where we want them. What good is a CGI that lists pictures but doesn't display them? To be able to show the pictures, the CGI must be modified so that the name is used within an <img> (image) tag rather than just displayed on the screen. Try adding a new line that uses an image, rather than the image name, as shown in Listing 24.3. Listing 24.3. The Revised Code Displays an Image as Well as Its Name 1: #!/usr/bin/perl 2: print "Content-Type: text/html\n\n"; 3: $imagedir="imagefolder"; 4: @imagelist=glob("$imagedir/*jpg"); 5: 6: for ($x=0;$x<@imagelist;$x++) { 7: $imagename=$imagelist[$x]; 8: print "<img src=\"$imagename\" width=\"120\" height=\"90\"><br/>"; 9: print "Image $x = $imagename<br/>"; 10: } Line 8 performs the magic in the application. Using the same $imagename variable used to print an image's name (now in line 9), the variable is instead used to set an image source within an <img> tag. I've also added a width and height to the image tag to maintain some consistency in the display. When viewed in a web browser, the result resembles Figure 24.5. Figure 24.5. With the addition of the <img> tag, the images themselves can now be seen in the listing.
By now, you're starting to see the method to the madness. CGIs are just applications that write HTML as their output. The example we've been looking at is barely modified from the original command-line version, yet it includes full images for each file it finds. To fully realize the potential of a CGI, you must use HTML to its fullest. So far, the Perl script we've been developing is nothing but a simple port of the initial command-line utility. With only a small amount of work, we can turn it into something far more useful. Listing 24.4 shows a more developed version of the application. Unlike the previous version of the CGI, this revision uses an HTML table to structure the layout of the images. Listing 24.4. With a Little Work, the CGI Can Take Advantage of HTML's Layout Capabilities 1: #!/usr/bin/perl 2: print "Content-Type: text/html\n\n"; 3: 4: $imagedir="imagefolder"; 5: $columns=3; 6: 7: @imagelist=glob("$imagedir/*jpg"); 8: 9: print "<table bgcolor=\"#FFFFFF\" border=\"1\" bordercolor=\"#000000\">"; 10: while ($x<@imagelist) { 11: print "<tr>"; 12: for ($y=0;$y<$columns;$y++) { 13: $imagename=$imagelist[$x]; 14: if ($x<@imagelist) { 15: $x++; 16: print "<td align=\"center\">"; 17: print "<img src=\"$imagename\" width=\"120\" height=\"90\"><br/>"; 18: $imagename=~s/$imagedir\///; 19: print "<font type=\"Arial\">$imagename</font>"; 20: print "</td>"; 21: } 22: } 23: print "</tr>"; 24: } 25: print "</table>"; Line 5 sets a limit for the number of columns in the table (how many images will be displayed in a single line), whereas line 9 sets up the table structure using a table with a white (#FFFFFF) background and a black (#000000) border. In line 10, instead of using a for loop to go through each image, the counter $x is incremented when an image tag is output. The while loop continues as long as the counter is less than the total number of images. Line 11 starts a new table row (<tr>). Lines 12 22 loop through the number of columns set for the table. For each column, increment the variable $x. If $x has not exceeded the total number of images available, output a table data cell (<td>) that contains the image and its name. Line 18 removes the path from the image filename. This is done using a simple Perl regular expression search and replace. After displaying all the data cells for a row, line 23 ends the table row (</tr>). Line 24 repeats lines 11 23 until all images have been displayed, and line 25 ends the table (</table>). Figure 24.6 shows the output from the finalized CGI. Figure 24.6. The final version of the CGI outputs the image directory in a nicely formatted table.
Using CGI.pm to Simplify CGI DevelopmentThis quick-and-dirty image viewer provides a reasonable start to CGI programming, but it is lacking in the one area that can be used to create truly dynamic and user-driven sites: user input. Getting input into a CGI can be a bit of a challenge if you're starting from scratch. Thankfully, others have been here before, and Perl includes a module (CGI.pm) that handles most of the dirty work for you. Because we're going to be using only a few of the functions to handle incoming data, you might want to read http://stein.cshl.org/WWW/software/CGI/ for full documentation. We will be using the software in function mode rather than object-oriented mode to avoid delving into the complexities of Perl's object-oriented model. We'll introduce three functions:
Let's take a look at practical CGI input by altering the Hello World application we used previously so that it personalizes the message. If your name happens to be World, you might skip this exercise. Listing 24.5 shows the helloworld.cgi modified to display a person's name. I'll refer to this new version as helloworld2.cgi. Listing 24.5. Using the CGI.pm Module, Any Script Can Receive Input 1: #!/usr/bin/perl 2: use CGI qw(:standard); 3: 4: $myname=param('name'); 5: 6: header; 7: print "Hello $myname! I have a Mac, shouldn't you?"; Although mostly apparent, the breakdown of the code is as follows: Line 2 loads CGI.pm: the Perl CGI module. Line 4 sets the variable $myname to the submitted variable name. Line 6 sends the required content-type header, and line 7 prints a greeting containing the name submitted to the CGI in the name variable. As you can see, the number of changes to the original application is small. This CGI should now correctly allow a name to be sent to it for use in a customized greeting. The problem remains, however, how do you go about actually sending the variable and value to the application? Because the parse() function handles either POST or GET method transmission, there are two ways that this new CGI can be called. Using the URL to pass a variable is the easiest, so let's start there. Start a web browser and enter the URL for the new CGI, adding ?name=John (or whatever is appropriate for you) to the end: http://localhost/~<your username>/helloworld2.cgi?name=<your name> My test system, for example, looks like this: http://localhost/~john/helloworld2.cgi?name=John Figure 24.7 shows the new personalized message. Figure 24.7. Providing an input method to a CGI enables interactivity.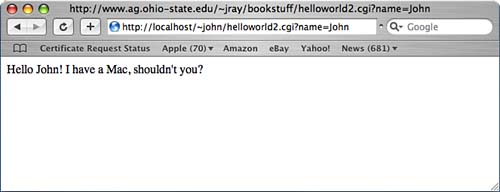 To use the POST method to send information to the CGI, create an HTML form that submits its data to the web application. For helloworld2.cgi, the form needs nothing more than a name field and a submit button: <form action="helloworld2.cgi" method="post"> Enter your name: <input type="text" name="name"> <input type="submit" name="submit"> </form> Save the form code in a new HTML file (hello.html) in the same directory as the helloworld2.cgi. Open the new web page in your browser, type a name, and click Submit. You should see results identical to the earlier URL-based input shown in Figure 24.7.
As it stands, if you're using a separate HTML page to submit information to the CGI, two files comprise the entire project: helloworld2.cgi and hello.html. This isn't excessive, but it can be consolidated. Rather than hello.html containing the form, it can be added directly to helloworld2.cgi. Listing 24.6 consolidates the form and application into a single CGI file. Listing 24.6. A CGI Can Encapsulate HTML and Application Logic 1: #!/usr/bin/perl 2: use CGI qw(:standard); 3: 4: $myname=param('name'); 5: header; 6: 7: if ($myname eq "") { 8: print <<ENDOFHTML; 9: <form action="helloworld2.cgi" method="post"> 10: Enter your name: <input type="text" name="name"> 11: <input type="submit" name="submit"> 12: </form> 13: ENDOFHTML 14: exit; 15: } 16: 17: print "Hello $myname! I have a Mac, shouldn't you?"; Consolidating the code into the single CGI brings into play some of the session management techniques discussed earlier in the chapter. This revision of helloworld2.cgi has two states: prior to entering the name and after entering the name. To determine what the program should be doing, it checks the value of $myname if a name hasn't been set, the HTML form should be displayed. If a name is defined, the Hello message is shown. A more detailed analysis of the changes follows: Line 7 checks to see whether the $myname variable is empty. If it is, this is the first time the CGI has been executed the user hasn't entered his name yet. Lines 8 13 display the HTML form, and line 14 exits the CGI. This line is more important than it might appear. If it is not included, the CGI will continue to execute after displaying the HTML form; this will generate an empty hello message immediately following the form. Finally, line 17 displays the hello message with the user's name. This demonstrates the fundamental workings of CGI applications. Although the example is only a two-step process, it could easily be extended to multiple steps by passing data from screen to screen. For an encore, let's add another form to the hello page that collects the user's age. After submitting this second form, a third page is shown with the user's name, age, and a few comments. Listing 24.7 shows the final version of this overly long Hello World application. Listing 24.7. The Extended Version of Hello World Now Includes Three Steps and Demonstrates CGI Input and Variable Passing 1: #!/usr/bin/perl 2: use CGI qw(:standard); 3: 4: $myname=param('name'); 6: $myage=param('age'); 7: 8: header; 9: 10: if ($myname eq "") { 11: print <<ENDOFHTML; 12: <form action="helloworld2.cgi" method="post"> 13: Enter your name: <input type="text" name="name"> 14: <input type="submit" name="submit"> 15: </form> 16: ENDOFHTML 17: exit; 18: } 19: 20: if ($myage eq "") { 21: print "Hello $myname!"; 22: print "</br>"; 23: print <<ENDOFHTML2; 24: <form action="helloworld2.cgi" method="post"> 25: Enter your age: <input type="text" name="age"><br/> 26: <input type="hidden" name="name" value="$myname"> 27: <input type="submit" name="submit"> 28: </form> 29: ENDOFHTML2 30: exit; 31: } 32: 33: $dayage=$myage*365; 34: $hourage=$dayage*24; 35: $minage=$hourage*60; 36: print "Hello again $myname!<br\/>"; 37: print "You have lived for $dayage days...<br\/>"; 38: print ".. or $hourage hours...<br\/>"; 39: print ".. or $minage minutes!<br\/>"; This final revision adds an additional form and output screen. Lines 20 31 display the standard hello message but also show a form where the user is prompted for his age. What makes this form unique is that it includes a hidden name field set to the original $myname value. This shows how information can be carried from page to page. The final page, generated in lines 33 39, calculates a user's name in days, hours, and minutes. This demonstrates that the name has indeed been carried through each of the CGI screens. As an exercise, you might want to try adding a search screen to the image catalog creator that was built earlier in the chapter. Suppose, for instance, that there are multiple image folders to view, a need for the number of columns to be adjusted, or even searching based on the image filename these features can all be added easily to the application. Listing 24.8 is a two-step version of the image catalog application. Listing 24.8. This New Version of the Image Catalog CGI Now Offers Searching and Display Settings 1: #!/usr/bin/perl 2: 3: use CGI qw(:standard); 4: 5: $imagedir=param('imagedir'); 6: $imagename=param('imagename'); 7: $columns=param('columns'); 8: $match=param('match'); 9: if ($imagedir=~/\//) { $imagedir="imagefolder"; } 10: if ($imagename=~/\//) { $imagename=""; } 11: 12: header; 13: if ($imagedir eq "") { 14: print <<ENDOFHTML; 15: <form action="showimages5.cgi" method="post"> 16: Image dir: <input type="text" name="imagedir" value="imagefolder"><br/> 17: Select the number of columns in the display: <select name="columns"> 18: <option>1</option> 19: <option>2</option> 20: <option>3</option> 21: <option>4</option> 22: </select><br/> 23: Show images that match: <input type="text" name="match"> 24: <input type="submit" name="submit"> 25: </form> 26: ENDOFHTML 27: } 28: 29: @imagelist=glob("$imagedir/*$match*jpg"); 30: 31: print "<table bgcolor=\"#FFFFFF\" border=\"1\" bordercolor=\"#000000\">"; 32: while ($x<@imagelist) { 33: print "<tr>"; 34: for ($y=0;$y<$columns;$y++) { 35: $imagename=$imagelist[$x]; 36: if ($x<@imagelist) { 37 $x++; 38: print "<td align=\"center\">"; 39: print "<img src=\"$imagename\" width=\"120\" height=\"90\"><br/>"; 40: $imagename=~s/$imagedir\///; 41: print "<font type=\"Arial\">$imagename</font>"; 42: print "</td>"; 43: } 44: } 45: print "</tr>"; 46: } 47: print "</table>"; The only modifications to the original image catalog are the addition of lines 3 27. The rest remains the same. Line 3 loads the CGI.pm module. Lines 5 8 store values for the columns to display, image directory to use, and a string to search for in the image names. Lines 9 10 are very important. When processing user input, an application can never trust the incoming data. If the image catalog blindly accepted an arbitrary path, it could pose a serious security risk and give the user access to other parts of the filesystem. For that reason, any input that includes a / is disregarded. This eliminates the potential for the user to input any path information. If an image directory has not been set (such as the application has not received the search criteria yet), lines 13 27 display a search form. This is a simple HTML form that includes elements for setting the image directory, number of columns, and a search string for the image name. A modification to the original glob, this line 29 variation adds the $match string to the pattern, displaying only images that match the specified string. By now, you should have a grasp of the basics of CGI programming, and how Perl can be used to create quick-and-dirty web applications. Increasing Execution Speed with mod_perlIf you've decided on Perl for your Apache development environment, you might want to look into the mod_perl module. This add-on embeds a Perl interpreter to the Apache process, greatly speeding up CGI execution. If your site makes extensive use of large Perl applications, give it a try. mod_perl can be enabled by following these steps:
Although Perl is certainly capable of generating large-scale applications, many developers have had their heads turned by the popular PHP language. If you've grasped the basics of Perl, moving on to PHP will be no problem. |


| < Day Day Up > |
EAN: 2147483647
Pages: 251