Command-Line NetInfo Administration Tools
| < Day Day Up > |
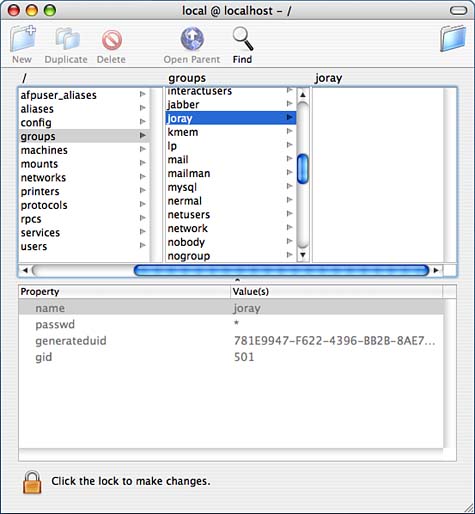
Managing Users Through NetInfoAlthough you can create and customize users using the Accounts System Preferences pane, there are some aspects about a user account that can only be customized directly in the NetInfo database, such as the group to which a user belongs. Understanding Sane User Account ManagementIt can be very useful to add groups to your system for any logically collected groups of users on your system. The Unix privilege system underlying Mac OS X contains a mechanism to allow groups of users to mutually share access to files within their group, while protecting those files from other users on the same system. To enable this capability, you must create groups for those users to belong to and you must add their usernames to the users value list of the group. A single user can be a member of an arbitrary number of groups and can assign files that he owns to be visible to any one of (or none of) the groups to which he belongs. To make use of this capability, the user must use the command-line group ownership tools discussed in Chapter 15, "Shell Configuration and Programming (Shell Scripting)." Starting with the release of 10.3, Apple has chosen to follow an administrative philosophy that believes that it's easiest to create a new group for each and every user that's created, and to assign each user to belong, by default, to his own group. This has the advantage that it's easy to assign a small group of users to belong to the same group as some user jim, by simply assigning them to the group jim. In other words, it makes management of groups that relate to individuals relatively easy ]all of jim's friends belong to group jim, and he can easily allow them privileged access to some of his files (although the administrator still must do the work of adding users to group jim there's no current way for jim to do this himself). Unfortunately, this administrative philosophy works well for managing a bunch of individuals, but it doesn't work well for managing things such as project groups or users that are otherwise logically grouped on the system into large "classes" of some sort. For this sort of system use, it's more convenient to have all users that belong to some project, or that have some grouped privilege class, to have the same default group. If an individual wants to have a group-of-friends-type group, root can always create an individual group for them as well as the general-class groups. Because root has to manually add "jims friends" to group jim in the new-group-for-each-user design, it's not really any more inconvenient to create additional per-user groups for those individuals who might want to have them when using the general-class group paradigm. If you decide to dispose of Apple's new-group-for-each-user paradigm for management of your system, you'll want to create at least one general-user group in NetInfo, typically called users, into which you can assign users who don't logically seem like staff users. Apple's Accounts pane now creates users as members of their own individual groups, and you're welcome to leave them with these default groups, but we'll also show you how you can automate the creation of users and take control of the group assignment process later in the chapter. On the other systems we run, we have a logical distinction between staff users and normal users, so we find it convenient to mirror this with our Mac OS X installations by creating a group to assign new, nonstaff users to. On our Mac OS X machines, we created this as GID 99, with group name users. We assume this value as a default in various other locations in this book.
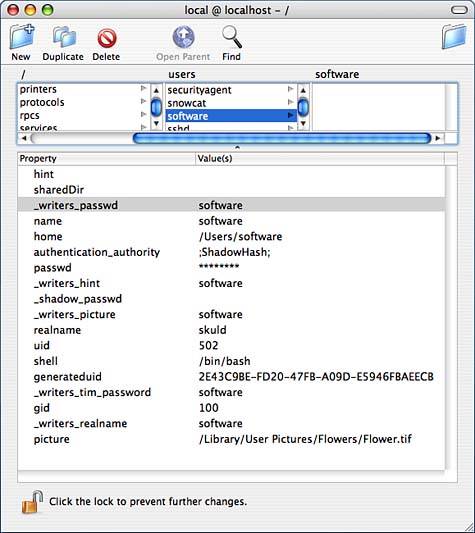
Using the NetInfo Database to Customize a UserNow you've had the opportunity to examine the NetInfo database, back it up, and use several tools to modify it. In the previous section, you saw that changes could be made in the NetInfo database and a small sampling of how these changes interact with and provide information to other tools. We make use of that idea in this section, in which you learn how to customize a user account. We use the Accounts control panel to create a user, but we customize our user by editing information in the NetInfo database. In our example, we create a user who we want to use as our general software user. This is a specialized user whose account we want to use when compiling software for the system, but we do not want this user to be one of the administrators for the machine. We want our user to belong to a group called tire with group ID 100. We'd also like to have a specific user ID, 502, for our user, whose account we intend to call software. To create this user, do the following:
In our example, software's original UID was 502, which is still software's UID. Depending on what changes you had to make in the NetInfo database to get the desired UID, you would probably see the original UID number that belonged to software here rather than the username. If you didn't change your software user's UID, you should see software in that column, as shown here. The default GID that the Accounts pane used for creating software was GID 502, the same number as the UID, and has the same group name,software, as well. So, the information that we see for software's home directory is the information that was originally assigned to software. We have to update the information to software's directory to reflect the new information. As root, or using sudo, in the /Users directory, change the ownership of software's directory to the software user in group tire: brezup:sage Users $ sudo chown -R software:tire software Password: Check the results: brezup:sage Users $ ls -ld software drwxr-xr-x 11 software tire 374 Mar 7 10:54 software brezup:sage Users $ ls -l software total 0 drwx------ 3 software tire 102 Mar 7 10:54 Desktop drwx------ 3 software tire 102 Mar 7 10:54 Documents drwx------ 17 software tire 578 Mar 7 10:54 Library drwx------ 3 software tire 102 Mar 7 10:54 Movies drwx------ 3 software tire 102 Mar 7 10:54 Music drwx------ 3 software tire 102 Mar 7 10:54 Pictures drwxr-xr-x 4 software tire 136 Mar 7 10:54 Public drwxr-xr-x 5 software tire 170 Mar 7 10:54 Sites If you changed the UID of a user who was originally assigned UID 502, look at that user's home directory and make the appropriate ownership changes. Enabling the root AccountAs mentioned earlier, the administrator account is a powerful account. But the most powerful account on a Unix machine is the account called root. People also refer to root as the super user, but the account name itself is root. On most Unix systems, the first available account is the root account. In Mac OS X, however, the root account is disabled by default as a security precaution. At some time, however, you might find it necessary to enable the root account. The root account can modify system settings, modify files it does not own, modify files that can't be written to by default, modify a user's password, install software, become another user without having to know the password of that account, and so on. In other words, root can do anything anywhere, making the power of root immense. Because root has so much power, the only users who can become root are users with administrative privileges. Because a user with administrative privileges can become the root user, you should assign these capabilities to only completely trusted individuals. If you choose to enable the root account, remember to use it with caution. Although the root account might provide some extra utility, you could accidentally wipe out your system if you don't pay careful attention to what you type. In addition, the root password you choose should be difficult to guess. Finally, become the root user for only as long as necessary to complete the task at hand. With the presence of an administrative user, it might be a long time, if ever, before you discover a need to enable the root user. You can take many approaches for dealing with the root user from ways to use root without enabling the root account to actually enabling the root account. Let's take a look at four different ways to gain root access to your system. Although you can choose whichever method you like, it's useful to understand that even though some of these methods appear to work magic, they all accomplish very much the same thing. The root user is disabled because it does not have a valid password set. Because there are a number of ways to set a password, there are also several ways to enable root, including one method (the first method we'll look at) that was designed specifically for assigning the root account password and only the root password. In addition, you'll see how the sudo command can provide root-level access even when the root password is disabled. We recommend that users access the root account only when absolutely necessary. Using the NetInfo Manager UtilityThe NetInfo Manager Utility provides a graphical method for enabling the root user.
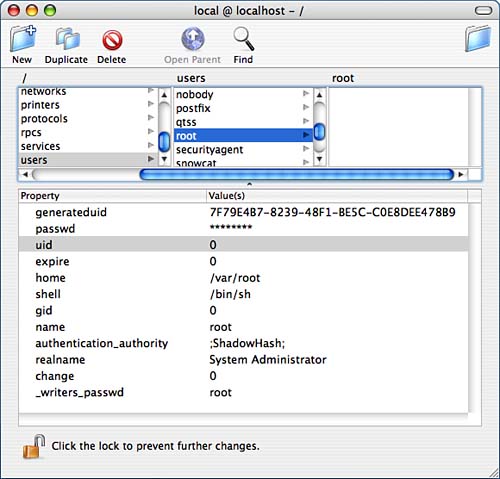
Figure 20.11 shows an example of what an enabled root account looks like in NetInfo Manager. Note that the password field no longer has a single * in it; instead it has a string of *s. Figure 20.11. The root account has been enabled on this machine. Note the * that was in the password field has been replaced with several *s.
Using the Mac OS X Installation CDBecause the Mac OS X installation CD comes with an option to reset a user's password, you could use the installation CD itself to enable the root user. To enable the root account using the Mac OS X installation CD, do the following:
Using sudo to Enable the root AccountRecall that the sudo command is used to execute a command that root might execute. One way to enable the root account is to use sudo to execute passwd, which is a command used to change passwords. Here's an example: brezup:sage sage $ sudo passwd root Password: Changing password for root. New password: Retype new password: brezup:sage sage $ The password that you initially enter is your password. Then you supply a password for root and reenter it for verification. If you mistype the password, you're prompted again, as shown in this example: brezup:sage sage $ sudo passwd root Password: Changing password for root. New password: Retype new password: Mismatch; try again, EOF to quit. New password: Retype new password: brezup:sage sage $ |

| < Day Day Up > |
EAN: 2147483647
Pages: 251