Hack100.Host a Photo Gallery
Hack 100. Host a Photo Gallery
Use Gallery to easily thumbnail, label, and organize your photos into galleriesall from a web interface. Photo albums have a long tradition of reminding us of special family moments as well as embarrassing a family member in front of their significant other. As nice as they are, photo albums have some problems. For one, photos degrade over time. For another, if a family is spread out geographically, it can be difficult to share photos without making multiple prints. Of course, in the age of the Internet and digital cameras, you can simply move your photos away from a physical album into a digital one stored on the Web. This way you can share photos with family and friends no matter where they are, plus they can flip through the album at their leisure and download copies of the photos all on their own. There are a number of tools out there, both commercial and free, to help you manage your digital photo album, but one particularly nice project for Linux, Gallery, makes managing a number of photo galleries simple to set up, simple to administer, and simple for everyone to view. The Gallery project home is located at http://gallery.menalto.com. The site itself is a great resource, with extensive documentation and a number of sample sites so you can see how others have used Gallery. To install Gallery, you must first meet a few requirements:
There are also a number of optional libraries that Gallery can utilize if they are installed including mod_rewrite (so Gallery can create shorter URLs for albums), jhead (allows Gallery to extract EXIF data from images), zipinfo (so Gallery can unzip zip archives containing multiple photos), and jpegtran (provides Gallery with the ability to losslessly rotate JPEG images). After you have met Gallery's requirements, you are ready to download and install the Gallery package. Go to the official page and click the Download Now link on the left side bar. There you will see links to download sites for the Gallery package itself as well as links to optional libraries. Click the link for the latest stable release and download the newest gallery*.tar.gz file you see. Extract the tarball in a directory on your machine, create two blank files called .htaccess and config.php in the new gallery directory, and then make them world-writeable: greenfly@napoleon:~$ tar xvzf gallery-1.5.tar.gz greenfly@napoleon:~$ cd gallery greenfly@napoleon:~/gallery$ touch config.php .htaccess greenfly@napoleon:~/gallery$ chmod 0777 config.php .htaccess Now create a directory to hold all of the different albums and make it world-writeable. This directory just needs to be accessible somewhere in your web directory, but you might as well put it in your gallery directory so everything is together: greenfly@napoleon:~/gallery$ mkdir albums greenfly@napoleon:~/gallery$ chmod 0777 albums
Now copy the gallery directory to your web server. The method you use for this will be different depending on whether you are using hosted web space (in which case you will likely FTP the entire directory up) or your own web server (in which case you will copy it however you wish). You don't necessarily need to put gallery in the root of your web directory, but for the purposes of these examples that is where the gallery directory will be. With the gallery directory copied up, open a web browser and go to http://www.example.com/gallery/setup/index.php replacing www.example.com with the URL to your web space. This page is the gallery configuration wizard, and it will perform some tests to ensure that all of its requirements are met. If all the checks come up green, then you are ready to move on to the next step. If any checks come up red, the test failed and you will need to fix the listed problem on your web server. Some tests might fail with a yellow warning, in which case you might want to remedy the problem, but you don't necessarily have to for Gallery to function. After Gallery finds no serious errors, you may move on to the second page, which will walk you through settings to apply to the entire site. The third page lets you configure the default settings for a new album. The fourth and final page displays the actual config.php configuration file. If everything is set the way you want it, click Save Config. With the configuration saved, you can now lock down the file permissions. If you have shell access to the gallery directory, execute the secure.sh script inside the main gallery directory. If you have FTP access you can use chmod directly: ftp> cd gallery ftp> chmod 644 .htaccess ftp> chmod 644 config.php ftp> chmod 400 setup At this point Gallery is configured and ready to accept your first album. Go to your main Gallery page, click on the login link, and log in with your administrator username and password. After you have logged in, you will notice new options along the top of the screen. Click the new album link to create a new album. After the screen refreshes, click the main link to your new untitled album to go inside. Gallery supports both single albums with photos and nested albums. Nested albums are basically albums inside of albums, and can be useful if you want to separate multiple days of a vacation or otherwise organize a particular album into subcategories. Click "add photos" to add new photos to the current album or click new nested album to create a new album within the current one (see Figure 5-4). Figure 5-4. Default gallery page with a few thumbnails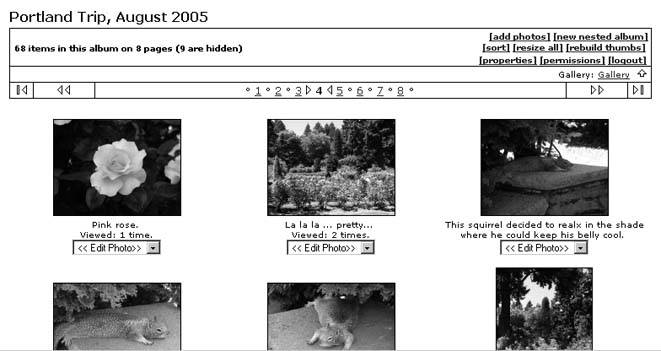 When you click the add photos link, a new window will appear with a few different options for file uploading. The first option is to click the various Browse buttons on the screen and find individual photos that you want to upload. Alternatively, you can FTP or otherwise copy the files to the web server, and then type in the full path to that directory. After the file path or paths are configured, click Submit. A new window will appear and show you which files gallery is about to process. Approve the list and gallery will begin uploading (if the files were loaded locally) and processing the files. Depending on the speed of your network and the speed of your processor this might take some time for a large number of images since Gallery makes different thumbnail sizes for each photo. Once it is finished processing the files, close the window and go back to the window for your album. The page should refresh to show you the new photos you have added. Gallery provides you with a number of options for photos in an album. You can add individual captions to each album and photo, rotate the photo, hide it so that regular visitors won't see it, move it to another gallery, or set it as the highlight photo. A highlight photo is the photo that will be used as the main photo for a particular album. Once you are finished editing your photos, go back to the main page for the album and rename the title and add a description to the album. Then log out if you wish and email your friends and family with the URL of your new album. |

- Challenging the Unpredictable: Changeable Order Management Systems
- The Second Wave ERP Market: An Australian Viewpoint
- Context Management of ERP Processes in Virtual Communities
- Intrinsic and Contextual Data Quality: The Effect of Media and Personal Involvement
- Relevance and Micro-Relevance for the Professional as Determinants of IT-Diffusion and IT-Use in Healthcare