| You'll create light flashes by animating the Lens Flare effect (available only in the Professional version of After Effects). First, you'll create a Flare Center keyframe over each portion of the title at the same time each portion is revealed. Then, you'll move the flare forward a bit in time so that viewers see the flash just before they see the title come into view. Note If you have the Standard version of After Effects (and so don't have the Lens Flare effect), you may be able to create similar results by importing a Photoshop file that uses the Photoshop Lens Flare filter. It won't be nearly as easy to work with as the After Effects effect, but it's worth a try.
1. | Go to time 0:00, and create a new compsize solid named Light Flash that's colored black (RGB: 0, 0, 0).
Settings for the Light Flash solid 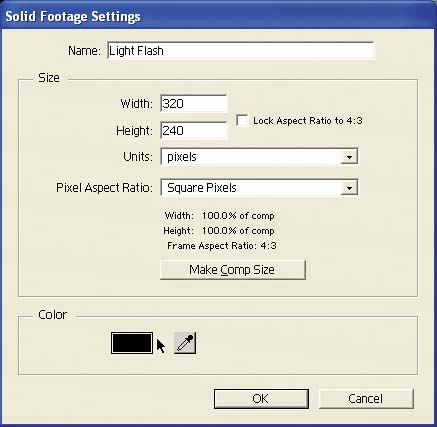
| 2. | Apply Effect > Render > Lens Flare to the solid. It's a bit too brilliant right now, but you'll tone it down later.
| 3. | Display the Modes column in the Timeline, and set the Light Flash layer's mode to Screen. Doing so lets you reveal the text layers behind the black solid in the next steps.
Blending the Light Flash layer with the title 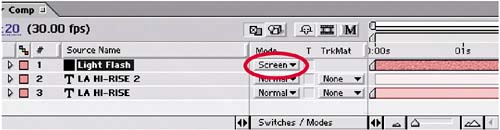 | 4. | Go to time 1;01, and create a keyframe for the effect's Flare Center property. Press U to reveal the Light Flash layer's keyframes in the Timeline.
| 5. | Reposition the Flare Center so that it lies right over the blurred L in the Comp window. The light will act as a reveal for the blurred text layer later in the project.
| 6. | Go to time 1;21, and drag the icon in the Flare Center over the next portion of the title (the letters SE) that's revealed in the Comp window. Be sure to drag the circled + (plus sign) at the center of the flare; otherwise, a keyframe isn't created when you reposition the lens flare.
Animating the lens flare's center 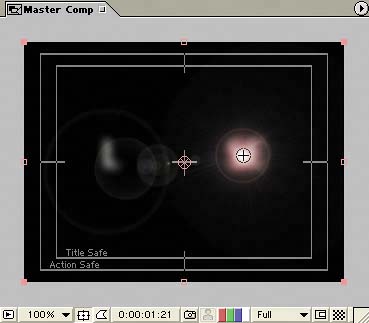
| 7. | Repeat step 6 at times 2;11 (letters HI), 3;01 (A), and 3;21 (-RI).
|
Next, we'll show you an easy way to offset the time of all five Flare Center keyframes: 1. | Go to time 0;26, and click the Flare Center property name to select all of its keyframes.
| 2. | Hold down your mouse pointer on the first keyframe, press Shift, and drag to snap the first keyframe to the Current Time Indicator (CTI). Reposition all the keyframes accordingly.
|
If you preview the comp at this point, the lens flare should glide back and forth over the title. The masked sections of the title fade in right after the lens flare passes over a section. Now you'll make the lens flare stay put over each set of letters until the next set appears, instead of gliding between the letters: 1. | Make certain that all your Flare Center keyframes are selected.
| 2. | Choose Animation > Toggle Hold Keyframe. This option prevents interpolation between the keyframes so the property's value doesn't change until the next keyframe.
Setting the Flare Center keyframes' interpolation to Hold 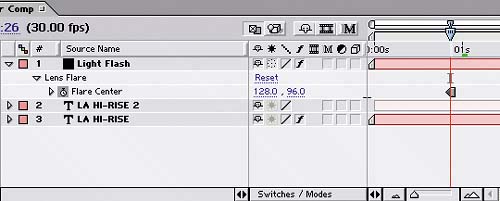 |
|