Making Posted Appointments
| A large part of time management involves scheduling appointments, and GroupWise provides an easy-to-use interface for creating and managing your personal engagements. Posted appointment messages appear only on your calendar; you don't send them to other people. Figure 6.8 shows an example of a posted appointment. Figure 6.8. Using the Posted Appointment screen, you can manage your personal appointments.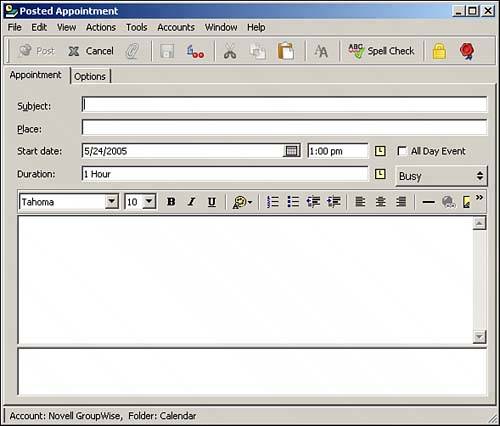 As you can see in Figure 6.8, a posted appointment includes the following information: appointment date, start time, duration, and place. The time increment (default of 15 minutes) can be changed, as well as the date format. You can also set the appointment as an all-day appointment. In addition, you can customize GroupWise to use military date and time as well as other formats. (See Chapter 10 for more information on customizing your GroupWise environment.) The Subject line of an appointment appears in the calendar. TIP One of the best uses for a personal posted appointment is to block out time on your own schedule that will show as "busy" when other individuals look at your schedule or do a Busy Search to try to schedule a meeting. This allows you to clear a portion of your schedule to work on projects that require you to be distraction free. To create a posted appointment, follow these steps:
You can also set alarms for your appointments. Here's how to set an alarm:
NOTE After you set an alarm, you can change the time or remove the alarm by right-clicking the appointment, selecting Alarms, and then clicking the Clear button. |
EAN: 2147483647
Pages: 213