7.2 Myrinet
| < Day Day Up > |
| Myrinet is the brand name for all network products from Myricom Inc.; see: http://www.myri.com The products range from PCI- and PCI-X based network adapters, switches, cables, to software support such as device drivers and middleware. In this section, we describe the installation of Myrinet products, from the device driver to message passing interface library. 7.2.1 Myrinet hardwareTable 7-1 lists characteristics of the latest Myrinet adapters, the single-ported D-card (M3F-PCIXD-2), and the dual-ported E-card (M3F-PCIXE-2), which are supported on pSeries running Linux (ppc64). Table 7-1. Myrinet adapters supported on pSeries running Linux
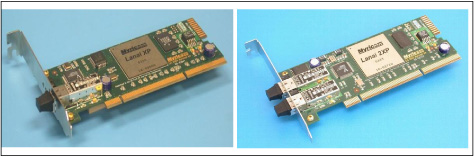
Figure 7-1 shows what each adapter looks like. Figure 7-1. Myrinet D-card (left) and E-card (right) It should be noted that:
7.2.2 GM installation and enablementMX was not available at the time of writing (and GM version 2.0.8 became available while the project was running). Although we tested GM versions 2.0.3 and 2.0.6, we use only version 2.0.6 in our redbook examples. The GM installation requires root privileges. It consists of the following steps.
Compile and install the device driverBefore starting compilation, you need to do some planningand a major planning consideration is the addressing space. With the ability to support both 32-bit and 64-bit at the hardware level of pSeries processors, and at the software level with, for example, XLF and VACPP compilers and the ESSL/PESSL libraries, it would be useful to HPC users to have the flexibility of being able to work on both 32-bit and 64-bit applications. Therefore, it would be beneficial to have both 32-bit and 64-bit support from GM drivers and other libraries, such as MPICH_GM. 32-bit buildExample 7-1 on page 308 lists commands to build and install a 32-bit device driver (gm.o) and application library (libgm.so). The device driver will not be used because the only Linux kernel supported is 64-bit. However, the 32-bit application library is needed for building 32-bit applications. Example 7-1. 32-bit GM driver build /bin/bash install_dir=/opt/gm-2.0.6/ 32 mkdir -p $install_dir export CC=gcc ./configure --host=ppc64-unknown-linux --prefix=$install_dir make cd binary # if make has been successful ./GM_INSTALL $install_dir 64-bit buildExample 7-2 shows a script for a 64-bit build. (Note that the default installation dir is /opt/gm for either a 32-bit or 64-bit build.) Example 7-2. 64-bit GM driver build /bin/bash install_dir=/opt/gm-2.0.6/ 64 mkdir -p $install_dir export PATH=/opt/cross/bin:$PATH export LD=/opt/cross/powerpc64-linux/bin/ld export RANLIB=/opt/cross/powerpc64-linux/bin/ranlib export STRIP=/opt/cross/powerpc64-linux/bin/strip export CC=powerpc64-linux-gcc ./configure --host=ppc64-unknown-linux --prefix=$install_dir make cd binary # if make has been successful ./GM_INSTALL $install_dir Note Configuring and compiling GM requires a Linux source tree to be available, and the default location is /usr/src/linux. The kernel header files must match the running kernel exactly. If the source tree is at a different place, you must provide the option --with-linux=<linux-src-dir> to the configure command. The GM_INSTALL script copies GM binaries to the specified installation directory $install_dir (which is /opt/gm-2.0.6/32 for the 32-bit build, and /opt/gm-2.0.6/64 for the 64-bit build). Configure the GM mapperThe GM mapper is responsible for discovering hosts on the Myrinet network, and then computing the route to each host. There are two ways to accomplish this, depending on the level of high availability required for the Myrinet network: by using manual mapping, or by using active/passive mapping. We explain both techniques in the following section. Manual mapping (map-once)This is the favored mapping technique for small clusters where the possibility of nodes leaving the Myrinet is low. To enable this mapping mode, the following command is needed for each node: /opt/gm-2.0.6/64/sbin/gm_install_drivers --manual -mapper After the kernel module is loaded (see below), you start the mapping with this command: /opt/gm-2.0.6/64/sbin/gm_mapper --map-once -verbose Active/passive mapping (dynamic mapping)This is the preferred mapping for large clusters where some nodes (active) continuously query the Myrinet network to build the map table for other (passive) nodes. Since mapping is created dynamically, the cluster is able to recover itself from falling nodes. This is done by running the following command on every node: /opt/gm-2.0.6/64/sbin/gm_install_drivers --active-mappers="lp05 lp08" where nodes lp05 and lp08 serve as active mappers. Verify that these are the names returned by the hostname command. Load and start the driverThe last step in making Myrinet available to applications is to load the GM module on all participating nodes. This is done by running the following command on every node: /etc/init.d/gm start As with other network devices, you can restart or stop the device by providing restart or stop to the command /etc/init.d/gm . Tip You may be wondering, should you use manual mapping or dynamic mapping? Since overhead is not a concern here, dynamic mapping seems more attractive because it heals itself without human interference. However, there are potentially serious problems with dynamic (active/passive) mapping. For example, with very intensive MPI applications, the GM mapping may break. The high communication rate may take all the bandwidth, causing some GM mapping control messages to be delayed, or lost. This makes GM think that some nodes are down and it will therefore terminate the MPI application. Even worse , in some cases, the application exhibits unpredictable behavior and gives wrong answers, simply based on the interaction between application messages and GM mapping control messages. To prevent this from happening and yet still use the active/passive mapping during mapping configuration and kernel module loading, run the following command on all nodes: gm_install_drivers --active-mappers="lp05 lp08" Then load the GM module, using /etc/init.d/gm start . After this is done, execute killall gm_mapper on all nodes. This technique works, although it is not supported by Myricom; the README-linux file states "Stopping the mapper while GM is running is not supported. The gm_mapper should be left running at all times, and it will not interfere with the performance of jobs running over Myrinet". 7.2.3 IP over MyrinetGM by default supports 16 ports, but only 13 ports (ports 2, 4-15) are available to non-privileged user applications. Port 0 is for internal GM use and is never available. Port 1 is used by the GM mapper when running. Port 3 is used by the IP-over-Myrinet driver. The install procedure does not enable IP mode of the Myrinet card. In order to IP-over-Myrinet, run this command: ifconfig myri0 <ip_addr> up 7.2.4 Checking GM status and performanceMyrinet provides a set of scripts and test programs to show the status and performance of the Myrinet network. We assume /opt/gm-2.0.6/bin on the system PATH. To check the status of the GM ports, issue the following command: gm_board_info To test DMA rate between memory and Myrinet adapter: gm_debug -L The performance should then be compared with the published numbers , if available, at: http://www.conservativecomputers.com/myrinet/perf.html To test point-to-point communication, issue the following command on one node, for example, lp07: gm_allsize --slave --size=15 And also on another node, for example, lp08: gm_allsize --unidirectional --bandwidth --remote-host=lp07 --size=15 --geometric 7.2.5 MPICH_GM installationAny user can install MPICH_GM. The installation of MPICH_GM does not require root access, as long as the installation directory (/opt/gm-2.0.6/32, in our example) does not require it. After downloading the source code from the Myricom Web site and untarring it, you can build a 32-bit MPICH_GM library with the script in Example 7-3. A 64-bit library can be built with minor modifications (refer to Example 7-2 on page 308 and Example 7-3 for hints). Note that we used XLF for Fortran and Fortran90 support. Example 7-3. Script to build a 32-bit MPICH_GM /bin/sh CC=gcc CXX=g++ FC="xlf_r -qnosave -q32 -qpic=large" F90="xlf90_r -q32 -qpic=large" GM_HOME=/opt/gm-2.0.6/32 CFLAGS="-I${GM_HOME}/include" export CC CXX FC F90 GM_HOME CFLAGS PREFIX=/opt/mpich-1.2.5..10/32 mkdir -p $PREFIX ./configure --with-device=ch_gm -prefix=$PREFIX -opt="-O2" \ -lib="-lgm -lpthread" --enable-sharedlib make make install |
| < Day Day Up > |
EAN: N/A
Pages: 108