Using the Import/Export Wizard A helpful feature of Project 2003 is the Import/Export Wizard. This wizard launches automatically whenever you attempt to open or save a file that does not have the .mpp file extension. To demonstrate how the Import/Export Wizard functions, the following steps document what the Export Wizard shows when you attempt to save a file as an Excel workbook ( .xls ): -
The first screen of the Import/Export Wizard is the Welcome page. If you are importing a file, Import Wizard is displayed on the title bar of the dialog box and if you are exporting a project file, the Export Wizard appears. There are no options for you to selectonly an explanation of what this wizard can do. Click Next to continue or Cancel to stop the export procedure. -
The second screen displayed is the Data page, which asks how you want to export the data. Generally , you can export data as a full project, selected data only, or some other option that is unique to the type of data you are exporting. As with most wizards in Microsoft software applications, you can click Back to return to the previous page, click Next to continue, or click Cancel to stop the exporting procedure. -
If you chose to export selective data, the third screen is the Map page (see Figure 17.1). This page allows you to choose the type of map to use for exporting data. The choices are generally limited to creating your own map by selecting the New Map option, or using an existing map. Figure 17.1. The Map page allows you to choose whether to use a new map or an existing map to export data. 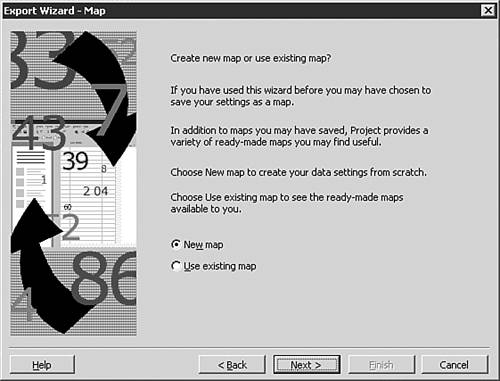 -
If you choose the Existing Map option in the Map page, you see the Map Selection page (see Figure 17.2). Choose the existing map that you want to use to export your data and click the Finish button. Figure 17.2. The Map Selection page lists all the predefined and custom maps for exporting data. 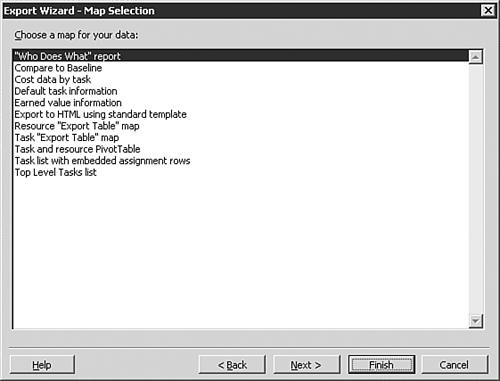 -
The next screen is the Map Options page, which allows you to select the type of data you want to export. The options generally include exporting tasks , resources, or assignments, or a combination of the three. One exception is that when you export project data to a text file ( .txt or .csv ), you can export only one of the three data types at a time. In addition to the data options to be selected, there may be additional options in the bottom half of the dialog box, depending on the file type. -
The next screen is the Task Mapping page (see Figure 17.3), where you provide information that is used for mapping Project data into the receiving application. For example, you provide information on how to map the field names in Project with field names in the application that is receiving the exported data. Figure 17.3. The Task Mapping page tells Project how to map your data to the application that is receiving the exported data. 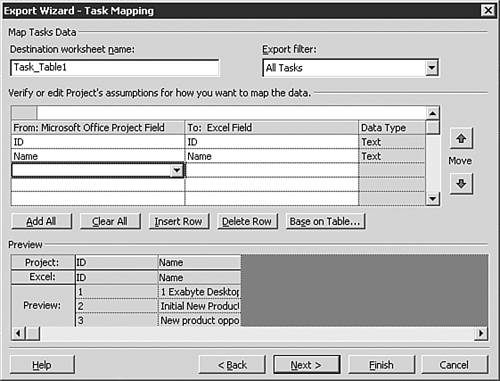 -
The final screen of the Import/Export Wizard shows the End of Map Definition page. This page allows you to save your map, whether you created a new map or edited an existing map. To save the map, click the Save Map button. Otherwise, click Finish to export the data. -
If you elected to save the map, you next see the Save Map dialog box (see Figure 17.4). Give the new map a name and click Save. You can use the Organizer button to copy one or more maps into the active Project file. Figure 17.4. You use the Save Map dialog box to save a new or edited map. 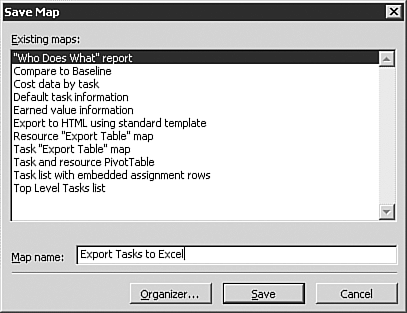 You see additional wizard pages only when you are importing data. One of these is the Import Mode page (see Figure 17.5), which is used to tell Project how to import the data. Generally, if you have chosen to import partial data from a file such as an Excel workbook or an Access database, you will see this additional page as the fourth or fifth page in the wizard. You can choose to create a new file with the imported data or append the data to a project file that is already open in a project window. Finally, you can merge your data into an open project file, which overwrites tasks that match the key field you indicate to use for a merge. Figure 17.5. The Import Mode page is used only during an import operation, to determine how to import the data into a Project file. 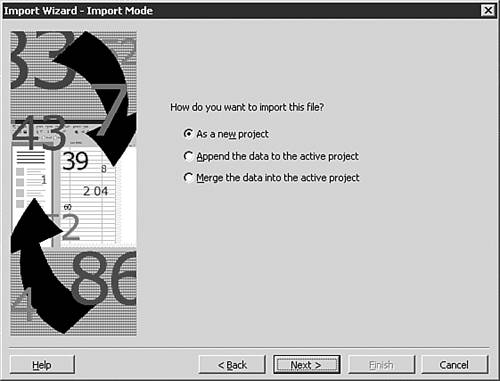 |