The Hidden Keypress
| [ LiB ] |
In Part One of this book you learned how to create buttons and how to define their on event handler so that the button could execute a block of commands. In this section, you will learn how to create a button that can execute a block of commands with keyboard shortcuts.
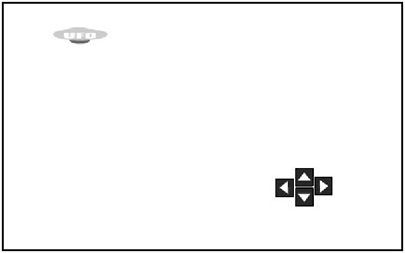
I have prepared demo GDA_PROG8.1.fla in the fashion with which you are already familiar. There's a Movie Clip instance in the middle of the screen with the instance name of obj. There are also four buttons on the bottom right of the screen that you can press to move this object up, down, right and left.
Take a look at GDA_PROG8.1.swf, which is shown in Figure 8.1.
Figure 8.1. Moving an object through custom controls
If you were to pry open one of the button's scripts, you'd see something like this:
on (release) { obj._x += 5; } Every time the user presses then releases the button that is associated with that script, the code block will add 5 to the object's x property. This will cause the object to move to the right.
Now that you know what the code does, let's see how I set up the project file. First off, in the Properties panel you can see that I have named the instance of the moveable object.
I have also grouped the four buttons together. If you double-click the group , you'll be able to access the actions for each buttongo ahead and do that.
Let's examine the script for the Up button:
on (release) { obj._y += -5; } It's very similar to what we have already discussed in previous chapters. This makes the object move up.
Now examine the on handlers for the other buttons.
Here's the Left button code:
on (release) { obj._x += -5; } Here's the Right button code:
on (release) { obj._x += -5; } Here's the Down button code:
on (release) { obj._y += +5; } All this code is very simple, and now that you have seen the demo and are familiar with the project, let's do something more exciting.
I have prepared project file GDA_PROG8.2.fla for this discussion. I didn't include a screenshot because it would look identical to Figure 8.1. The difference in the two demos is that in GDA_PROG8.2.fla, buttons will respond to your keyboard shortcutsin other words, you can actually use the arrow keys to move the object instead of clicking your life away.
The on handler has a special Keypress parameter. It helps detect a certain key that it will use to trigger the execution of the code block.
NOTE
NOTE
Your keyboard has a repeating key feature that allows you to hold down a button so it will be automatically sent to the program as if you were rapidly typing that same key over and over.That feature comes in handy for this demo.You can hold down an arrow key and the object onscreen will continue to move in that direction.Without this feature, you would have to press the key lit erally every five pixels.
Observe the following block:
on (Keypress "a") { trace("You have pressed the a key."); } What do you think this handler does? The button waits around for the lowercase "a" to be pressed. Once it is, it outputs, "You have pressed the a key." All you have to do is write out the handler's name, as usual, and in the parameter (between the parentheses) type the keyword Keypress and then, in quotation marks, write out the (case sensitive) letter that you want it to detect.
If you want the handler to detect a special keyboard key, ActionScript has predefined expressions for these keys.
Following is a list of these special expressions:
<Left> <Right> <Up> <Down> <Home> <End> <Insert> <Delete> <Backspace> <Enter> <PageUp> <PageDown> <Tab> <Escape> <Space>
Now that you have a list of all of the possibly detectable keyboard commands, let's look into the code in GDA_PROG8.2.fla. Go ahead and play with the SWF before you move on through this chapter.
Here is the code for the Up button:
on (keyPress "<Up>", release) { obj._y += -5; } Before I continue to show you the rest of the code, let's discuss how I formatted the on event handler. Notice that besides setting up the code to detect the Up key, I have also added the release keyword after a comma so that it can also detect the mouse click. This way, if the player decides to use the mouse and/or the keyboard, then he may. Here is the code for the Left button:
on (Keypress "<Left>", release) { obj._x += -5; } Here is the code for the Right button:
on (Keypress "<Right>", release) { obj._x += +5; } And the Down button:
on (Keypress "<Down>", release) { obj._y += +5; } As you can see, the other buttons handle the input in a similar way. Now you possess the power to add some keyboard functionality to your programs.
| [ LiB ] |
EAN: 2147483647
Pages: 162