Using Remote Installation Services to Deploy System Images
| Windows Server 2003 includes a server and workstation imaging-deployment product called Remote Installation Services (RIS). First introduced in Windows 2000, the RIS deployment tools were somewhat limited and could be used only to deploy Windows 2000 Professional workstations. Starting with Windows Server 2003, server images can also be saved and deployed across the enterprise. This allows administrators to configure both server and desktop standard images to be used across the enterprise. Remote Installation Services is handy, but before you deploy desktops using this product, you should do some testing and planning. Planning RIS DeploymentsInstalling RIS on a Windows Server 2003 system is a fairly simple process, but planning how the RIS server will be used can help ensure a successful implementation. Considerations for RIS include deciding how many systems the RIS server should deliver installation images to simultaneously. Also, RIS client computers must support remote boot either with a bootup disk or using pre-boot execution (PXE) on compatible systems. Because RIS servers try to deliver the image to clients as fast as the network can handle, you must limit RIS server access to LAN clients to avoid having the RIS server saturate WAN links while imaging client computers. Storage is always a big concern for imaging servers, and third-party imaging software stores each image in a separate file, which can take up a lot of storage space. Although these image files often compress fairly well, RIS stores images in their native file formats and replaces duplicate files with file pointers or links to save storage space. The technology used to optimize storage space by recognizing files used in different images is Single Instance Storage (SIS). SIS works by replacing actual duplicate files with junction points within the RIS image storage locations. This reduces the overall storage requirements of the RIS server, allowing for the creation of several custom images, including saving user desktop images to the RIS server as a means of recovery. To optimize performance, you should install RIS and RIS images on separate physical disks than the operating system to improve system image access. Installing RISAn administrator with Local Administrator access can quickly install RIS. The RIS server must also be part of an Active Directory domain, and a DHCP server must be available on the network. To install RIS, perform the following steps:
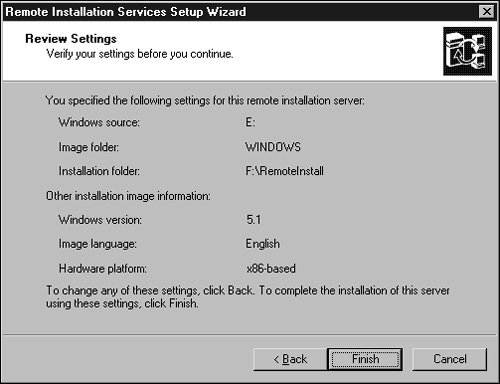
Configuring RISAfter the RIS server reboots, the service can be configured. Upon the initial configuration, you need to specify the storage location of the RIS server and choose some simple installation options. Also, during this process, the first installation image is created. This image is based on a clean OS installation of the particular operating system version. For example, a Windows 2000 Professional CD could be used for the first image on a Windows Server 2003 RIS server. To configure RIS, follow these steps:
After you click Finish, the RIS installation finishes and copies the first image installation files to the server. During this process, the unattended answer file must be created to allow the RIS server to automate part, if not all, of the installation. After this process is complete, you need to add two DHCP server scope options for clients to locate the RIS server. Configuring DHCP for RIS ClientsAfter you complete the RIS server installation, you must add two DHCP scope options for clients to locate the RIS server. These settings include option numbers 066 and 067; these options are the boot server hostname and the bootfile name. The boot server hostname value is a fully qualified DNS name, and the bootfile name is simply Startrom.exe. To add these options, perform the following steps:
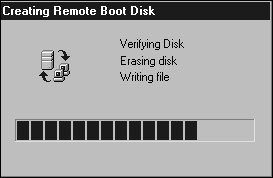
Establishing Client RequirementsFor a remote client to access an RIS server, it must be able to access the network before it can locate the RIS server. RIS servers require client computers to support preboot execution (PXE) or network boot. Many workstations have this option, but you might need to enable this option or choose it at bootup before it can be used. For client workstations that do not support it, you can use the Remote Boot Floppy Generator (Rbfg.exe) to create a network boot floppy disk. Rbfg.exe is loaded on an RIS server and can be accessed in the %systemroot%\System32\Reminst folder. To create a boot disk, perform the following steps:
If the correct adapter is not on the list, you must create a boot disk in a different way. Search the network interface card (NIC) manufacturer's documentation and Web site for driver details. What you need is a TCP/IP DOS-based driver that can use DHCP to get network configuration and execute a remote file on the RIS server to start the image selection process. |
EAN: 2147483647
Pages: 499