TIP 49: Designing with the Layer Tool
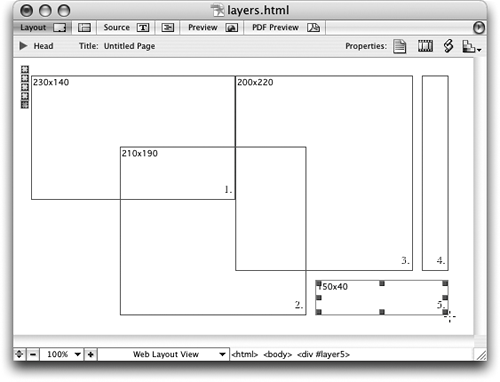
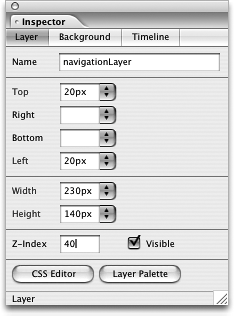
| Layout Grids are fantastic for quickly designing Web pages, but a more modern approach would be to use layers. Layers offer even more flexibility than Layout Grids when it comes to placing objects on a page, because you can overlap layers, stack them, turn them on and off, and even animate them. Note In GoLive CyberStudio 3 and Adobe GoLive 4, 5, and 6, layers were called Floating Boxes. Enough people were bewildered by that odd name that the GoLive team finally changed it. New in GoLive CS2 is a Layer tool that makes it easier than ever to put layers on a page where you want them. Click the Layer tool Figure 49a. Layers can be adjacent, overlapping, or floating by themselves. After drawing layers, use to the Object Selection tool to move layers around. Enable the Objects Selection tool by clicking it in the Toolbox or pressing V on the keyboard, then click and drag in a layer to move it around the page. Notice that a layer has two parts: a black rectangle indicating the layer's border and a tiny square yellow marker. Clicking the yellow marker brings the Layer Inspector into focus; clicking the black rectangle not only focuses the Inspector, but also selects the layer itself. If you move the yellow marker, you are actually moving the syntax for the layer in the HTML source code, whereas if you move the rectangle, you are repositioning the layer on the page. You can put other objects, such as an image, a table, text, or even a Layout Grid, into a layer. It's a good idea to give a descriptive name to your layers. Although GoLive automatically assigns a name to each layer, it's hard to tell which is which unless they are named properly. You'll also want to assign each layer a Z-index, which indicates the order in which they are stacked. Use the Inspector palette to accomplish both those tasks (Figure 49b). Figure 49b. Set a layer's attributes, such as name and Z-index, in the Inspector palette.
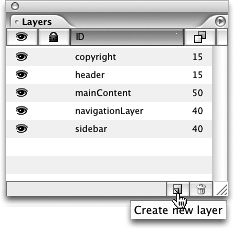
Although you can move layers by dragging them, you can also position them using the fields in the Inspector. You'll also notice a checkbox for Visible in the Inspector. This turns a layer on or off in the browser and is often used in conjunction with a link or action to show and hide layers. Go to the Background area in the Layer Inspector to assign a color or background image to a layer. The Timeline portion of the Layer Inspector has a nifty way of letting you create a quick animation. Select a layer and click the Record button, then move the layer around the page. GoLive automatically sets time markers as it records the movement. To fine-tune your animation, click the Open Timeline Editor button and work directly in the Timeline Editor itself. Another way to select a layer is to click its name in the Layers palette. The Layers palette also sports Create New Layer and Delete Selected Layers buttons (Figure 49c). Figure 49c. Create or delete layers, give layers a name, or select layers in the Layers palette.
If you'd like to able to move layer names in the list, choose Hierarchic from the Layer palette menu and then simply drag the layer names up or down. The Hierarchic mode also gives a nice visual representation of nested layers. The little eyeball icon to the left of a layer in the Layer palette turns the layer on or off as you are editing, but it does not affect the visibility of the layer in the browser. For that you need to use the Visibility option in the Inspector. |
EAN: N/A
Pages: 301

