Adding Some Meat
| I l @ ve RuBoard |
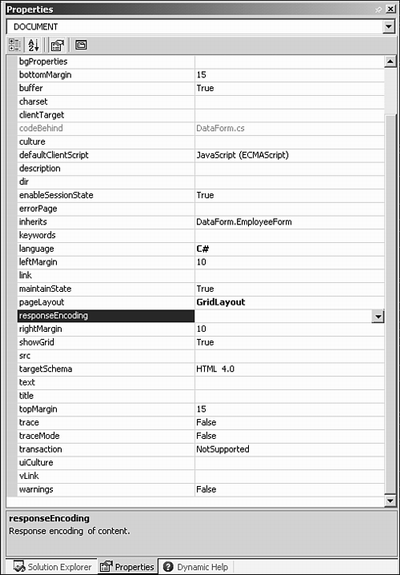
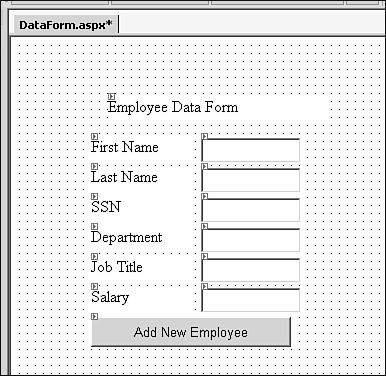
| The goal of ASP.NET is rapid Web-based application development, so Microsoft has created 45 controls for ASP.NET applications. ASP.NET controls run server-side and automatically down level to the requesting client. Most Web sites today have code to support IE and Net scape , thus requiring the Web Developer to maintain two sets of code that accomplish the same thing. With the advent of server-side controls, this burden is soon to go away. ASP.NET supports standard HTML controls as well as ASP.NET controls. In fact, the controls can co-exist within the same page and even nested within each other. One of the main purposes of any application is to gather data and to present data in a meaningful fashion. Consider an internal Web Application that is used to gather information about a new hire. This information will then be submitted to HR for processing and stored in the company database. To begin the process, a basic understanding of WebForms is required. Just as current ASP applications use a Request/Response style of data gathering, so does ASP.NET. This action happens through a traditional Form Post. Ideas TestThe best way to learn a new development language/platform is to build a somewhat useful application that encompasses as much of the language and framework as possible. In the case of ASP.NET and the .NET framework, this would be a sizeable task, to say the least. To explore ASP.NET, a Web-based Employee database will go a long way to demonstrate the ease of development afforded by ASP.NET. I'm not known for my ability to create wonderful page layouts and graphics design, so I'll leave the aesthetics to you. Along the way, topics that will be covered include ASP controls, ADO.NET, custom Web control development, client-side file uploading, and anything else that might be of use. To begin, start by creating a new Web Application project with the name DataForm . Next, the DOCUMENT.pageLayout property should default to GridLayout ; this allows for absolute positioning of controls in terms of (x,y) coordinates. Also, be sure that the targetSchema is set to Internet Explorer 5. Figure 4.1.7. The document Properties. Next, create the layout as show in Figure 4.1.8 and use the variable names listed in Table 4.1.1. Figure 4.1.8. The DataForm layout. Table 4.1.1. Variables for the DataForm.aspx Page
The basic form should look similar to Figure 4.1.8. With the form layout in place, it's a good time to view the generated HTML code for the aspx page and the C# source file. Listing 4.1.1 Code for DataForm.aspx1: <%@ Page language="c#" Codebehind="DataForm.aspx.cs" AutoEventWireup="false" Just as the Windows Forms designer produces some of the most atrocious code known to man, so does the WebForms designer. In fact, I went through and trimmed and cleaned the code for DataForm.aspx so it could actually be read. The HTML for the DataForm.aspx is basically XHTML. Notice on line 26 that I've inserted a comment declaring that an asp:repeater control will be added later. The asp:repeater control will be used to display the employees as they are added. A WebForm is derived from System.Web.UI.Page , and the DataForm aspx page is then derived from the DataForm.DataFormBehind class as listed in the Inherits attribute for the page. The DataFormBehind class is the CodeBehind page and is renamed from the default WebForm1 class. It is important to note that ASP .NET seems to have problems when dealing with a class name that shares the same name as the namespace in which it lives. This is the reason the class name for the code behind page is different from the filename. VS.NET generates the most generic name possible rather than prompting you for the proper name. This is certainly one of my pet peeves! You'll often waste time renaming generated classes and forms and all references to them. Along with the declaration of variables within the actual apsx page, the DataForm.aspx.cs file will also contain the variable declarations. This allows for access to the controls properties and methods during page loading and other events handled by the DataFormBehind class. If you're wondering how this happens, ASP.NET does code generation the first time the page is accessed, during which time the necessary glue-code is generated to link the aspx controls to the variables declared within the CodeBehind page. The DataFormBehind class in Listing 4.1.2 is used during this process as well and contains the page logic for such actions as databinding, layout, validation, and other business logic as required by the application. Listing 4.1.2 The DataFormBehind Class 1: using System; 2: using System.Collections; 3: using System.ComponentModel; 4: using System.Data; 5: using System.Drawing; 6: using System.Web; 7: using System.Web.SessionState; 8: using System.Web.UI; 9: using System.Web.UI.WebControls; 10: using System.Web.UI.HtmlControls; 11: 12: namespace DataForm 13: { 14: /// <summary> 15: /// Summary description for DataForm. 16: /// </summary> 17: public class DataFormBehind : System.Web.UI.Page 18: { 19: protected System.Web.UI.WebControls.Label FirstNameLabel; 20: protected System.Web.UI.WebControls.Label LastNameLabel; 21: protected System.Web.UI.WebControls.Label SSNLabel; 22: protected System.Web.UI.WebControls.Label DepartmentLabel; 23: protected System.Web.UI.WebControls.Label JobTitleLabel; 24: protected System.Web.UI.WebControls.Label SalaryLabel; 25: protected System.Web.UI.WebControls.Button AddEmployee; 26: protected System.Web.UI.WebControls.TextBox FirstName; 27: protected System.Web.UI.WebControls.TextBox LastName; 28: protected System.Web.UI.WebControls.TextBox SSN; 29: protected System.Web.UI.WebControls.TextBox Dept; 30: protected System.Web.UI.WebControls.TextBox JobTitle; 31: protected System.Web.UI.WebControls.TextBox Salary; 32: 33: protected System.Web.UI.WebControls.Repeater EmployeeRepeater; 34: 35: public DataFormBehind() 36: { 37: Page.Init += new System.EventHandler(Page_Init); 38: } 39: 40: private void Page_Load(object sender, System.EventArgs e) 41: { 42: if( !this.IsPostBack ) { 43: //Create an ArrayList to hold Employees 44: ArrayList employees = new ArrayList( ); 45: this.Session[ "Employees" ] = employees; 46: } else { 47: 48: //Since only one button exists on the form 49: //it must have been clicked so add the 50: //new employee and update the databinding 51: //for the EmployeeRepeater control 52: Employee emp = new Employee( ); 53: emp.FirstName = FirstName.Text; 54: emp.LastName = LastName.Text; 55: emp.SSN = SSN.Text; 56: emp.Dept = Dept.Text; 57: emp.JobTitle = JobTitle.Text; 58: emp.Salary = Double.Parse( Salary.Text ); 59: 60: ((ArrayList)this.Session["employees"]).Add( emp ); 61: EmployeeRepeater.DataSource = (ArrayList)this.Session["employees"]; 62: EmployeeRepeater.DataBind( ); 63: 64: } 65: } 66: 67: private void Page_Init(object sender, EventArgs e) 68: { 69: // 70: // CODEGEN: This call is required by the ASP.NET Web Form Designer. 71: // 72: InitializeComponent(); 73: } 74: 75: #region Web Form Designer generated code 76: /// <summary> 77: /// Required method for Designer support - do not modify 78: /// the contents of this method with the code editor. 79: /// </summary> 80: private void InitializeComponent() 81: { 82: this.Load += new System.EventHandler(this.Page_Load); 83: 84: } 85: #endregion 86: } 87: } I've made some additions to the DataFormBehind class that you will also need to make. The first is the declaration of the EmployeeRepeater variable. A Repeater allows for template expansion of HTML code during page processing. In the case of this example, rows will be added to an HTML table for each employee. The Repeater class makes use of reflection to glean information about the object(s) it is enumerating over to access the public properties of that object. Update the DataForm.cs source to reflect the added code presented in Listing 4.1.2. Next, there needs to exist a class that represents an employee. For now, when a new employee is added, the employee will be stored in an array list. This array list will then be used as the data source for the Repeater control. A very basic class will be constructed for the purpose of maintaining the employee information. Listing 4.1.3 contains the Employee class. Listing 4.1.3 The Employee Class 1: namespace DataForm 2: { 3: using System; 4: 5: /// <summary> 6: /// Summary description for Employee. 7: /// NOTE: Since the employee class will be used in conjunction with Although this class doesn't really accomplish anything of value, it will serve the purpose of illustrating how the Repeater control works. It is also worth noting that any asp control that uses data binding does so through the properties of the bound object. Bound controls seem to ignore public fields and only seem to look for public properties. To make use of the Repeater control, add the code in Listing 4.1.4 to the DataForm.aspx file where I had originally inserted the comment referring to the repeater control. Listing 4.1.4 The EmployeeRepeater Template Code1: <asp:Repeater id="EmployeeRepeater" runat="server"> 2: <HeaderTemplate> 3: <table style="BORDER-RIGHT: gray thin ridge; BORDER-TOP: gray thin ridge; With the addition of the asp:repeater template code in place, a new row will be added to the table each time a new employee is added. C++ developers are already familiar with the idea of templates and their use during development. Templates allow for a generic framework that can be expanded as needed. You should become comfortable with the asp:repeater because it will save you countless hours of development time. The final product should look similar to Figure 4.1.9. Figure 4.1.9. The basic ideas page. The basic premise of the application has now been established. An initial feel for ASP.NET development should leave you with a warm fuzzy feeling inside and ready to tackle a much larger Web Application. |

| I l @ ve RuBoard |
EAN: 2147483647
Pages: 204