Securing Routing Group Connectors
| < Day Day Up > |
Securing Routing Group ConnectorsA collection of messaging servers connected via high-speed bandwidth (512KB or higher) in Exchange Server 2003 is defined as a routing group . By default, one routing group is created. Anytime a server is added to a routing group the connections between the servers are automatically configured. Another purpose for the routing group is communicating with other routing groups through specialized connectors. When routing groups communicate with other routing groups, they do so through designated servers most commonly known as bridgehead servers . Exchange Server 2003 provides many such connectors that can connect to other Exchange servers as well as foreign messaging environments, such as Lotus Notes. The most common connector in Exchange Server 2003 is the SMTP connector. As the name implies, the SMTP connector uses the SMTP protocol, but other connectors use SMTP by default as well. Other commonly used routing groups include the X.400 and the routing group connectors. NOTE Routing group connector security is strong by default and there is minimal configuration. However, this connector does not support encryption unless the servers participate in an IPSec policy where all traffic is encrypted. If connector communications traffic flows through public networks, use the SMTP connector instead to support encrypted communications. Using X.400X.400 is a long-standing messaging standard that Exchange Server 2003 uses for compatibility with older or foreign messaging systems. It can be configured using either X.25 or TCP/IP. From a security perspective, X.400 has been superceded by SMTP. One of the key reasons is because SMTP supports strong authentication whereas X.400's authentication is much weaker. For instance, X.400 supports the use of passwords, but the passwords are transmitted in plain text. Use the SMTP connector instead of the X.400 connector whenever possible. Securing SMTP ConnectorsExchange Server 2003's SMTP connector can be used to connect to the Internet, to other Exchange servers, to other Exchange organizations, or to other messaging systems. With regard to security there are several key considerations to take in account, including content restrictions, authentication, encryption, and relaying. Outbound Security ControlsOutbound security controls can be set on the SMTP connector and are very similar to those mentioned earlier in the section "Using Authentication Controls." These controls provide authentication (anonymous, Basic, and Integrated Windows Authentication) and encryption (using TLS) options. The basic difference between these options and those for the SMTP virtual server is that only one authentication method can be selected. To configure outbound security controls for the SMTP connector, do the following:
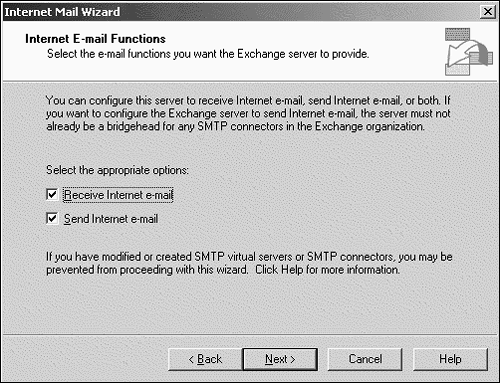
Integrated Windows Authentication with TLS offers the strongest and securest form of authentication for outbound security and is therefore recommended. Using the Internet Mail WizardThe Internet Mail Wizard is designed to create a secure, reliable, nonrelaying Internet mail SMTP connector. This wizard is not only for inexperienced Exchange Server 2003 administrators, but it is also very useful for even the most experienced . It walks the administrator through the creation of an Internet mail SMTP connector. To use the Internet Mail Wizard, do the following:
|
| < Day Day Up > |
EAN: 2147483647
Pages: 393
