Configuring Printing Options
| Outlook comes preconfigured with print styles and many people never change the defaults. However, you can change them if you want to or you can create your own print styles.
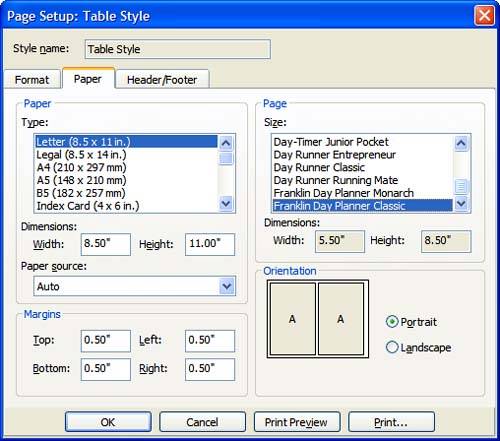
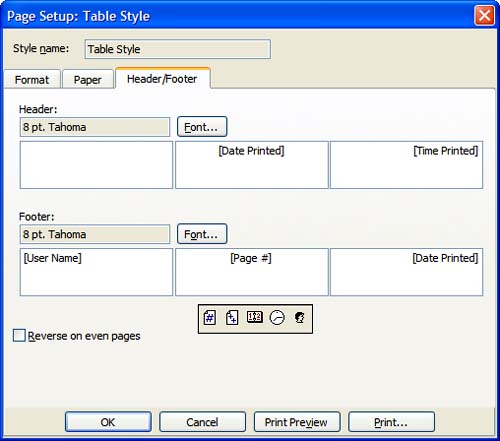
Open the Page Setup dialog using F ile, Page Set u p and select the print style you want to use. In most cases, you'll have a choice of Table Style or Memo Style in addition to Define Print S tyles. If you created your own styles or are using a view based on Day/Week/Month or Address Card layouts, you'll have additional styles to choose from. When you choose a print style by name or choose Define Print S tyles, and E dit or C opy, a print dialog resembling the one shown in Figure 17.4 opens. Figure 17.4. This dialog is identical for all print styles and enables you to customize the style's properties. The Format tab of the Page Setup dialog includes the Fonts settings and column shading settings. Use the Paper tab, as shown in Figure 17.4, to choose the paper type, the size of the printed page, and the page orientation. Many paper types are included in the list, but you also can create a custom type. The page size reflects the size of the finished page, with many sizes defined, including pages for popular planners. As you select different page sizes, a preview of the page is shown in the orientation preview section. The Header/Footer tab has your options for headers and footer (see Figure 17.5). Click your mouse in any of the sections and click the icons at the bottom of the footer area to insert the page number, date and time, and username. Text entered into the left block is blocked left, text in the center section is aligned center, and text on the right is blocked right. Figure 17.5. Add page numbers , number of pages, printed date, printed time, and username to the headers and footers.
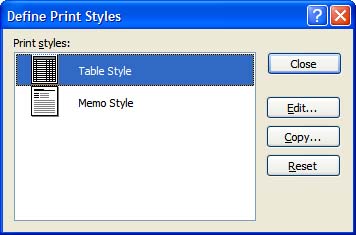
You can edit the style from the Print dialog using the Define S t yles button, but if you want to create a new print style, choose Define Print S tyles. This opens the Define Print Styles dialog, which enables you to select the default style that you want to work in creating your new style (see Figure 17.6). Select the style that's closest to your needs and click C opy. Figure 17.6. Use the Define Print Styles dialog to E dit, C opy, D elete, or R eset a style. The D elete button is hidden until you've created a new style. When you choose E dit or C opy, the Page Setup dialog opens, as shown in Figures 17.4 and 17.5. Use it to create the style you need. For example, if you often print out copies to carry in your planner, you'll want to create a style with the paper options set for your planner.
|
EAN: 2147483647
Pages: 228