Working with Categories and Email
| Outlook supports categories on all items and, although no one thinks twice about using them on calendars, tasks , and contacts, categories aren't as widely used on messages as they should be. To add a category to messages using the Rules Wizard, open the Rules Wizard using T ools, Ru l es and Alerts, N ew Rule:
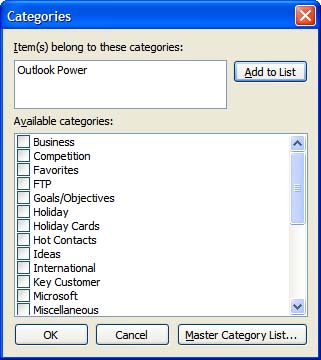
Run the rule on any folder in your message store to set categories on messages already in your message store. Turn on the rule and all new messages meeting your conditions will be assigned the category. If you find the default category list lacking, you can add categories to messages by using the Edit, Categories menu selection or by right-clicking on a message and choosing Categories (see Figure 14.15). From there, select categories from the list or type new ones in the I tem(s) Belong to These Categories list. Click Add to List to add the category to the Master Category list. You can select more than one message and assign the category to the entire selection. Figure 14.15. Select one or more categories for your messages from the Categories dialog. Click the M aster Category List button to add or remove categories from the master list stored in the Registry. Although you can add categories from the Categories dialog, you can remove them only from the Master Category List dialog. Add categories to the messages you send by selecting O ptions, O p tions as you compose a message using Word or by selecting V iew, O ptions when using the Outlook editor. Type your categories in the Categories field or click the Cate g ories button and select from the Categories list.
After your messages are assigned categories, you can use smart grouping, search folders, and Advanced Find to find and view your messages. Outlook includes a predefined list of categories, but you can add your own categories. Categories you've added to messages can be used on any other Outlook item, as long as the category is added to the Master Category list. |
EAN: 2147483647
Pages: 228