Adding a Navigation Bar
|
Given the information already in the page, it s easy to make a fancier navigation bar that consists of more than just two buttons. The navigation bar lets you navigate forward or backward to view the slides and has a counter to display the information about the current slide, as shown in Figure 5-2.
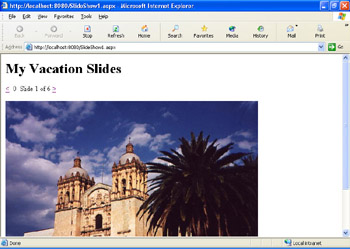
Figure 5-2: A navigation bar added to the slideshow page.
Configure controls for the navigation bar
-
Change the Text property of the Previous button to < and of the Next button to >. If you want, you can change the Font and ForeColor properties to make the text more visible.
-
To get the counter, drag a Label control between the Previous and Next buttons. (You might need to add a few spaces between the two buttons first to make room.) If necessary, set the control s background color to match the page.
-
Resize the Label control to display all the label content. Set the Label control s ID property to labelNavbar and clear its Text property.
To display information about the current slide, you need to change the text of the Label control each time you click a navigation button. You need this line of code to perform this task:
labelNavbar.Text = "Slide " & currentSlide+1 & " of " & slideNames.Length
This code builds up a string out of the fixed text plus the current slide number plus the length of the array. We re adding 1 to the current slide number because the slide numbers start at 0, and that would look odd to users. Once the string has been built up, it s assigned to the Text property of the Label control. The following procedure describes how to update the navigation bar label text.
Update the navigation bar label text
-
In Code view, go to the Page_Load handler and add the boldfaced code shown here:
Sub Page_Load( ⋮ If IsPostBack = True The currentSlide = Viewstate("currentSlid e" Els currentSlide = Viewstate("currentSlide") = currentSli d imageSlide.ImageUrl = path & slideName s(currentSlide labelNavbar.Text = "Slide " & currentSlide+1 & _ " of " & slideNames.Length End I End Sub
Go to the buttonNext_Click handler and add the same boldfaced code, as shown here:
Sub buttonNext_Click(sender As Object, e As Ev entArgs ⋮ imageSlide.ImageUrl = path & slideNames(cu rrentSlide Viewstate("currentSlide") = currentSlid labelNavbar.Text = "Slide " & currentSlide+1 & " of " & _ slideNames.Length End SubFinally, go to the buttonPrevious_Click handler and add the same boldfaced code again, as shown here:
Sub buttonPrevious_Click(sender As Object, e A s EventArgs ⋮ imageSlide.ImageUrl = path & slideNames(cu rrentSlide Viewstate("currentSlide") = currentSlid labelNavbar.Text = "Slide " & currentSlide+1 & " of " & _ slideNames.Length End Sub