Process Management
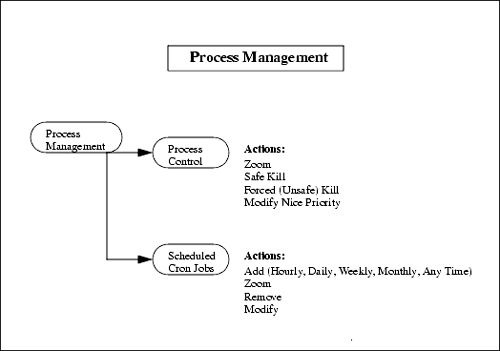
Figure 10-38. Process Management Menu Structure Process Control
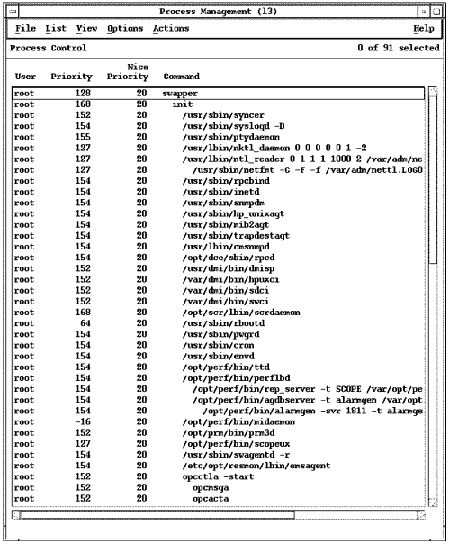
Figure 10-39. Partial Process Control Listing. There are the four columns of information listed for.
In addition to these four columns, there are several others you can specify to be included in the list by selecting Columns from the View menu. You can include such information as the Process ID, Parent Process ID, Processor Utilization, Core Image Size , and so on. Adding Processor Utilization as a column, for instance, shows me how much of the processor all processes are consuming, including SAM. You can now select one of the processes and an Action to perform. When you select a process to kill and pick Safe Kill from the Actions menu, you will see a message that indicates the process number killed and that it may take a few minutes to kill it in order to terminate cleanly. If you select a process to kill and pick Forced Kill from the Actions menu, you don't get any feedback; SAM just kills the process and you move on. Chapter 11 covered the kill command. To save you the trouble of flipping ahead, I have included some of the information related to kill here. The kill command can be either /usr/bin/kill or kill , which is part of the POSIX shell. The POSIX shell is the default shell for HP-UX 11i. The other shells provide their own kill commands as well. We use the phrase "kill a process" in the UNIX world all the time, I think, because it has a powerful connotation associated with it. What we are really saying is that we want to terminate a process. This termination is done with a signal. The most common signal to send is "SIGKILL," which terminates the process. There are other signals you can send to the process, but SIGKILL is the most common. As an alternative to sending the signal, you could send the corresponding signal number. A list of signal numbers and corresponding signals is shown as follows :
I obtained this list of processes from the kill manual page. To kill a process with a process ID of 234 , you would issue the following command: $ kill -9 234 > process id (PID) > signal number > kill command to terminate the process The final selection from the Actions menu is to Modify Nice Priority of the process you have selected. If you were to read the manual page on nice, you would be very happy to see that you can modify this with SAM. Modifying the nice value in SAM simply requires you to select a process and specify its new nice value within the acceptable range. Scheduling Cron JobsThe Scheduled Cron Jobs menu selection lists all the cron jobs you have scheduled and allows you to Add, Zoom, Remove , and Modify cron jobs through the Actions menu. cron was described earlier in this chapter in the section "Backup and Recovery." I have included some of the cron background covered earlier to save you the trouble of flipping back.
The format of entries in the crontab file is as follows: You have many options in the crontab file for specifying the minute, hour, monthday, month, and weekday to perform a task. You could list one entry in a field and then a space, several entries in any field separated by a comma, two entries separated by a dash indicating a range, or an asterisk, which corresponds to all possible entries for the field. To list the contents of a crontab file, you would issue the crontab -l command. |
EAN: 2147483647
Pages: 301