Section 2.1. Playing Music
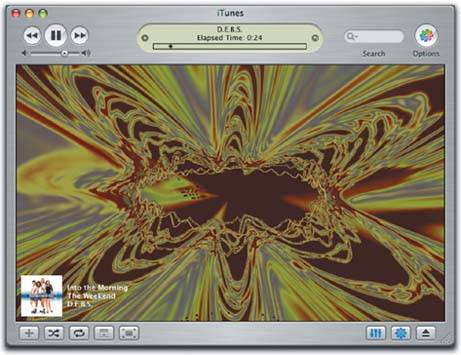

2.1. Playing Music

To turn your computer into a jukebox, click the triangular Play button in the upper-left corner of the iTunes window, or press the Space bar. The computer immediately begins to play the songs whose names have checkmarks in the main list. (You can also double-click a song's name to make it start playing.)

The central display at the top of the window shows not only the name of the song and album, but also where you are in the song, as represented by the diamond in the horizontal strip. Drag this diamond, or click elsewhere in the strip, to jump around in the song.

Or just click the tiny triangle at the left side of this display to see a pulsing VU meter, indicating the current music's sound levels at various frequencies.


Tip: You can also control CD playback from the Mac's Dock. Just Control-click or right-click the iTunes icon (or click and hold on it) to produce a pop-up menu offering playback commands like Pause, Next Song, and Previous Song, along with a display that identifies the song currently being played .

As music plays, you can control and manipulate the music and the visuals of your Mac in all kinds of interesting ways. As a result, some people don't move from their machines for months at a time.

2.1.1. Visuals

Visuals is the iTunes term for an onscreen laser-light show that pulses and dances in perfect sync to the music you're listening to. The effect is hypnotic and wild. (For real party fun, invite some people who grew up in the 1960s to your house to watch.)

To summon this psychedelic display, click the flower-power icon in the lower-right corner of the window (see Figure 2-1). The show begins immediatelyalthough it's much more fun if you choose Visualizer Full Screen so that the movie takes over your whole monitor. True, you wont get a lot of work done, but when it comes to stress relief, visuals are a lot cheaper than a hot tub.

Figure 2-1. No matter what you're listening to, the animated full- color patterns produced by the iTunes Visualizations feature can make it a more interesting experience. (This feature works really well with the original cast album from "Hair" or anything by Jimi Hendrix.)


Once the screen is alive with visuals, you can turn it into your personal biofeedback screen by experimenting with these keys:

Table 2-1.

Key

Function

?

Displays a cheat sheet of secret keystrokes. (Press it repeatedly to see the other shortcut keys.)

F

Displays, in the upper-left corner of your screen, how many frames per second iTunes' animation is managinga quick, easy way to test the power of your graphics circuitry .

T

Turns frame rate capping on or offa feature that limits the frame rate to 30 frames per second, to avoid sapping your Mac's horsepower when you're working in other programs (not really much of an issue in Mac OS X, of course).

I

Shows/hides information about the current song.

C

Shows/hides the current Visuals configuration (the name of the current waveform, style, and color scheme) in the upper-right corner of the screen.

M

Turns slide show mode on or off. In slide show mode, the visuals keep changing color and waveform as they play. (Otherwise, the visuals stick with one style and color.)

B

Turns on an Apple logo in the center of the Visuals screen.

R

Chooses a new waveform/style/color at random.

Q or W

Cycles through the various waveform styles stored in iTunes.

A or S

Cycles though variations on the currently selected waveform.

Z or X

Cycles through color schemes.

Number keys

Cycles through the ten different preset, preprogrammed wave-form/color/style configurations.

D

Restores the default waveform settings.


Tip: These are the secret keystrokes for the built-in visuals. The Web is crawling with add-on modules that have secret keystrokes of their own.

2.1.2. Keyboard Control

You can control iTunes' music playback using its menus , of course, but the keyboard can be far more efficient. Here are a few of the control keystrokes worth noting:

Table 2-2.

Function

Keystroke

Play, Pause

Space bar

Next song/previous song

Right arrow, left arrow

Next source/previous source

Down arrow, up arrow

Louder

-up arrow

Quieter

-down arrow

Mute

-M

Fast-forward, rewind

Option- -right arrow, -left arrow

Eject

-E

Turn Visuals on

-T

Turn Visuals off

-T or mouse click

Full-screen visuals

-F

Exit full-screen visuals

-T, -F, or mouse click


2.1.3. Shuffle, Repeat

iTunes has all the shiny controls you'd expect to find on a decent CD player, and more. In the Controls menu, for example, you'll find playback controls like these:

  • The Shuffle command tells iTunes to get randomly funky with the order of the songs currently listed in your iTunes window at the timean album listing, a single playlist, or all the songs in the library. A checkmark next to the Shuffle command means that the setting is already turned on; select Shuffle again to toggle it off. Shortcut : Click the Shuffle button, second from left at the bottom of the iTunes window.

  • The Repeat Off, All , and One choices on the Controls menu make iTunes automatically play current playlists or albums over and over (Repeat All) or just once (Repeat One). Repeat Off disables the repeat function altogether. (You can choose only choose one of these commands at a time, and the checkmark shows you which setting is active.)

2.1.4. The Graphic Equalizer

If you click the Graphic Equalizer button (third from bottom right in Figure 2-1), you get a handsome floating control console that lets you adjust the strength of each musical frequency independently (Figure 2-2). (Or just press -2 to get the console onscreen.)


Tip: You can also make an Equalizer pop-up tab appear as one of the iTunes columns . Choose Edit View Options and turn on the Equalizer checkbox.
-I or choose File Get Info , and click the Options tab, shown at bottom in Figure 2-2.

You can drag the Preamp slider (at the left side of the Equalizer) up or down to help compensate for songs that sound too loud or soft. To design your own custom preset pattern with the Preamp and the other ten sliders, click the pop-up tab at the top of the Equalizer and select Make Preset.

FREQUENTLY ASKED QUESTION
Auto-Playing Music CDs

In Mac OS 9, you could set the QuickTime Settings control panel to play music CDs automatically when they're inserted into the Mac. Can Mac OS X do that ?

Sure!

First, make sure that iTunes is slated to open automatically when you insert a music CD. You do that on the CDs & DVDs panel of System Preferences (use the "When you insert a music CD" pop-up menu).

Then all you have to do is make sure iTunes knows to begin playing automatically once it launches. Choose iTunes Preferences, click the General icon, and from the On CD Insert pop-up menu, choose Begin Playing, and click OK.


2.1.5. Preventing Ear-Blast Syndrome

No longer must you strain to hear delicate Chopin piano compositions on one track, only to suffer from melted eardrums when the hyperkinetic Rachmaninoff cut kicks in right after it. The Sound Check feature attempts to bring the disparate volumes onto line, making the softer songs louder and gently lowering the level of the more bombastic numbers in the iTunes library. Audiophiles may nitpick about the Sound Check function, but it can be quite useful, especially for times, like bicycling uphill , when constantly grabbing at the iPod's volume controls on the remote or scroll wheel are inconvenient.

The first step using Sound Check is to turn it on. In iTunes, open the Preferences box ( -comma). Click the Audio icon or tab and turn on the box for Sound Check.

If you have an iPod, also connect your iPod and select it from the iTunes Source list when it pops up. Then click the iPod Preferences button at the lower right side of the iTunes window.

Figure 2-2. Top: Drag the sliders (bass on the left, treble on the right) to accommodate the strengths and weaknesses of your speakers or headphones (and listening tastes). Or save yourself the trouble by using the pop-up menu above the sliders to choose a canned set of slider positions for Classical, Dance , Jazz, Latin, and so on. These settings even transfer to the iPod.
Bottom: You can also apply preset or customized equalizer settings to individual songs under the Options tab in the song's Get Info box. If you have a live track with a lot of noodling or goofing around at the beginning or end of the song, you can use the Start and Stop Time controls in the Options area to edit out the borning parts .


In the resulting dialog box, click the Effects icon and turn on the Sound Check dialog box. You also need to turn on Sound Check on the iPod itself: From the iPod's main screen, choose Settings Sound Check and click the Select button.


iLife 05. The Missing Manual
iLife 05: The Missing Manual
ISBN: 0596100361
EAN: 2147483647
Year: 2005
Pages: 314
Authors: David Pogue

flylib.com © 2008-2017.
If you may any questions please contact us: flylib@qtcs.net