Working with Basic Music Arrangement Techniques
|
|
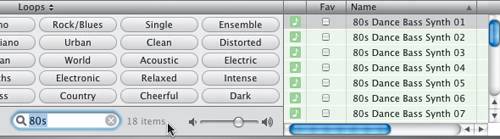
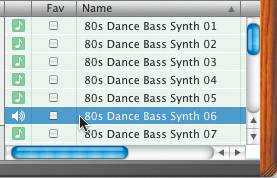
| Consider this section your basic training for song arrangement, before you dive into the battlefield of a full song. Throughout this lesson, I'll throw in some basic songwriting rules I've come up with over the years. Keep in mind that rules are meant to be broken, and that music is very subjective, so there are no absolutes. The "rules" of songwriting are more like guidelines to keep you and your music on track (pun intended). Rule #1: Decide what type of song you are going to write, and choose instruments and parts that will work for that song. This seems like a basic and obvious concept, but it's often overlooked, especially by new songwriters. Along with the power of GarageBand comes the temptation to try everything at once. There are so many different instruments and so many prerecorded loops to choose from that you might get caught up in the search and forget the song. Think of songwriting like cooking. If you're baking a cake, you use the ingredients for cake. If you're making meatloaf, you use the meatloaf ingredients. If you mix the cake ingredients into the meatloaf, you get meatcake surprise, which probably tastes as bad as it sounds and is probably not what you were going for when you started. Searching for Loops That FitRemember your goal! The song you are arranging is called Techno80s, so in theory it should consist of instruments that were used during that era. During the 1980s, electronic drum kits and digital keyboards infiltrated popular music. Some bands played all electronic techno instruments, for a total techno sound. Others bands had rock-and-roll roots and blended techno sounds with their classic rock instruments. The GarageBand loop library comes with some excellent examples of 80s music loops, which have all been conveniently named after the era "80s." Let's look at some of the 80s loops available in the GarageBand loop library.
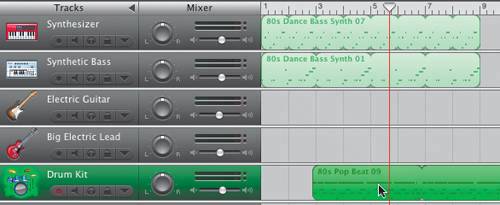
Evaluating a Monotonous ArrangementNow that you've heard some of the building blocks for the song, let's evaluate a very basic arrangement in the Timeline. 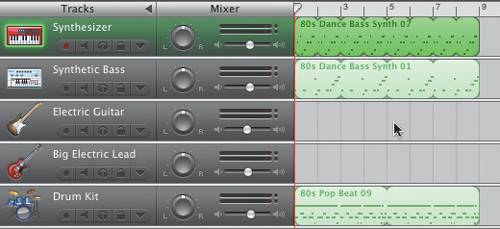 There are currently three basic tracks with music in the Timeline: a synthesizer track, synthetic bass track, and drum kit. These are the basic ingredients of a song. All three tracks utilize the prerecorded 80s loops from the Loop Browser. Let's listen to hear how it sounds.
Using Shortcuts to Solo and Mute TracksNow that you have heard all three tracks together, let's see how it sounds if we listen to just one or two tracks at a time. You already know how to click the Solo and Mute buttons to listen to specific tracks. For this exercise, you'll learn some new keyboard shortcuts. The keyboard shortcut for Solo is S. The keyboard shortcut for Mute is M. In addition, you can use your up and down arrows to change the selected track in the Timeline.
What did you think this time? I think it is much more interesting when you hear one part alone, then add other parts over time, instead of all of them at once. Why is it better that way? Because when you have only one instrument, then start adding new instruments, it feels like the beginning of a song instead of just a lot of repeating loops. This leads me to another rule of songwriting. Rule #2: Make sure your song has a beginning, middle, and end. Again, this seems simple, and it is. Most songs have a defined beginning, which leads to a middle, and then eventually it ends. Remember, songs are like stories, which also have a defined beginning, middle, and end. I'm not saying that you should make every song start and end the same way. I'm saying that you should define the start and end with something special. Evaluating a Region That Is Out of Time with the Rest of the ProjectHave you heard the musical term "off beat?" Off beat is an expression for a musical part that is out of time with the other music. Sometimes recording a musical part that is played outside the main rhythmic pulses (beats) of a song is intentionalit's a way to make the part stand out from the rest of the song. When you play a part off beat intentionally, it is often referred to as playing the backbeat of a song. Most of the time, you want to keep all of your musical parts in time. For this exercise, we'll focus on the negative effects of accidentally making your regions out of time. There are two ways you can make regions out of time or off beat:
To get a feel for why this is important, let's demonstrate what it sounds like when musical parts are out of time with one another.
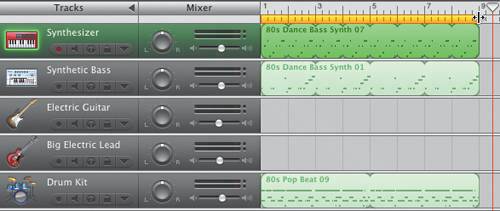
Note A region does not have to start at the beginning of a measure to be in time with the other regions. When snapping is on, you can snap a region to different beats or ticks within beats, depending on the settings you have for Snap to Grid. When the grid is set to automatic, it will adjust the snap-to value of the grid as you zoom in or out of the Timeline. Arranging the Beginning of the SongNow it's time to liven up the opening of this song. Remember how much better it sounded when you experimented with the Solo and Mute buttons to bring the different instruments into the song? Let's arrange the regions in the Timeline to create that same effect. This will become the opening of the Techno80s song.
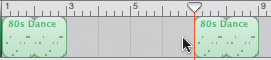
That reminds me of another songwriting rule. Rule #3: Sprinkle your music with catchy, stand-out riffs to liven up the song, but don't flood your song with these riffs, or you'll drown the other tracks. In other words, less is more. It's common to use a catchy riff several times in a song, perhaps near the beginning, middle, and end. By spreading them out, you leave the audience wanting more instead of wanting it to end. Think of your song as an action movie. In most action movies, the crashes, chases, and explosions are separated by story. If you went to an action movie that was just a series of explosions over and over, you'd probably be tired of them in a few minutes. The same thing goes for musical explosionsor cool musical riffs or partsthat you add to your song to make it more interesting. Splitting a Repetitive RegionLet's split the region in the Synthesizer track so that it comes in and out of the song instead of playing continuously.
Finishing the Beginning of the SongThe beginning of the song is almost finished. All you need to do is trim the region in the Synthetic Bass track and make one modification to the second Synthesizer region.
That's it. You've arranged the beginning of the song using basic arranging techniques. Basic arranging techniques include finding loops, adding them to the Timeline, and arranging the regions so they start at different times. You also split and resized regions to make them less repetitive. Knowing how to physically move regions in the Timeline is the physical act of arranging music. But keep in mind that your overall goal is to build a great song. Always think about why you are arranging the song in a particular way, and make sure it sounds good. If it doesn't sound good to you, it probably won't sound good to anyone else. If you're not sure if you like a part, change it. When the part is right, you know immediately. |

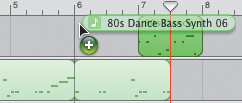
 The region splits into two separate regions.

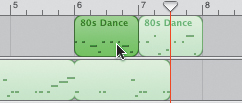
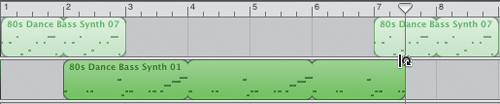 The 80s Dance Bass Synth 01 region should now end halfway between the 7th and 8th measures.
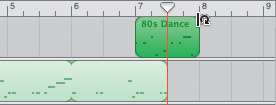
|
|
EAN: 2147483647
Pages: 139