Ducking Background Tracks
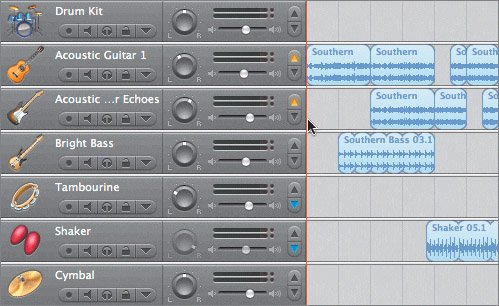
| The last mixing feature you'll explore in this lesson is the new ducking feature. Ducking was designed for easy mixing of your podcasts and movie soundtracks, so you'll work more extensively with it in Lessons 8 and 9. However, this is a good time to introduce you to ducking since it can also be used to automatically lower (duck) the levels of backing tracks to favor the levels of other tracks. You apply ducking by setting which tracks are lead tracks and which are backing (background) tracks. Whenever there is sound on the lead tracks, the volume of the backing track is lowered. Tracks that aren't designated as lead or backing stay the same. The term duck comes from the shape a Volume curve would take if you had to lower the volume of a track every time a part played, or voice spoke, in another track. It would look like the Volume curve is ducking (bending down) out of the way of the waveform in the other track. The best part of the new ducking feature is you don't have to use control points to create the same ducking effect. You can turn on the ducking feature by pressing Shift-Cmd-F, or by choosing Control > Ducking.
The ducking controls are most common for podcasts or working with voice-over or narration to automatically lower the music levels whenever someone is talking. You'll work more with this feature in the next lesson as you build a podcast. Project TasksThis is a good time to practice some of the skills you've learned throughout this lesson. Try changing the effect on the Acoustic Guitar Echoes track to change the sound. Apply effects to other tracks. Modify the volume and pan levels, and add dynamic changes within the track curves. Since the Master track is showing, you can open the Track Info pane and try different effects on the overall song. You can even record your own parts in the lowest tracks, or add more major scale type loops to enhance the song. Finally, feel free to experiment with the ducking controls. When you're finished, don't forget to save the project. |
EAN: 2147483647
Pages: 134
- ERP Systems Impact on Organizations
- The Effects of an Enterprise Resource Planning System (ERP) Implementation on Job Characteristics – A Study using the Hackman and Oldham Job Characteristics Model
- Context Management of ERP Processes in Virtual Communities
- Distributed Data Warehouse for Geo-spatial Services
- Relevance and Micro-Relevance for the Professional as Determinants of IT-Diffusion and IT-Use in Healthcare

