| Let's take a look at the layer you'll be using as the image mask. We'll look on the Layers tab to see how the mask was built. 1. | Press Cmd-4 to view the Layers tab.
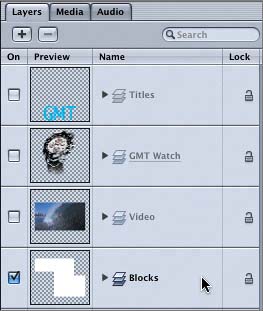
The project has four elements: Titles, GMT Watch, Video, and Blocks.
| 2. | On the Layers tab, click the disclosure triangle for the Blocks layer to display the contents of the layer.
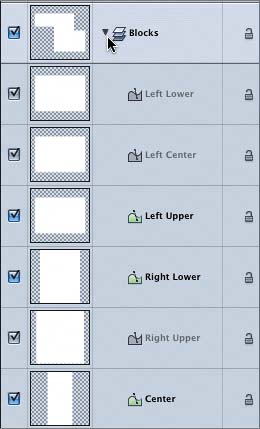
The Blocks layer contains six shapes named after their positions in the project.
| 3. | Click the disclosure triangle for the Blocks layer again to hide the con tents of the layer.
Now that you've seen how the mask was created, let's apply it to the video layer.
|
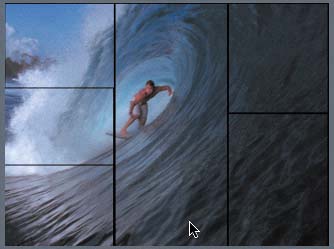
Analyzing the Video Layer For the start version of this project, the Video, GMT Watch, and Titles layers have all been turned off. Let's turn on the Video layer to see what it looks like before we apply the mask. 1. | On the Layers tab, select the Activation check box for the Video layer to turn the layer on.
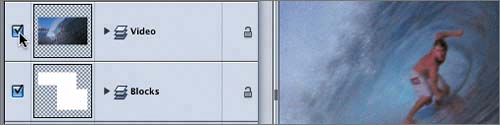 The Video layer appears in the Canvas. The Video layer appears in the Canvas.
| 2. | Press the spacebar to play the Video layer in the Canvas.
The Video layer includes two video clips, both of which have Fade In/Fade Out behaviors applied to them. The second video clip starts later in the mini-Timeline, so it doesn't appear until the second half of the project.
|
Applying an Image Mask to a Layer The goal in this exercise is to use the Blocks layer as an image mask for the Video layer. The black areas between the white blocks in the Canvas are transparent areas, or the alpha channel for the Blocks layer. Using an image mask, you can apply the same alpha channel information to the Video layer. Then the Video layer will have the same black transparent areas as the Blocks layer. You apply an image mask to a layer in either of two ways: Let's use the Object menu method. 1. | Press D to open the Dashboard, if it's not already open.
| 2. | On the Layers tab, select the Video layer.
| 3. | Choose Object > Add Image Mask.
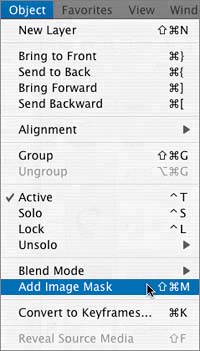
An image mask appears in the Video layer on the Layers tab, and the Image Mask Dashboard appears in the Canvas.
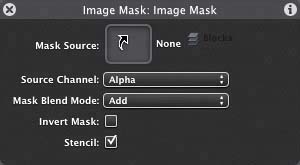
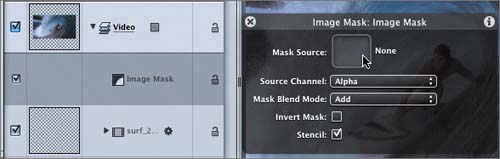 Now that you've applied the image mask, you need to assign a source object as the mask. You can assign a mask source on the Layers tab, the Inspector, or the Dashboard by dragging the source object to the image mask. Let's use the Mask Source well in the Image Mask Dashboard. Now that you've applied the image mask, you need to assign a source object as the mask. You can assign a mask source on the Layers tab, the Inspector, or the Dashboard by dragging the source object to the image mask. Let's use the Mask Source well in the Image Mask Dashboard.
| 4. | On the Layers tab, drag the Blocks layer to the Canvas and drop it in the Mask Source well on the Image Mask Dashboard.
The Video image now has the same alpha channel (transparency) as the Blocks layer.
| 5. | Press Cmd-S to save your progress.
|
Finishing the Project The video looks great with the image mask applied. All you need to do to complete the project is turn on the Titles and GMT Watch layers. The GMT Watch and Titles layers are the highest layers of the project, so they will appear above the Video layer in the Canvas. I applied a Soft Light blend mode to the GMT Watch layer so it will feel like part of the video clips instead of an object sitting on top of the video clips. 1. | On the Layers tab, select the Activation check boxes for the Titles and GMT Watch layers to turn them on.
| 2. | Press Cmd-4 to close the Layers tab.
| 3. | Play the finished project in the Canvas.
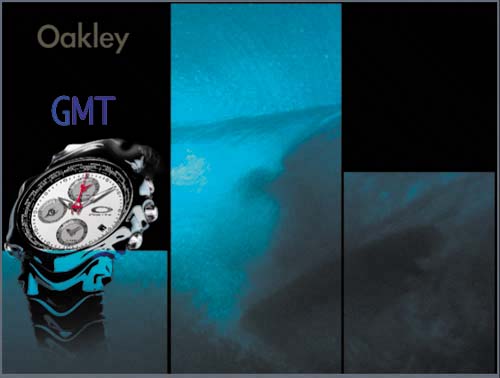
As you can see, image masks are another means of adding style and variety to your projects.
| 4. | Press Cmd-S to save your project.
| 5. | Choose File > Close to close the project.
|
|