| Music is always a good thing when creating movies. Find any excuse you can to add music to your projects and you will instantly improve your video by leaps and bounds. For this project, what would be better than a bit of travelling music with an "island" feel? We'll be using another clip generated from Quicktracks™, islandparty.wav (or, as it is known officially in the Quicktracks library, SmartSound - Island Party - Pool side [00;30;00].wav). We need to modify the volume for this track so that it starts off very quietly, playing softly through New England, building up just slightly in San Francisco, and thenbam!when we're in Hawaii, we'll bring it up loud for the end of the clip. If we were running credits, we would continue the music right on through the end credits playing. Add Some Music to the Soundtrack  Click the Get Media from button on the Media panel to access the Get Media from view, if it's not already active. Click the Get Media from button on the Media panel to access the Get Media from view, if it's not already active.
 Select DVD, Digital Camera, Mobile Phone, Hard Drive Camcorder, Card Reader. Select DVD, Digital Camera, Mobile Phone, Hard Drive Camcorder, Card Reader.
 When the Media Downloader displays, click the Advanced Dialog button to switch to Advanced mode. When the Media Downloader displays, click the Advanced Dialog button to switch to Advanced mode.
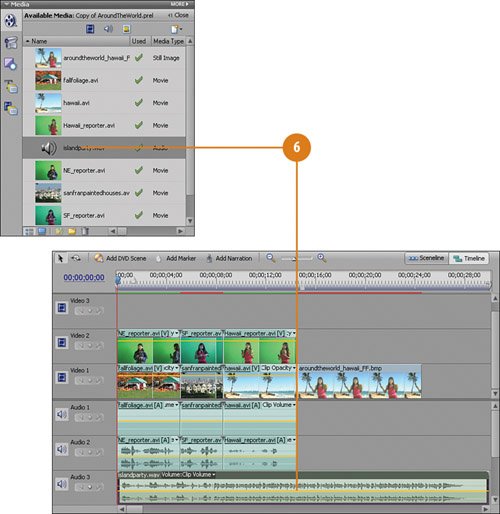
 Find and select the islandparty.wav clip. Find and select the islandparty.wav clip.
 Click the Get Media button. Premiere Elements copies the islandparty.wav clip you selected from the DVD onto your computer's hard drive and adds it to the Available Media list. Click the Get Media button. Premiere Elements copies the islandparty.wav clip you selected from the DVD onto your computer's hard drive and adds it to the Available Media list.
 Select the islandparty.wav clip on the Media panel and drag on drop it onto the Audio 3 track. Select the islandparty.wav clip on the Media panel and drag on drop it onto the Audio 3 track.
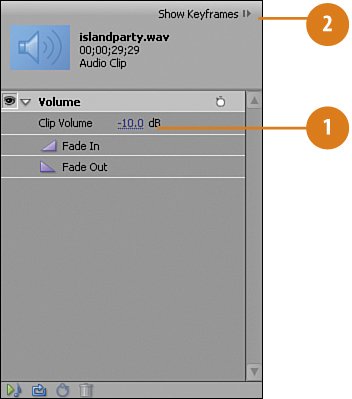
Adjust the Music's Volume to Match the Clips - With the islandparty.wav clip still selected, go to the Properties panel and set the Volume to -10 dB.
Tip Click the triangle to twirl open the volume controls, if they aren't already visible. - Click the Show Keyframes button.
- Move the CTI (either the one in the Properties Panel timeline or the one in the My Projects timeline) to the start of the San Francisco clip, at the 00;00;05;00 mark.
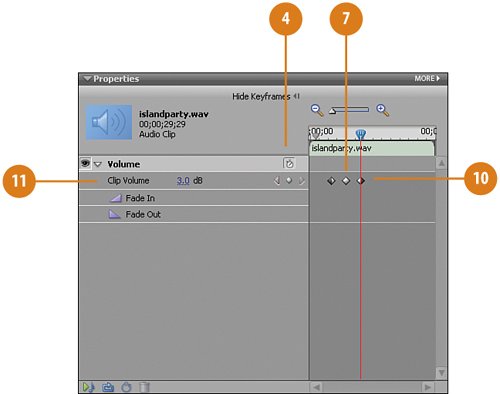
- Click the Toggle Animation button.
Tip A keyframe should automatically be placed for Volume. In case it doesn't, you can place a keyframe manually by clicking the Add/Remove Keyframe button. - Change the Volume to-3.0 dB.
- Move the CTI to the start of the Hawaii clip, at the 00;00;08;17 mark.
 Click the Add/Remove Keyframe button. Click the Add/Remove Keyframe button.
 Change the Volume to 0.0 dB. Change the Volume to 0.0 dB.
 Move the CTI to the middle of the Hawaii clip, at the 00;00;12;00 mark. Move the CTI to the middle of the Hawaii clip, at the 00;00;12;00 mark.
 Click the Add/Remove Keyframe button. Click the Add/Remove Keyframe button.
 Change the Volume to 3.0 dB. Change the Volume to 3.0 dB.
 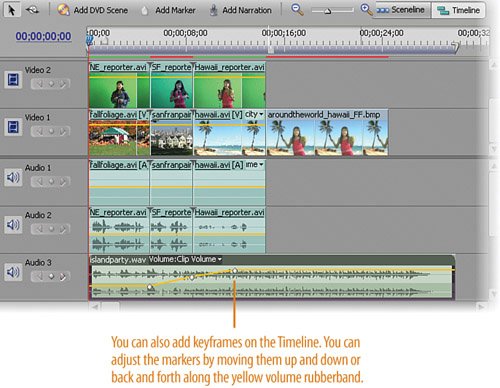 Tip Now, when you click the Play button on the Monitor panel (or press the Spacebar), you'll hear the music gradually increase in volume, swelling to a full-blown island party by the time the reporter has finished speaking.
|