| The Document window is where all the production of your Web page will happen. Dreamweaver tries to mimic what a Web browser looks like, so you have an idea as to what the page will look like on the Web in the development environment. Often times, however, you will want to check your work in an actual browser. Macromedia made the process of previewing the documents a snap. All you have to do is choose File, Preview in Browser, with Internet Explorer or any other browser; F12 is the keyboard shortcut. The document window consists of several different elements in its structure, as shown in Figure 2.26. Toolbar The toolbar is constructed of several different options. We'll look at each of these options, moving from left to right. Refer to Figure 2.27. Code View The Code view, as pictured in Figure 2.28, is a full-featured code editor, reminiscent of Allaire/Macromedia HomeSite. It offers the essentials such as code coloring, auto indenting, and line numbering. Figure 2.28. Dreamweaver MX in the code view is ideal for hand coding Web documents. 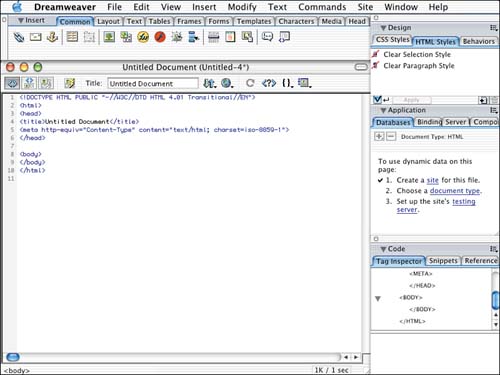
Split View The Split view provides developers the opportunity to experience the best of both worlds. Not only can you move things physically in the document and work in a very visual way, but you can also see and work in a more technical way at the same time. Dreamweaver also has a feature called Roundtrip HTML, whatever you do in the design view, will automatically be reflected in the code view and vice versa. If you don't know HTML this is a great way to learn. It can also be very handy for debugging. If something is positioned properly in your document, you might have an unnecessary tag. Select the item you're moving in the design view, notice that the code view is also highlighted, reflecting the area of the document you're working with. Refer to Figure 2.29 to see the split view window. Figure 2.29. Dreamweaver MX in the split view offers the best of both the coding world and the WYSISWYG design world. 
Design View The esign view is the default view in Dreamweaver, which we looked at earlier in the Document Window section of this chapter. The design view is a visual design environment, also know as WYSIWYG HTML editing. Live Data View This can be a time-saving feature for Web application developers. Typically, to see dynamic content you must upload it to the server, and then test it by calling the page from the server. Dreamweaver MX carries over a feature found in UltraDev 4, which is the live data view. In this view, Dreamweaver calls the server to process the scripts and display the information within the Dreamweaver authoring environment. The exception here is navigation, and passing parameters. It's helpful for quick previews, just to check if the dynamic content is working. Figure 2.27. The Dreamweaver MX Toolbar contains buttons to perform standard tasks such as Copy and Paste.
You add an HTML title to your document by typing in the title text field in the toolbar. The title shows up in the title bar of the browser window. It's a good idea to title your page for a couple of reasons, but one of the most important is search engines take titles into consideration when listing possible results for searches. Referring back to Figure 2.27, you'll notice there are also options on the toolbar for managing local and remote files. Especially when doing application development, using the File Management menu can save time, more so on the Mac, because of its missing site panel. Testing pages is common practice in Web development; it's also common to test using more than one browser. It's generally a good idea to test on the latest three versions of Internet Explorer and Netscape. Also, testing across platforms will ensure good performance and functionality. If you want ultimate control over the appearance of your site, you can also test other, less common browsers. The Refresh button, well, refreshes. Sometimes when writing in the code any new changes will not be reflected in the document window in design view. This would be a good time to use the Refresh button. There is also a reference button, which will either bring the code panel forward, appearing in front of all other panels, or it will open the panel if it is closed. The Code button will enable you to set or remove breaking points within your code. This button is grayed out and not available when in the design view. View Options enables you to change the view and characteristics of the code panel. Things like line numbers, word wrap, auto indent, and syntax coloring can all be applied here. |

